

I’m known as Woolly Wormhead in part because I used to make a *lot* of Hats with, well, worms and other appendages attached to them! And I mean a lot. I used to sell my hand-knitted or hand-crocheted Hats at craft fairs around London as well as through my online shop - we’re talking a very long time ago now - and they were never like any other Hats folks were selling. Hats have always been my playground and honestly I love nothing more than adding an I-cord or 5 to the crown.
These I-cord toppers are super quick to make and are a fun addition to just about any Hat. You could work one, three or as many I-cords as you like!
The toppers can be worked on a top-down Hat or bottom-up Hat, and today I’ll focus on how to add them to a bottom-up Hat. Adding I-cords to a top-down Hat is super easy and I suggest reading through the I-cord Tail Beanie of the Baby I-cord Beanie free patterns to see how it can be done.
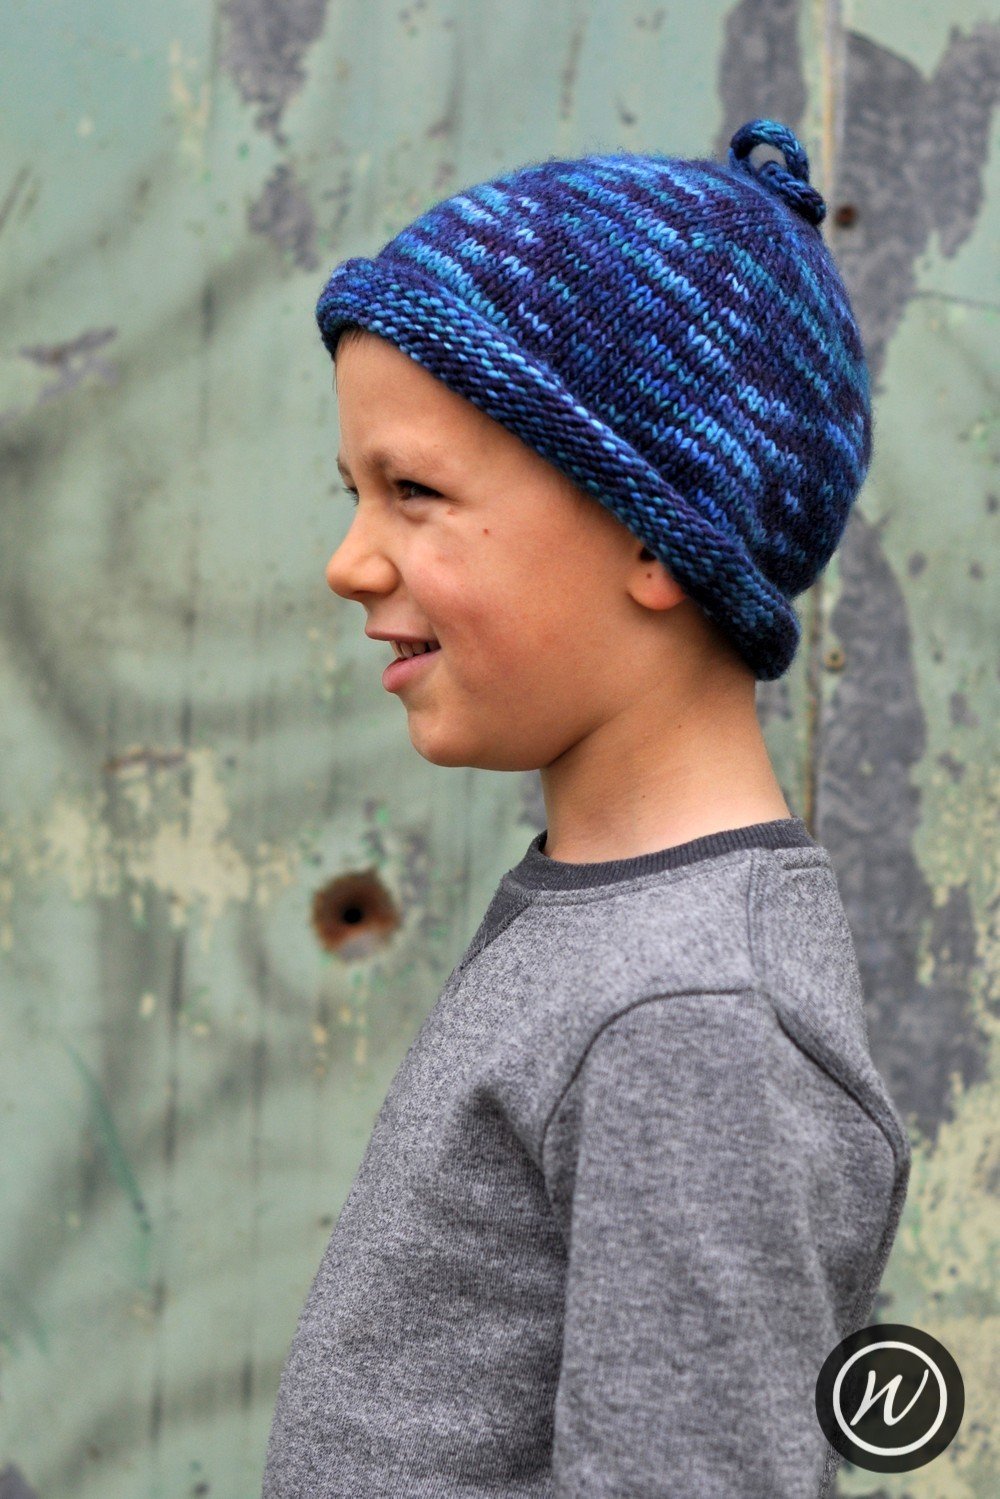
the ‘I-cord Tail Beanie’ with a long solo I-cord topper

the ‘Beamish’ pattern with multiple I-cord toppers in contrast yarn
Single I-cord Toppers
To work a single I-cord at the crown you’ll want to reduce the number of crown stitches down to 3 as quickly as possible. If you’ve 6 stitches remaining after finishing the crown shaping then working k2tog around will work out just fine. However if you’ve more than 6 stitches then you may need to bring in some triple decreases to get the stitch count down. Here’s a few suggestions:
6 stitches remaining:
Decrease Round: k2tog three times
7 stitches remaining:
Decrease Round: k3tog, k2tog twice
8 stitches remaining:
Decrease Round: k3tog twice, k2tog
9 stitches remaining:
Decrease Round: k3tog three times
Want you want to avoid doing, if at all possible, is working the decreases across more than one round. Doing so will do is start to add a point to the crown shaping, like a little pixie Hat, and that might be entirely desirable! But it might not be the look you’re after, especially if you’re thinking of adding a knitted bobble or maybe sewing the end of the I-cord down to form a loop. Whilst triple - or even quadruple - decreases might be a little awkward they’re only being done once and it’s worth the effort to keep the crown flat and the I-cord close to the centre.
Once you’re down to 3 stitches, work either a knit I-cord or a purl I-cord on the remaining stitches. 2 inches or 5 centimeters is an ideal length for forming a loop or adding a little knot. For a more dangly look, 3 inches or 7.5 centimeters will give you an I-cord that hangs down, and even longer could give you more to play with, depending on what you want to do with it!
Multiple I-cord Toppers
When it comes to having lots of I-cord toppers, working them in a contrast yarn, as shown in the Beamish Hat shown in the title image, adds to the playfulness of a Hat. Or work them with the same yarn - it really is up to you.
What we’ll be doing is working a knit I-cord into each of the remaining crown stitches that are left after you’ve finished all the crown shaping. You could also work a purl I-cord into every stitch, too, for a different finish.
If you want to change the number of I-cords and have a different number than the number of stitches left on your needles after finishing the crown shaping, then you’ll want to work one more round with either increases or decreases so that you get to the number you’d like. Just be mindful that you don’t want to work too many rounds between finishing the crown and working the I-cord toppers, as they’ll be less likely to sit close to the head. The more I-cords you have the more weight is added and they can pull or look a little odd if they’re not as close to the crown as possible.
Work the Hat pattern as directed and having finished the crown shaping, break yarn and thread it through the remaining stitches BUT leave the stitches on the needle - don’t slip them off as you would a regular draw-through finish. Threading the yarn tail through the live stitches like this helps us fully close the crown and neaten everything up at the end. It creates a few more yarn ends to weave in but I promise it’s worth it for the ease of finishing up a neater crown!
Starting with the first stitch and with DPNs - double pointed needles - at hand, increase into the first stitch as follows:
Increase Round: K1, M1, K1
You’ll now have 3 stitches. Now work an I-cord for approximately 4 inches, 10 centimeters, or desired length. Break yarn & thread through remaining 3 stitches, tighten to close. Tie a knot at the end of the I-cord for them to look like they do in the Beamish Hat above or leave them untidied for a more dangly look.
Rejoin the yarn to the next stitch and work each stitch as you did the first - increase, work I-cord, bind-off - until all the crown stitches have been worked.
From the inside of Hat, pull the yarn tail to tighten and close the hole at the crown. Weave in all the I-cord topper tails and block as required. Voila!
Support
Have fun with this finish! If you’ve a question about this technique, pop it in a comment below or visit the forum. I’m unable to offer help with patterns or techniques via email. I’d love to see what you do with this!
This tutorial was updated on 1st December 2021 with fresh photos and new links, and was republished from my drafts.


