
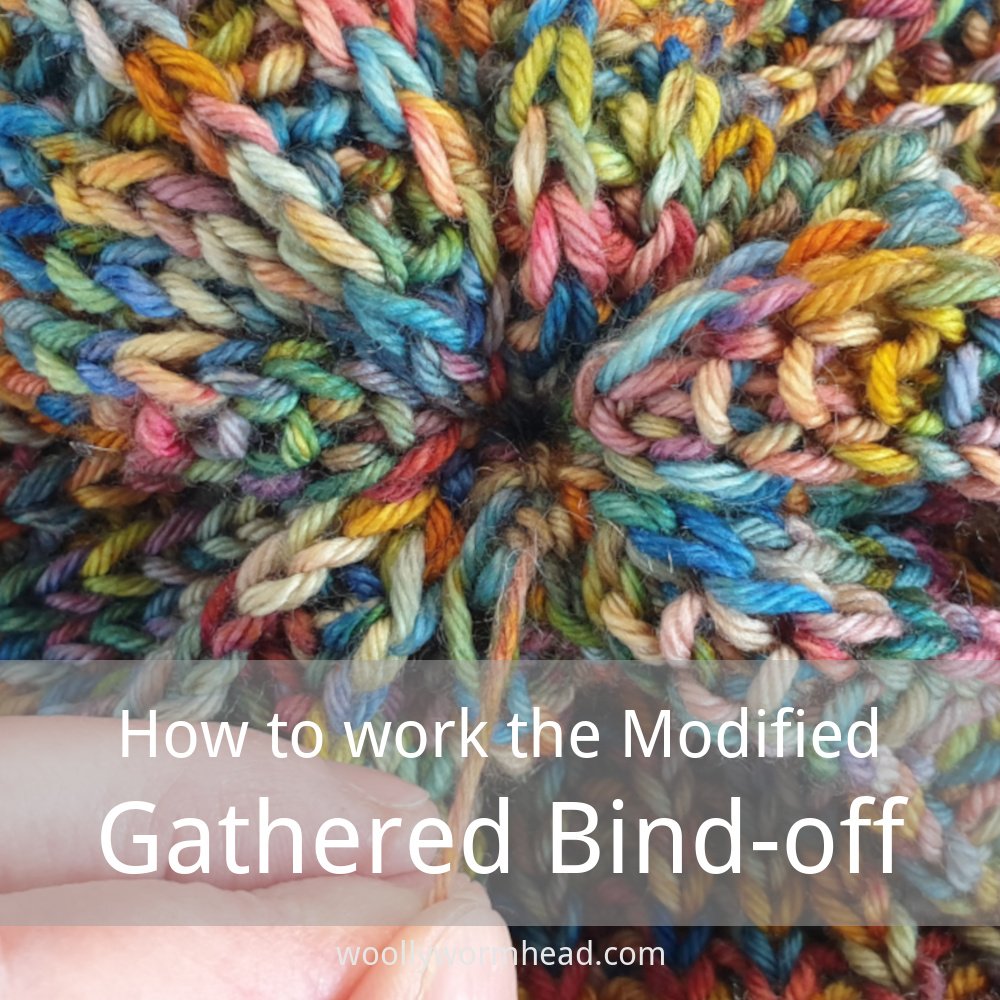
This is the modified version of the Gathered Bind-off. It’s worked in two parts, and we work on alternate stitches. Doing this reduces the bulk and makes for a more comfortable finish to the crown.
This method for binding off is a great way to finish a vertically knit bottom up Hat without any kind of shaping. This makes it ideal for beginner knitters, who may not have learnt decrease methods yet, but it also means it can be used on a Hat where the stitch pattern may not work well with various shaping methods.
Do bear in mind that when working a gathered bind-off, the body of the Hat will need to be much longer than it would usually be when starting the crown shaping. On a standard vertically knit beanie, the crown accounts for roughly one-third of the overall length of a Hat, so your Hat will want to be at least a third longer before finishing. Furthermore, the nature of the gather creates some bulk, even with the modified version, and that bulk eats some of that length, so you’ll want to knit for longer to accommodate that, too.

1) Once you’ve reached the desired length of your Hat, bearing in mind that you’ll want to knit for longer than a Hat that may have a shaped crown, you’re ready to start the gather.

2) Cut the yarn, leaving a yarn tail of approximately twice the circumference of your Hat. Then cut a 2nd yarn tail of the same length from the ball of yarn.

3) Thread the first yarn tail onto a tapestry needle and with the right side of the work facing, thread the needle through every other stitch on the left-hand knitting needle.

4) In this example, which is shown in Fisherman’s Rib, the tapestry needle is inserted into the knit stitches only.

5) Continue to do this for every other stitch. You can speed things up by inserting the tapestry needle through a few stitches at a time, although do make sure you’re not splitting the yarn, as that’ll cause a problem when you come to do the gather.

6) This is how the stitches that have been threaded onto the yarn tail will look whilst they’re still on the needle. Continue threading every other stitch onto the yarn until you come back to the beginning again. Unlike the standard gathered bind-off you’ll want to leave the stitches on the knitting needle to work the second part of the gather.

7) We’ll now want to gather the 2nd set of stitches. To do this, thread the 2nd yarn tail onto a tapestry needle and with the wrong side of the work facing, insert the tapestry needle into the stitches that were ignored when we worked from the right side.

8) We can see here how we’re catching every other stitch, and that the stitches are offset from the first part of this bind-off.

9) Continue catching every other stitch, ensuring the stitch hasn’t already been caught on the first yarn tail, until you come back to the beginning again.

10) Gently slide the knitting needle out from the stitches, taking care not to pull either of the yarn tails out.
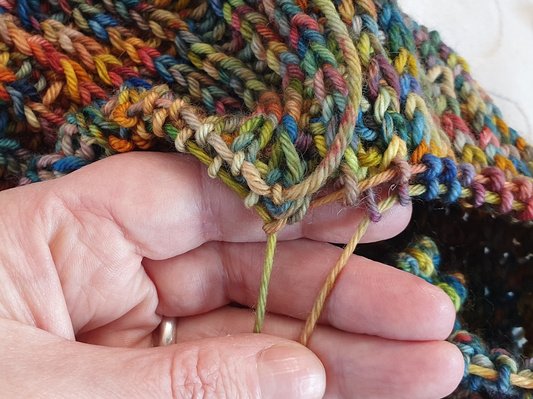
11) We now have 2 sets of stitches on two yarn tails, and the gather will be worked in two parts.

12) With the right side of the work facing and working with the stitches held on the 2nd yarn tail, gently gather the stitches. Take care to avoid the stitches getting stuck on each other and bunching up.

13) Carefully turn the work inside out to tighten the gathered stitches and securely fasten the yarn tail, to prevent them loosening.

14) Then turn work inside out again so the right side is facing and gently pull the first yarn tail to gather the first set of stitches. Again, take care to avoid them bunching up and getting stuck.

15) Once all of the stitches are evenly gathered, pull the yarn tail as tight as you can then thread it through the centre hole to fasten securely on the wrong side.

16) The bind-off is now complete! Weave in all ends then wash and block your Hat as required.
Support
If you’ve a question about this technique, pop it in a comment below or visit the forum! I’m unable to offer help with patterns or techniques via email. I do hope you find this a useful way to finish a bottom up Hat!


