

If that sounds a bit of a mouthful or has you wondering what on earth Woolly is on about now, think of it as a Sideways Brim to Brim method – and it’s the third sideways method in this series about Hat construction.
So… it’s another sideways Hat method? Yes, totally!
Before I dive in, I suggest having a read of the Hat Construction Guide and the Sideways Linear and Sideways Radial construction articles. They cover a lot of ground between them, talk through what’s different about sideways Hat knitting and how a Hat is structured. I’m not going to cover all of that in this article and without that background info, the construction description may not make total sense. It’ll be worth the read, I promise!
Like the Sideways Linear Construction method and the Sideways Radial Construction method, the stitches within our knitting will travel horizontally and parallel to the brim; a Hat made this way is worked as a series of panels, requires some grafting and allows for easy adjustment of the circumference size. So why is this one different, then?
The Sideways Traverse method is probably closest to the Sideways Linear method, in that all of its shaping is created by short rows. If you missed the bit about how there’s a sideways Hat method that doesn’t use short rows, then do check out the Sideways Radial Construction method article!
The traverse method is so named because our knitting travels from the brim to the brim. And you might say well, Woolly, don’t all sideways Hats do that? Where the selvedge edge is the brim edge and we work those consecutive panels then when we graft, the first and last panels join and the selvedge edge becomes continuous?
Well, yes, but that’s more about the direction of the construction. With this method one row will start at a brim selvedge edge, travel along to the crown, it’ll not stop at the crown and will instead travel through it, and then back down again to the other brim edge. And then you’ll work back again. I’ve named it the Sideways Traverse method because our knitting literally swings from brim edge to brim edge.
Let’s think about this a different way.

Diagram 1: the schematic represents a rectangle of knitting that it wider than it is tall. The arrow indicates the direction of knitting and the direction that the stitches follow. The dashed lines that sit to the left-hand side of the rectangle, to the top and bottom of it, represent the graft lines. And the central dash-dot line would be the fold line.
Imagine you start with a provisional cast-on and knit a rectangle that’s twice as wide as it is tall. You don’t bind off when you’re done; you’ll leave the stitches on a spare needle, and then you’ll release the provisional cast-on and place those stitches on to another spare needle. Next, you’ll fold the work in half horizontally to make a square – half of the released stitches from the provisional cast-on lie on top of the other half, likewise the stitches that you left on the needle when you finished knitting the rectangle. Now you’ll graft those released stitches together, and then you’ll graft the final row stitches together –it’s important to note that these two sets of stitches, the released stitches and the final row stitches – shouldn’t meet. Once the grafting is done, your square will have one open edge. That open edge is your Hat brim. Where you grafted will be your side seams. And the top of the Hat is simply where you folded the knitting.
Now, granted this doesn’t have any crown shaping at all, but it is technically a Sideways Traverse Hat – the rows were knit from one side of brim through the crown to the other side of brim and back again. Each selvedge edge of your knitting will became half of the brim circumference. What makes this method distinct from the other sideways methods is that not only is the crown shaping worked within the panels, but so is the crown finishing. With the Sideways Linear and Sideways Radial methods there’ll always be a need to do a sideways draw-through bind-off, as there’ll always be a tiny hole at the crown. That hole is created by the tiny selvedge that occurs as we shape the crown; it can’t be avoided, because every panel will always have an opening and closing row. Whereas with the Sideways Traverse method, it simply isn’t an issue, because our rows never stop at the crown.
This will have an impact on the crown shaping, because there have to be a few rows for each panel travelling through the crown. But as in the Sideways Radial method, the number of panels is very flexible and as in the Sideways Linear method, the entire crown is shaped by short rows – and that means we can get really clever about where and how we place those short rows to achieve different types of Hat styles and crown shapes.
And as in both the Sideways Linear and Radial methods, should you wish to create any kind of slouch – that is, extra room in the body of the Hat – or otherwise want to change the Hat between the brim and the body, then you’ll use short rows at the brim edge. Just remember that you’re working two lots of brim edges at a time, brim edges that will be opposite each other once the Hat is finished.

the ‘Get Garter - Envelope Slouch’ Hat, rear left view
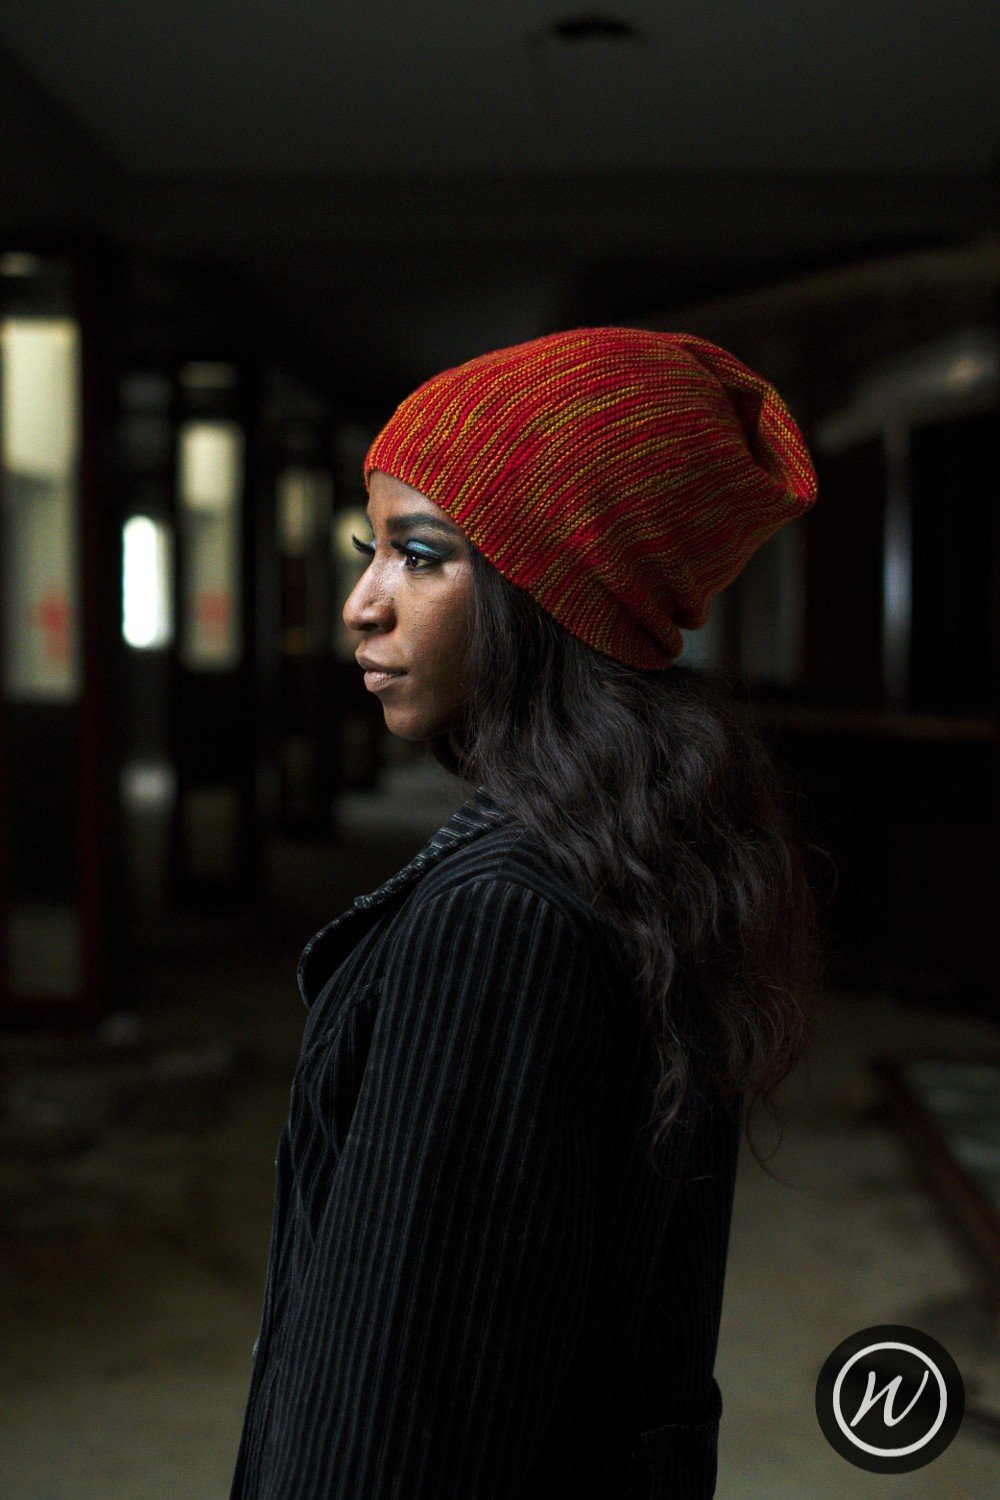
the ‘Get Garter - Envelope Slouch’ Hat, left view
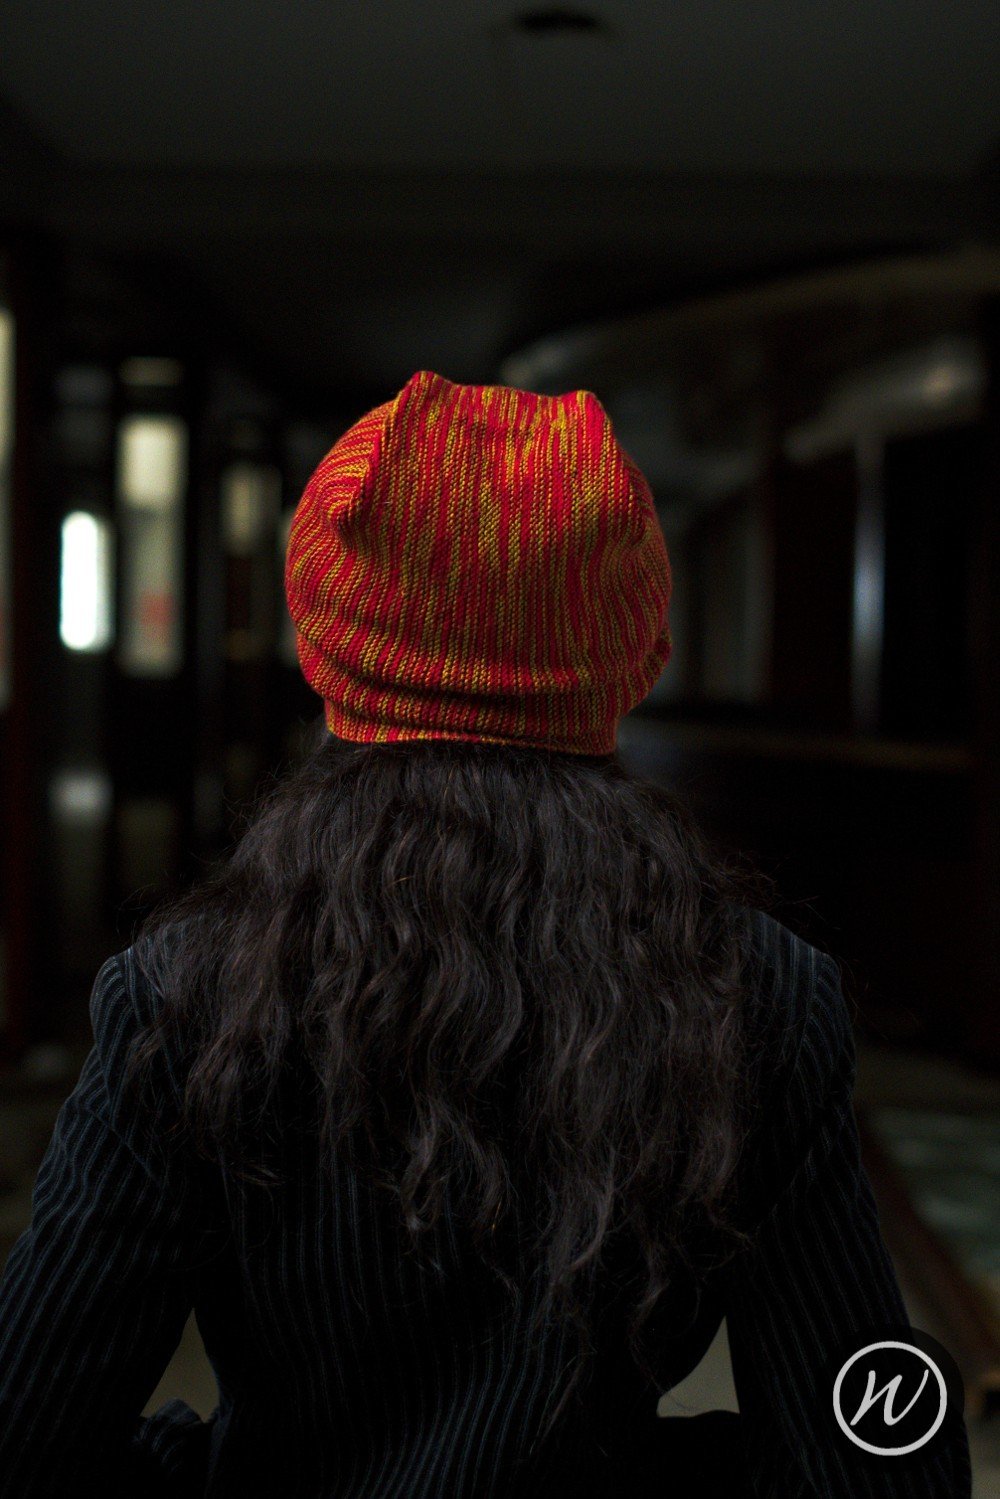
the ‘Get Garter - Envelope Slouch’ Hat, crown view
If you’ve made the Envelope Slouch from my Get Garter book, you’ll have made a Hat this way, using folding techniques to create the crown shaping and short rows to create the slouch. Techniques wise, this method is no different to the Sideways Linear method – provisional cast-on, short rows and grafting.
Let’s have a look at how our knitting may travel within a single panel of a Hat made this way.

Diagram 2: this schematic shows an example of a Sideways Traverse panel. Each half of the panel is worked separately, the right side is shown first then the left. The short row shaping occurs towards the centre of panel, as this is where the crown would be.
Unlike the Sideways Linear and Radial methods, a Sideways Traverse panel doesn’t quite fit into a neat shape. Because it swings back and forth, from brim edge to brim edge via the crown, we need to consider the number of rows that travel through the crown, so the appearance of the short rows may look offset within a chart or when viewed this way. However, when worked, this one panel is the equivalent to a pair of opposite linear panels and would give us a smooth flat crown.
The Pros and Cons
If you’re looking for a little more challenge in your sideways Hat knitting, this one could be for you. There are also, generally, fewer panels to work, as you’re working two sides of the Hat in one go. And it’s also incredibly satisfying to not have to close a small circle at the crown!
This one, in my opinion, really comes into its own on two counts. Firstly, how it’ll play with hand-dyed, variegated or handspun yarn. Remember in the previous articles how I said that the sideways construction methods make the most of these yarns and vice versa? This method takes it to the next level, as any variation in colour or texture within the yarn will travel through the crown and you can achieve a whole other set of effects.
The second is with the shapes that can be achieved. Because of the extra rows that travel through the crown, some of the more common styles, such as fitted beanies or slouchy Hats with gathered crowns, aren’t quite as straightforward with this method as the other sideways methods. And so, it lends itself to more architectural shapes, more sculptural or structural Hats. Which is no bad thing! Restrictions can become design challenges, and it’s something that personally pushes me to approach a Hat shape or form differently.
The downsides? Those extra rows that travel through the crown might be a fun challenge for some but not for others. There’s also the fact that, assuming a Hat made this way wants to be consistent all the way around the finished Hat, the second half of a traverse panel may mirror the first half, and not everyone can transpose that in their heads – this is certainly one area where I make mistakes with this method.
Then there’s the grafting, and how the setup changes the rules. This is a Hat that will be folded in half and the grafting will replace or be equivalent to two vertical seams, unlike the one grafted seam in the linear or radial methods. When we graft, it replaces one full and complete row. It has a relationship with the two rows either side of it, but it is equivalent to one full row of knitting. If you’ve ever knit a hood of the kind that’s folded in half and grafted, and especially if you’ve made it in garter stitch, maybe with a pattern such as Zimmermann’s Tomten, then you may remember stopping the final row at the midway point. Doing so keeps the graft, and any repeatable pattern, consistent and invisible. And it’s no different with a Hat made this way – that’s why the panel in the schematic above starts and finishes at the panel mid-way point, or at the crown point. This can be a tripping up point, and it’s something to be mindful of.
This is an unusual construction method and I hope this has helped explain it a little! It’s a method I have So Many Ideas for, there aren’t enough hours in the day!


