

Panel maps are a method of charting sideways colourwork patterns that I developed in early 2017. My want was to be able to visually present the instructions for my Elemental patterns whilst trying to reduce the amount of clutter within the chart. Charts for patterns worked flat often have different symbols for different rows, and couple that with needing to indicate the short rows, and the colours worked at each point, a chart can often get overwhelming.
Furthermore, when working a pattern that is entirely short rows it’s all too easy to get muddled about which short row you’re on and which way you should be knitting.
One of the drawbacks of traditional chart symbols is that they don’t indicate direction, just the stitch that’s to be worked, and the symbol for it would depend upon how it looks on the right side of the work and from which side of the work you’re working. For a lot of people, especially folks with brains like mine, this makes little sense and is too much to try and decode.
When I was developing the Elemental patterns it made total sense to me to not indicate the stitch at all, after all the patterns are entirely in garter stitch so is there any real need to use what many consider to be the standard symbols? Why do that when they don’t serve the purpose of indicating direction other than saying “this is a wrong side row that you’re knitting” which creates yet more mental gymnastics?
So I pushed that out of my head and used arrows instead. You don’t need to know which is the right or wrong side as you work, you just follow the arrows, knowing that the first row - a wrong side row - is worked away from the yarn tail with which you began.
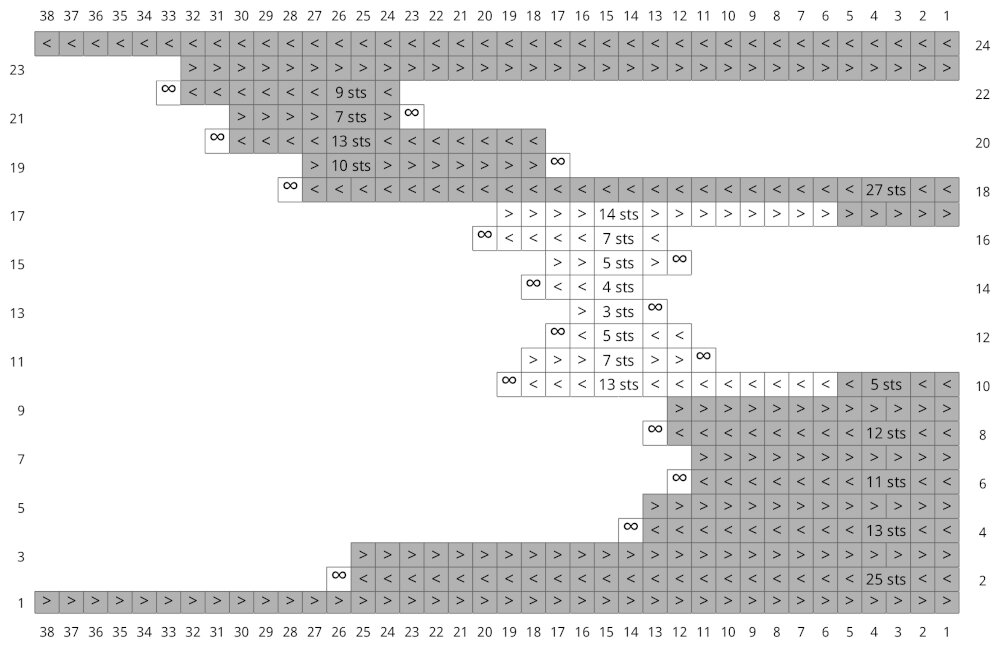
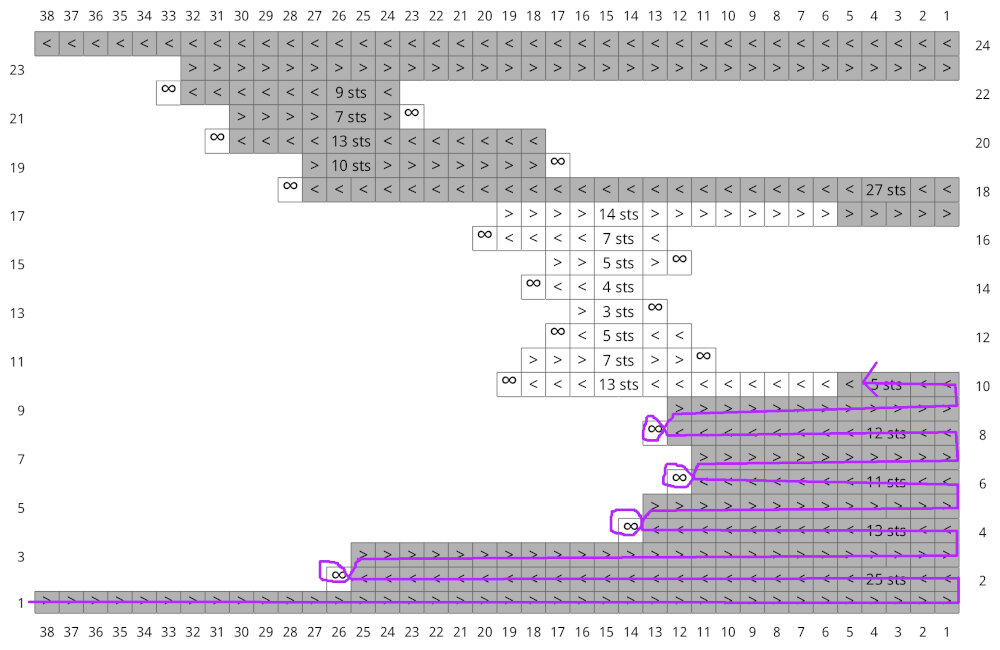
Image above shows a sample short row colourwork map. It features rows or arrows pointing to the left or to the right, and the coloured squares indicate which colour is worked at which point.
The sample panel map above isn’t from any particular pattern, and it won’t be balanced - i.e. each stitch doesn’t have the same amount of rows worked - so it might not make anything notable if you knit it! But it’d be good practice if you want to give the method a try.
This method of presenting the instructions has totally clicked for many people but it has also stumped some folks. Folks who aren’t too familiar with charts, or don’t feel confident with them, may have some difficulty with them. I want to offer reassurance by saying that these aren’t traditional charts, don’t overthink them. I know when you’re faced with new symbols in a method that you’re not familiar with it can be confusing, I completely get that! I think it’s helpful to not see it as a chart, and instead a set of directions, hence I call them maps.
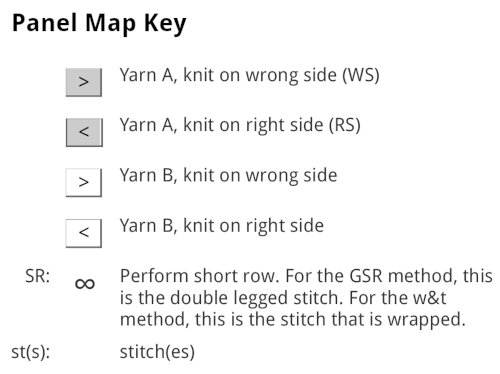
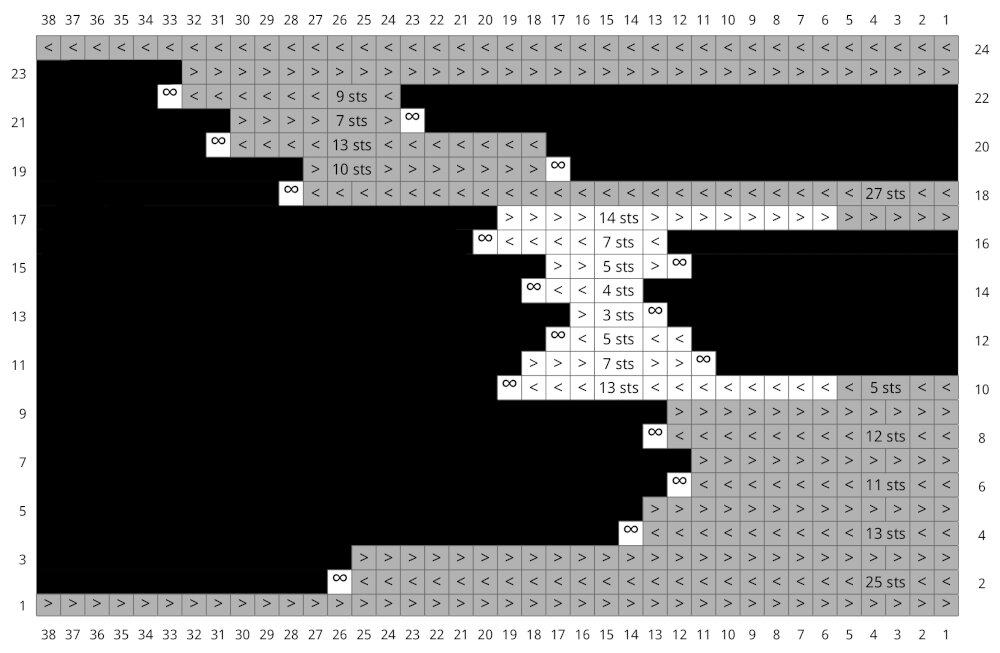
This image shows the symbols key for the panel map above.
This key explains what each symbol means.
The right facing arrow in the grey square means knit in Yarn A on the wrong side, i.e. knit away from the yarn tail.
The left facing arrow in the grey square means knit in Yarn A on the right side, i.e. knit towards the yarn tail.
The right facing arrow in the white square means knit in Yarn B on the wrong side, i.e. knit away from the yarn tail.
The left facing arrow in the white square means knit in Yarn B on the right side, i.e. knit towards the yarn tail.
The infinity symbol is my standard symbol for work a short row - that is the stitch that gets short rowed. For the wrap and turn method, wrap this stitch. For the German short row method, this becomes your double legged stitch. Work the short row in the yarn that you’ve just used or will use in the next row.
The explanations of the symbols that refer to right side and wrong side help connect them to standard terminology - this is the way the sides of our knitting are referred to in knitting patterns. If thinking about left and right arrows is a hurdle, think about whether your knitting away from the yarn tail: right or towards it: left. I get my left and right, wrong side and right etc muddled up all the time, so this is how I think of it.
The stitch counts you see in the map indicate how many stitches you knit in that colour, exclusive of the short rowed stitches, within that row. The short rows are never included in the stitch counts! Where a row works straight to the end no stitch count is given as it’s not needed.
The very handy thing about these stitch counts is they can tell you where you are if you need to put your work down, or if you have to under a few rows - they’ve saved me more than a few times!
Let’s have a look at working through the map in more detail.
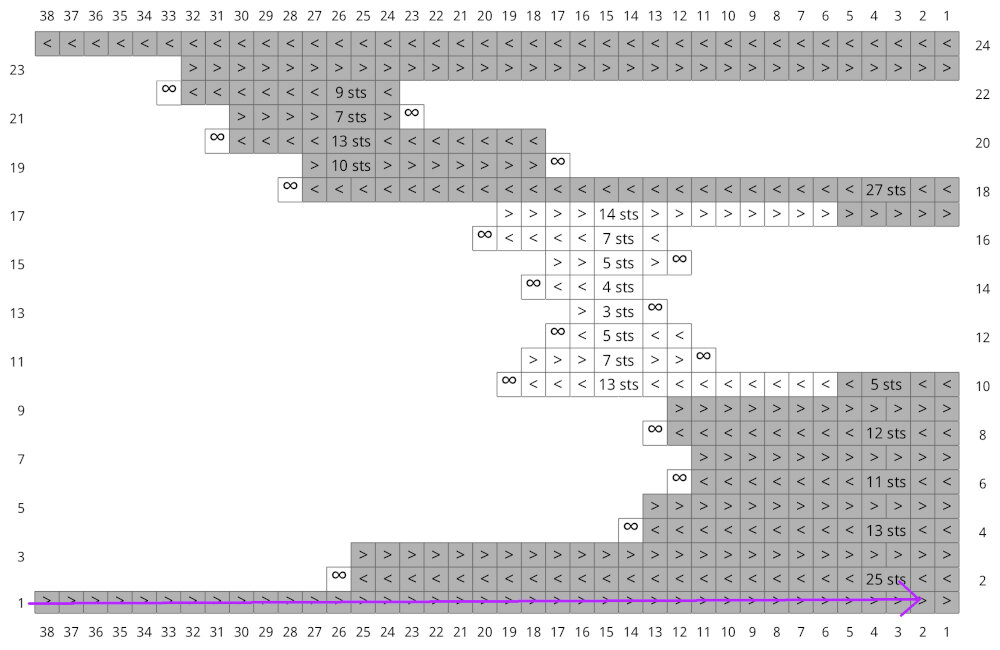
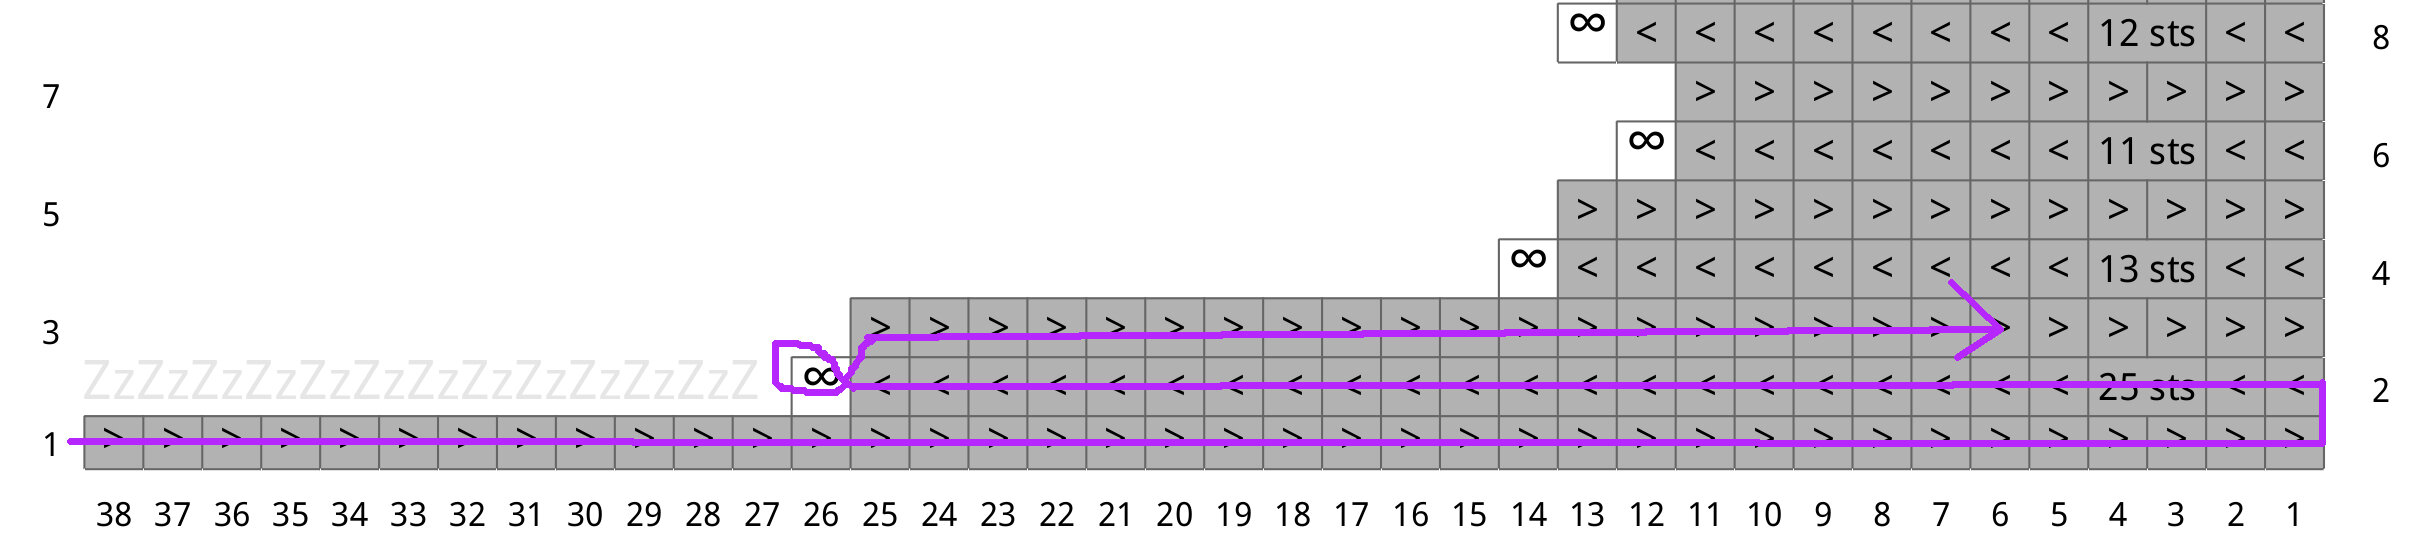
This image shows the same panel map with a long purple arrowed line highlighting a rightwards direction along the first row, indicating how we knit the first row of the panel from left to right.
Standard chart notation for knitting worked flat says that wrong side rows read left to right, and right side rows right to left. I couldn’t tell you why that it is, it isn’t wise to always start your work on the wrong side as it really depends on what you’re going to do with it or what kind of edge your prefer, but this is one standard that’s stuck and is pretty universal.
So our first row, which is a knit row like all the others, is worked from stitch 38 to stitch 1 in this map. In other words, having provisionally cast on with waste yarn, you join your main yarn and you knit to the other end, knitting away from the yarn tail. The yarn tail end will become the crown end, so your first row is crown to brim. Or you could simply remember it in relation to the yarn tail - whichever makes the most sense to you.

This image shows how purple line now moving leftwards, having finished the first row and started the second.
Once you’ve got to the end of your row, work your selvedge however you do in garter stitch - I slip the first stitch of the next row for a neater edge, I don’t work a slipped stitch selvedge on these Hats - turn and then carry on knitting the next row until you get to stitch 25.
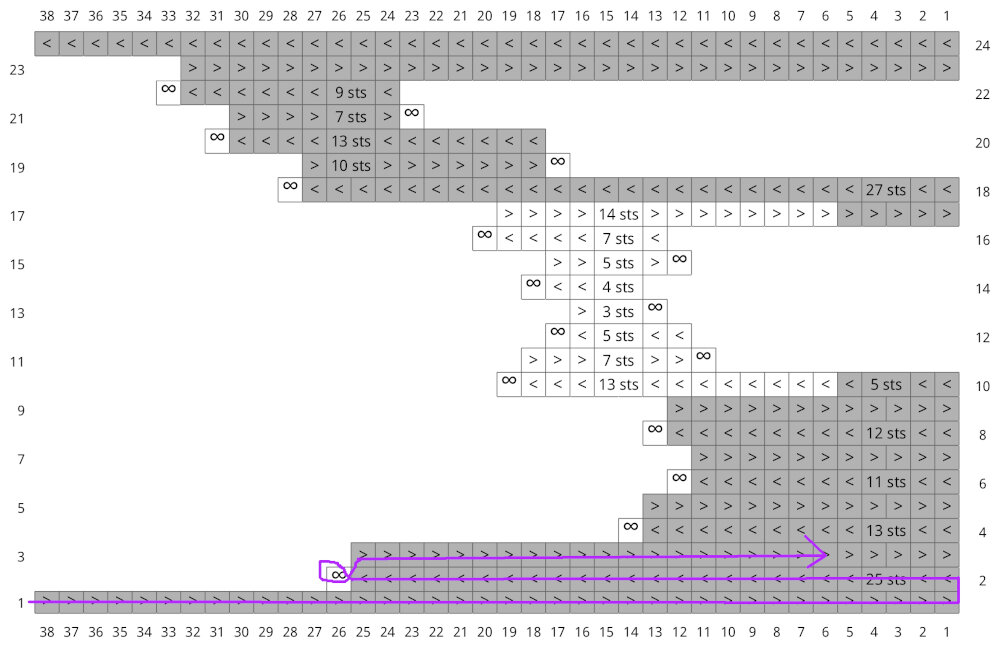
In this image the purple line has reached the short row at the end of the second row, and is now moving towards the right for the third row of the map.
In this example, stitch 26 is to be short rowed, so perform your preferred method - I recommend the German short row method in allover garter stitch and especially in short row colourwork - turn and start knitting back to the brim edge.
You’ll find that the brim edge starts to develop some substance, even if it’s only a few rows. The crown end will always be narrower than the brim end.
One question that comes up a lot is what about the other stitches?
Well, they’re dormant. They’re waiting, held on the left-hand needle if you’re a right-handed knitter like me, until they’re needed again.
This image is very similar to the above except it suggests that the unworked stitches at the end of row 2 are sleeping - indicated by the small ‘Zz’ symbols.
I’ve often found that it helps to describe them as sleeping.
They’re not cast-off. They’re not put on a spare needle, although in effect that’s kinda what you’re doing, except that because the number of dormant stitches changes on every row you don’t want to be faffing with a stitch holder every time, so you’re using your working needle both for knitting and as a stitch holder. If it helps to imagine that the end of your needle is a stitch holder and you’re placing them there, go for it.
One thing I’ve always found really confusing about several chart standards (don’t be fooled into thinking there is one standard, there isn’t!) is the concept of a symbol for ‘no stitch’. It makes absolutely no sense to my brain - if the stitch isn’t needed, why does it need a symbol? A symbol means a stitch which is an action, so no action means no symbol.
Not everyone agrees with me, I know! But whenever there’s a symbol, or even a coloured square, for ‘no stitch’ it’s one extra thing my brain has to filter, translate and transpose and it just adds to the confusion. I’ve got severe ADHD which means cognitive function, especially executive function, is up the spout. The less steps I have to go through to understand something the easier it is to grasp and the less likely I am to make mistakes. It took me a long time to get used to the concept that a chart should show the right side of the work, as I grew up with charts that were a visual set of instructions, not a visual representation of the finished work. Once I got that concept - it took years! - I never understood why a blank square represented a knit stitch or a dot a purl stitch. That broke my brain, it still does. But I was comfortable with a vertical line for a knit stitch and a horizontal one for a purl, as at least they looked like the stitches they represent, and it was easier to learn and navigate.
I digress.
Because charts for sideways knit Hats have a lot of dormant stitches where the short rows are worked, usually at the crown, a chart would be very visually cluttered if I included a symbol to indicate that they’re dormant for each and every stitch. Again, this is something that can really affect neurodivergent folk - too much information to wade through quickly becomes confusing, especially visual information that needs decoding. And so I leave the dormant stitches blank in all of my charts. They’re asleep, they don’t need a symbol.
This image is the same as the very first except the dormant stitches are shown in all black, not white.
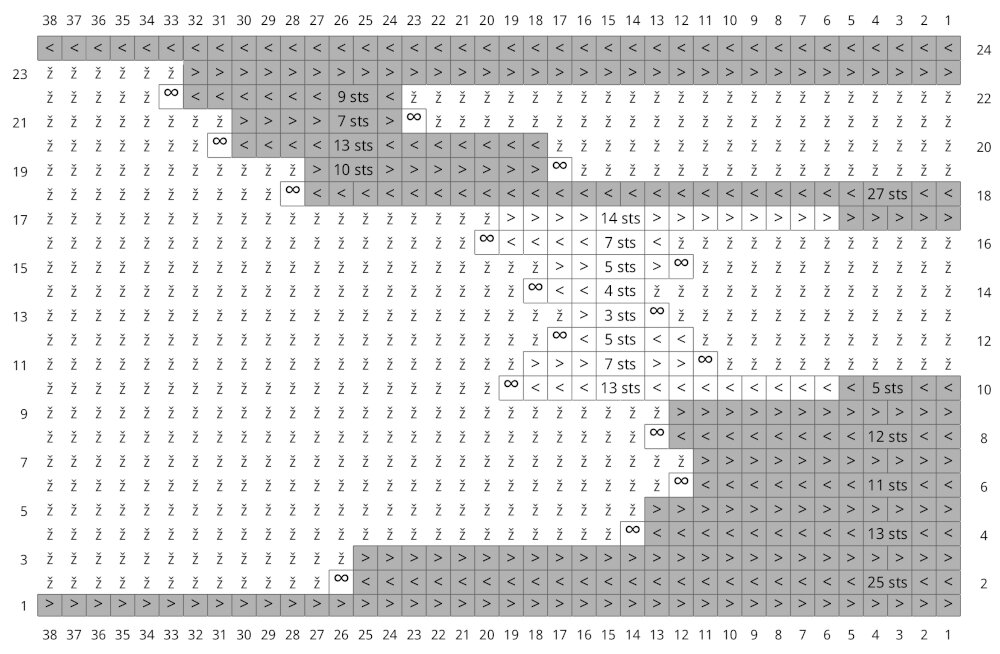
This image is the same as the very first except the dormant stitches are shown with a small ‘z’ symbol instead of no symbol.
I went on a bit of a tangent with the two maps above, but I wanted to show what they may look like either with the no stitch square filled black, as some chart standards suggest, or with a symbol, as others recommend. The one with the symbol is completely unreadable, even with a different symbol that was less angular it would still look garbled. Some folks may be fine with the black fill around the working stitches but it’s still harsh to look at, and the black takes visual dominance. Which means it’s an extra step to get through to make sense of the instructions. We want the important visual information to stand forward, not sit back.
With my charts, and especially with these panel maps, the aim is to be intuitive and logical. Don’t read any more into them than you need - the arrows literally mean knit that way or this, in this colour or that, and the dormant stitches want to be left alone until they’re needed.
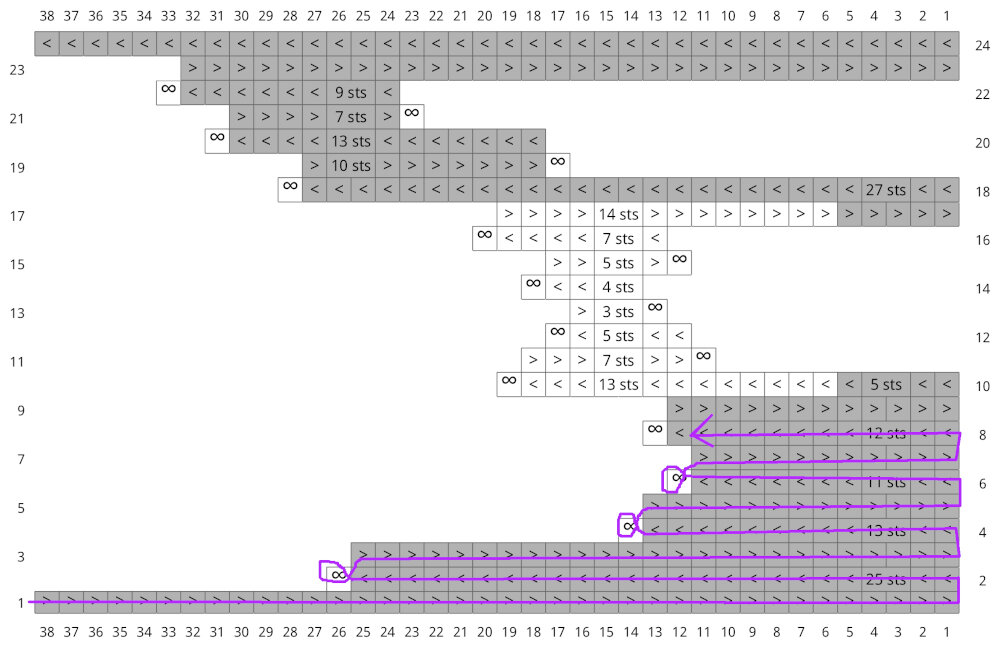
In this image the journey the short rows take is becoming clearer, as the purple line swings back and forth across the map.
Moving along with our sample we’ll knit a few more rows, each shorter than the last, until we get to row 8. The short row at the end of this row will be after a previously worked short rowed stitch. In fact we want to short row the stitch that’s directly after the short rowed stitch in row 6, and the stitch we’ll be short rowing in this row was dormant in the previous 2 rows.
That makes it sound a little complicated but it isn’t! If you used the German short rows method then you’d just work stitch 12 as a regular knit stitch, only work it through the double-legged stitch as you would working across any German short row. If you’ve used the wrap and turn method then you’ll want to pick up the wrap and knit it together with stitch 12. You’ll then perform a short row on stitch 13. Whenever you encounter a short rowed stitch within the panel that you need to work across, do the same.
Working a short row directly after picking up or working across a previous short row isn’t tricky, and there’s no special method to it. You simply work the next short row as you would any other. The only time there might be a concern is if the tension is a little off, or you didn’t manage to pick the short row up as you intended. To be honest with you, I wouldn’t worry too much about these things unless they’re likely to cause a dropped stitch or ladder. These patterns are entirely short rows and they will all even out in the end.
Stitch 13 will be one ridge, or two rows, shorter than the other stitches within the same row and that’s the point! This is where the magic of this type of construction starts to take form and it really is wonderful to see it growing on the needles. The fact that it’s a ridge shorter may make the tension seem a little odd at first, but it will balance out. All of my short row colourwork patterns are balanced which means, short rows for the brim and crown shaping aside, every stitch will have the same number of rows worked, or will be short rowed evenly throughout. There won’t be any stitches left stretching, trying to catch up with the others.
The purple line, indicating the journey our knitting and short rows taking, has reached the first point where we need to change yarn and introduce the second colour.
When you get to row 10, you’re ready to introduce the second colour. Work 5 stitches in the first yarn then bring in the second yarn and simply knit a further 13 stitches with it, leaving a yarn tail of a few inches or long enough to weave in later.
Leave the first yarn attached if you can - if you want to aim for a reversible Hat or avoid floats then by all means break the yarn and refasten it on row 17 when that yarn is reintroduced. Short row colourwork is a mix of techniques, and working with two colours this way at this point in the map is essentially garter stitch intarsia. There will also be times when you need to carry floats, and because we’re working sideways instead of vertically, our floats will be vertical instead of horizontal! This isn’t as scary as it sounds, and if anything working this way requires less yarn management than vertical colourwork knitting.
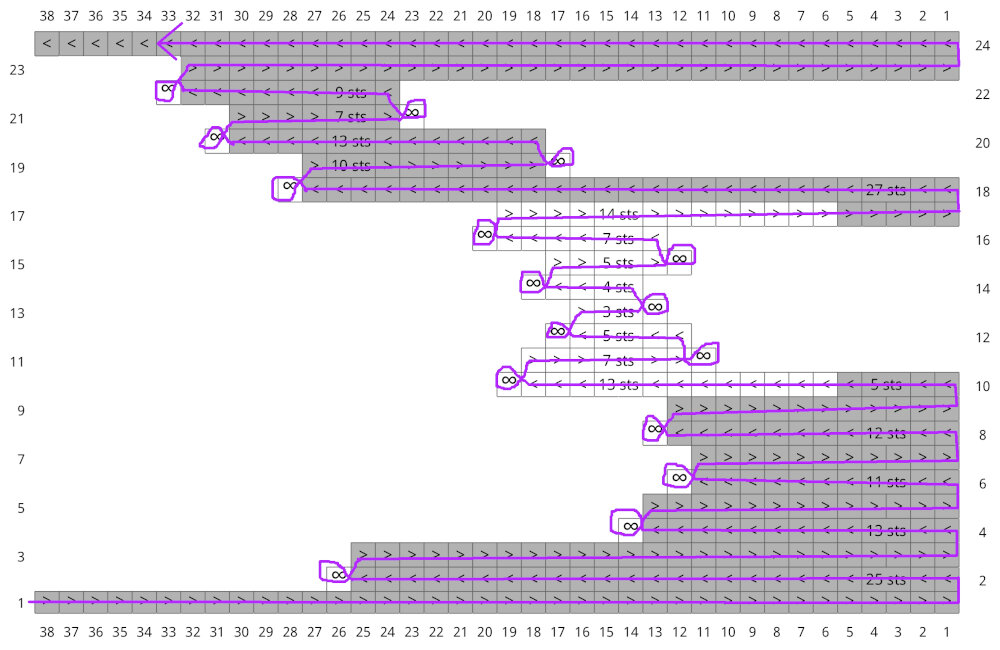
A complete panel, with the purple line having completed it’s journey and reached the final row. It illustrates how much our knitting twists and turns throughout the short rows.
As we work our way through the rest of the map there are no new manoeuvres that we haven’t covered already - changing yarns, working across short rows, knitting dormant stitches etc, until we get to the end of the map.
At the very end of the map is the last row of the panel. Unless you want to work short rows on top of short rows or have an incomplete graft, the opening and closing row of each and every panel of a sideways knit Hat will be a plain row. And so, just knit across all of the stitches, working across the short rows as you encounter them as you’ve done previously and then you’re done! To work the next panel just start from row 1 again and work all the way through. We only provisionally cast-on once with these patterns, repeat the panel however many times, then graft once at the very end.
I hope this is helpful! I find this a fascinating and engaging way to knit Hats, and the maps make things so much easier to follow. If you’ve a question post it in the comments below and I’ll get back to you as soon as I can.


