
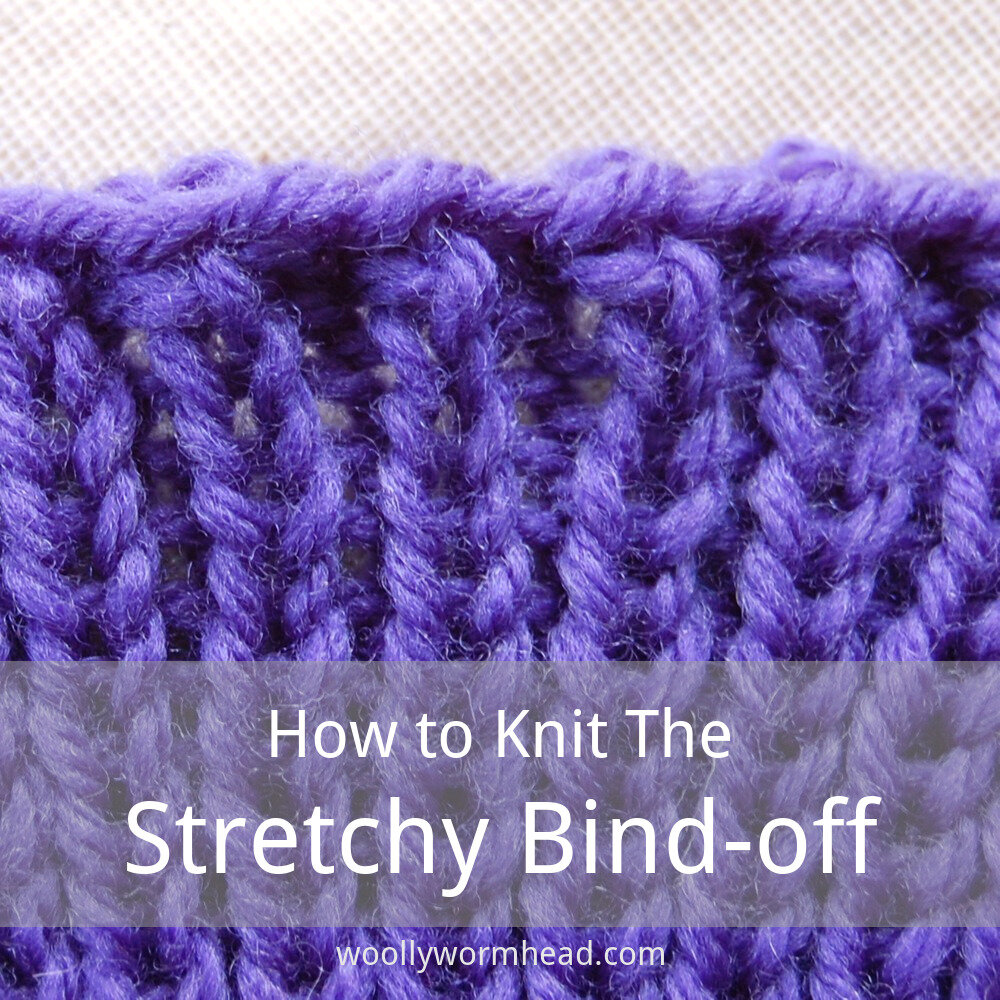
This is a brilliant way to cast (or bind) off a ribbed portion of knitting. Unstretched I think it looks a little unsightly, yet this is ribbing we're talking about, and it's meant to be stretched. And when stretched, this cast-off comes into its own.
It can also be used on stocking stitch or garter stitch or in fact any stitch pattern, as the knit and purl aspects can be intertwined as needed. You don't even need an even number of stitches!
For this tutorial I've used the order of stitches for a 1 by 1 rib, but feel free to work them in the order needed for your project.

1) Work the first stitch of the cast-off as you find it – that is, if you need to knit it to keep it in pattern, then knit it.

2) Presuming we’re working a 1 by 1 rib, the second stitch is normally a purl, so purl the next stitch (if the next stitch is a knit stitch, jump to step 6).

3) You'll now have the 2 stitches on your right hand needle.

4) Insert your left needle through both stitches, taking it behind the right needle.

5) And then purl these 2 stitches together, leaving the resulting stitch on the right hand needle.

6) If the next stitch is a knit stitch, knit it and leave the stitch on the right hand needle.
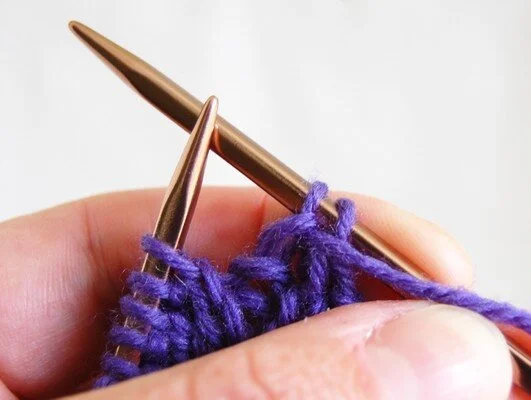
7) You will now have 2 stitches on the right hand needle.

8) Insert the left handle needle through both of these stitches, taking it in front (on top of) of the right hand needle.

9) Knit these 2 stitches together, and because of the position of the needles, they'll be knit together through the backs of the loops.

10) Continue to work these steps depending on the order of your stitches as you see them. For a 1 by 1 rib, you would repeat steps 2 to 9 until all the stitches have been cast off.
Support
As always, if you have a question about this technique or need some help with it, leave a comment below! I’m afraid I’m unable to offer help via email or private message, but you’re welcome to post in our forums.


