

A Lateral Braid, otherwise known as an Estonian Braid, consists of a horizontal chain of stitches across the front of your knitting. It’s used primarily as a decorative feature but also adds structure. It’s a method I’ve used in my Imperceptions collection but can of course be applied anywhere, in one or two colours.
This method is simpler than a Latvian Braid and only uses one colour. If you’re working this braid after a section of Corrugated Ribbing or elsewhere in a stranded knitting project, working one round plain in the colour the braid will be worked in makes everything that much neater.
I’ve found this braid can work up a little loose, as the changing between the stitches as you work them adds in a little extra yarn. For this reason I usually suggest going down a needle size or two to compensate.

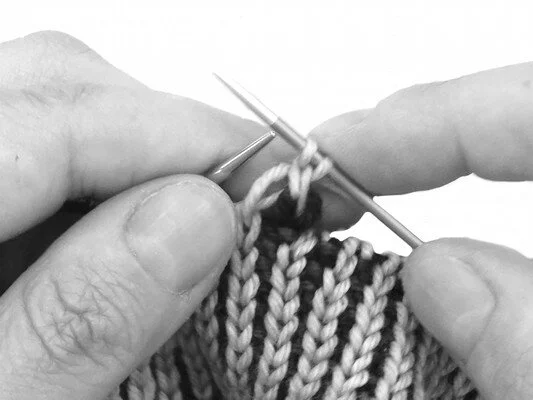
1) To start the braid, slip the last stitch on the right needle (i.e. the last stitch worked in the previous round) to the left needle, slipping it purlwise.

2) Insert the right needle into the back of the 2nd stitch in on the left needle, then knit this stitch through the back of the loop.

3) Pull the stitch through, leaving both stitches on the needle.

4) Now insert the needle into the 1st stitch then knit it.
5) Then slip both stitches off the needle.

6) Slip the last stitch on the right needle back to the left needle – this stitch is the chain stitch that runs across the front of the fabric. It’ll always be worked after the stitch behind it and it will always be placed back onto the left needle to continue the chain.

7) Now repeat steps 2 to 6 until all stitches have been worked. Once you have worked the very last stitch don’t slip the chain stitch back to the left needle.

8) With the last chain stitch now on the right needle, the chain has been completed and you’re ready to close the chain in the round.

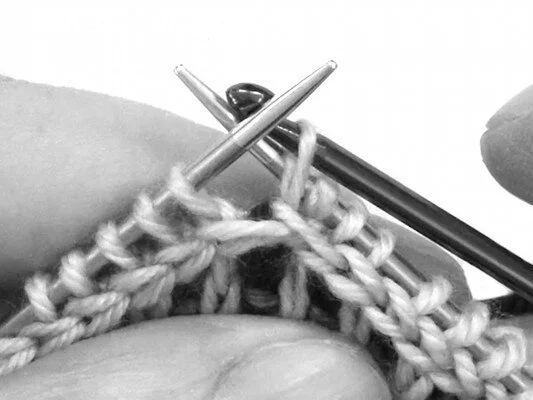
9) Using a crochet hook of about the same size as your needles, slip the hook underneath the first chain worked from top to bottom.

10) Then lift the hook up and grab the last stitch on the right needle, i.e. the chain stitch.

11) Pull the chain stitch through and underneath the first chain worked.

12) And place it onto the left needle

13) Now take your hook into the top of the last chain created at the end of the round.

14) And grab the chain stitch that you’ve just placed back on the left needle.
15) And pull it through the last chain. Then place the chain stitch onto the right needle. If you find that this join gets a little tight then you can ignore steps 14 to 16 and slip the chain stitch to the right needle at step 13; these last steps help make the join undetectable but it’ll still look pretty neat if you stop before the 2nd passing through.

16) The Lateral Braid is now finished! You can see here how the join is undetectable and blends into the braid.
Support
If you’ve a question about this technique, pop it in a comment below or visit the forum! I’m unable to offer help with patterns or techniques via email.


