

The Crochet Cast-on is one of those flexible cast-ons that allows you to cast on mid row, or at the end or beginning of a row.
If you need to extend your knitting at one end of your work it’s best done at the end of the previous row. This means that we can use the existing stitches to start the cast-on, and it also means that the chain edge will usually be leaning towards the right side of your work (not always, depending on what you’re doing, but most of the time).

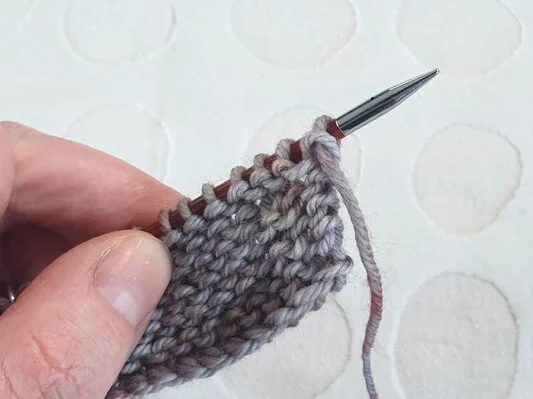
1) Insert your hook into the last stitch worked on the needle, or the last stitch that was worked if you’re extending mid-row.
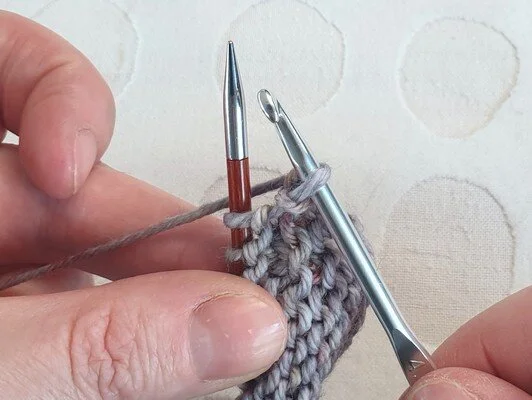
2) Slip that stitch off the needle and onto the hook, then take your working yarn around the back of the needle.

3) Then take your hook across the front of the needle and grab the working yarn.

4) and pull the yarn through the stitch on the hook, then take the working yarn around the back of the needle again. You’re doing exactly the same here as you did for the first method, the only difference being that there’s no slip knot, and instead we use a live stitch.

5) Repeats steps 3 and 4 until you have the desired number of extra stitches, then slip the stitch that’s on the hook back onto the needle. Don’t forget that the stitch that’s on the hook is counted in the existing section of knitting, and that you’ll want to cast-on the exact amount of extra stitches, not less one like before.

6) In this example I cast-on at the end of a right side row, so that I could extend the knitting to the left when viewed from the right side. That meant that I needed to have my yarn in position to purl. Here it is when the first row of purl stitches has been worked across the freshly cast on stitches.
Support
As always, if you have a question about this technique or need some help with it, leave a comment below! I’m afraid I’m unable to offer help via email or private message but you’re welcome to post in our forums.
I do hope you find this useful, it creates such a lovely edge!


