

If you've got a microwave, then use it wisely! I've never liked the things for cooking – I like the texture of food that an oven gives you, personally. Yet sweetheart Tom went on a mission to find a freebie working microwave for me to dye with – and he turned up with one in less than a week! It's tiny yet powerful, doesn't have a rotating function and needed a bloomin' good clean, but I was more than happy. If you are like us and a tad skint, folk chuck stuff like this out all the time in favour of a newer/better/bigger model, so keep your eyes open for whatever’s going.
Microwaves work a treat, whether you're dyeing wool or cotton. They cut down the time from around an hour to less than 10 minutes, and are strangely less messy, as you don't need large containers of water. The only thing they're rubbish at is even, one-colour dyeing – you'll need your big pot or sink for that one, as yarn/fabric needs space to move and a good stir to get an even colour.
But if you like sticking something in, not quite knowing how it will turn out and want the element of surprise, then this is a good way to go. Just don't go expecting self-patterning yarns like you can buy in the shops... you may well get a pattern of sorts or you could get something else entirely ;)
Get yer gear ready
Apart from the above mentioned microwave, you'll need a few other bits too.
- Small squeezy plastic bottles, preferably with snap-shut lids and only a small hole for the liquid to come out – I got a few of mine from Hobbycraft, although they're a tad small and cost money. You can use washed out Bodyshop bottles or similar.
- Easy acid dyes and a drop of plain old white vinegar. These dyes are available from Kemtex and Omega and aren't too expensive. A small pot of 25g (about 1 fl oz) goes a fair way. Any vinegar will do; the cheaper, the better. Wool (and other protein fibres) need heat and acid to take effect. These dyes already have the acid component, which saves a lot of aggro. The vinegar is just needed to help the process along a little and you don't need much.
Note – the Easy Acid dyes produce more subtle colours than the regular acid dyes
- Microwave cooking bags. I bought 10 for 99p in Morrisons, although if you rinse them out after dyeing they can be reused over and over.
- Plastic gloves. I hate wearing them and always end up with stained fingers.
- Waste plastic bags for working on to protect your worktop.
Preparation
If your skein isn't already tied, do so with some waste yarn in at least 2 places; don't tie it too tight, else it will stop the dye penetrating in those places.

You will need to soak the wool first, otherwise you'll end up with badly blotchy results and the colours will look nasty. If you can, soak it for a couple of hours in the bath first. A quick rinse out under the tap isn't enough - the properties of wool are such that it's fairly water repellent, so you gotta make sure it's wet through. A drop of washing up liquid helps. And I always add a dribble of vinegar to the soak, too.
In yer squeezy plastic bottles, make up some concentrated dye solutions. Being as we're not being scientific, just add a good sprinkle and hot water. For these small bottles, I used about 1/3 of a teaspoon of dye. Put the lid on and give 'em a good shake so there's no granules left at the bottom. If you want to reproduce a colour, then it's essential that you measure the quantity of dye to liquid. It's also a good idea to label the bottles with a permanent marker, so you know which colour is which.
And yer off!

Ok, so now lay the plastic bag on the worktop, lift the wool out of its bath (with a gentle squeeze to remove excess water) and spread it out on the plastic. Previously, I was doing this with 200g skeins, yet it's far better with 100g or less. If there's too much bulk, the dye won't penetrate well. Start now with your first colour. Squeeze and dribble the dye on – you'll soon get a feel for how much you're putting into the wool. The dye does spread when it's heated up, so don't worry if it looks a bit 'blobby'. Add as much or as little as you want, moving from colour to colour. The more dye you add, the more blended the end results will be.
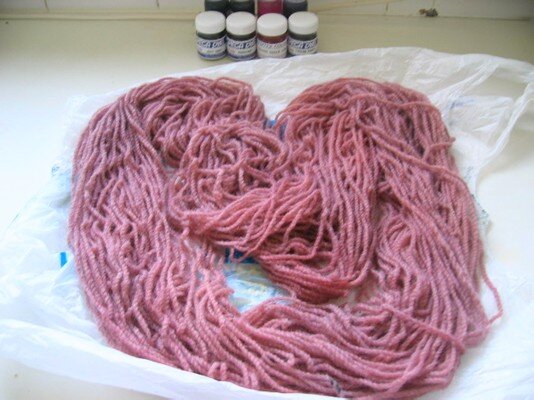
For this demo skein, I used purple, grey and burgundy on 100g of chunky wool yarn which was already a dusky pink. This how it looked just before cooking.

Actually, that reminds me.... I tend not to use this method on completely undyed yarn. You can, of course, but often you might get white bits or sections that end up rather pale, and I don't like that. So... I use a base colour first. If there's any dye left in a vat after a previous session, I just chuck the skein in to soak up the remaining dye (better than flushing it down the sink) and hey presto, you have a base colour. Another alternative is to buy a yarn that's already got a lightish colour to it. You can redye yarn a fair few times, so long as you're careful in the rinsing process not to agitate it too much and cause it to full (start to felt).
Now your yarn is ready to be cooked. BTW, being as you're doing all this in plastic bags, it's safe to use your regular foody microwave for dyeing. If the colour spills, just clean it up! Carefully put the yarn into the microwave roasting bags. Unless they're bags designed for microwaves, don't use them – plastic melts, y'know.

Cooking times vary from oven to oven and from one tutorial/guideline to another. Personally I’ve found that 8 minutes should be enough, but an extra zap won't hurt. Our microwave doesn't rotate, so I stop it halfway and turn the bag round. Dyed water tends to collect in the corner of the bags, so it's better if that's moved around. Another point is this – dry wool might combust in the microwave! If your skein has somehow got a little dry after its soak, add a few drops of water to the bag. Don't completely seal the bag either – the normal rules for using a microwave apply here.
After the machine has gone 'ping', you’re ready to remove the yarn. Be careful, as it will be bloomin' hot and steam will be in abundance. You will probably notice that the dye has spread. Carefully move the bag with its contents to the sink and leave it for a while to let the steam escape and cool down a little.
After 5 or 10 minutes, run the hot water tap until it’s at its hottest, and fill the sink sufficiently to cover the yarn. Empty the bag of its yarn and allow the wool to soak for a while. There are 2 golden rules to remember with wool to stop it felting:-
a) Try to avoid shocking the fibres with a sudden temperature change – this will open the scales and it'll be ready to cling to another bit of fibre.
b) Avoid too much agitation after a temperature change or when the wool is in hot water. Too much movement will help those little scales join up...

Leave the wool to cool down a little... gently stir it to see if there's much excess dye to be removed. I tend to find that this method does absorb most of the dye, unless you've been a little splash happy ;) Cold water won't remove the excess colour very well, so you will need to rinse it in hottish water; so just be careful. Change the water as necessary until it runs clear. Then gently lift the yarn for a little squeeze (some folk roll it in an old towel and squeeze) to remove the drips and then hang the skein up to dry. If it looks a little untidy, find the tied sections and give it a gentle shake until the yarn is hanging evenly. Tangled skeins are a big pain in the bum. When it's dry right through (pay particular attention to the tied areas) it's ready for whatever you want to do with it. Here's my finished yarn ('scuse the crap colour reproduction. It did work, honest!) Enjoy ;)

Support
As always, if you have a question about this technique or need some help with it, leave a comment below! I’m afraid I’m unable to offer help via email or private message but you’re welcome to post in our forums.


