Mobberley is the next release from the Painted Woolly Toppers for Kids collection!


There's something rather special about chevrons in garter stitch paired with sideways knitting, and this time I wanted to take it a bit further with a double chevron - and it's pretty effective!


Mobberley is named for the yarn, Mobberley Aran, which is named for where the dyer Yarns from the Plain hails from. Although I try to not give a pattern the same name as the yarn, it seemed the most appropriate and fitting! There's something rather charming and characterful about the name, which fits Aran's posing and attitude just so.


The pattern is sideways knit garter (and all you need to know is included) and the increases and decreases are pretty straightforward. It's a simple and memorable knit that is incredibly striking, don't you think? It wouldn't work at all in a solid colour yarn - it needs that bright variegation!


The yarn is a wonderfully woolly and sturdy (but still soft!) British yarn, and that structure works so well with the pattern. It says solid and warm and playful all at the same time.

The Mobberley pattern comes in 4 sizes, and of course being sideways knit, there's always the option of adjusting row gauge and trying it on as you go. Gotta love a sideways knit Hat :)

Posted
AuthorWoolly Wormhead
2 CommentsPost a comment

Kilbride is the first of the new patterns in Painted Woolly Toppers for Kids that I'd like to introduce you to.


Kilbride is named for the yarn; the pattern uses Old Maiden Aunt Merino 4ply, and OMA are based in West Kilbride, Scotland. One thing about this collection is that all the designs have a sense of place, relating to the yarn in some way.

The yarn is lovely to work with; very fine, and on the slimmer end of sock yarn. Smooth and soft, and it stood well up to frogging as I needed to work the crown a couple of times!


Ivy Mae was such a *star* to work with! We had a lot of fun with the photoshoot, and the deal clincher was the low stage on which the kids could stand and perform and do their thing - it made them both play up for the camera.


As with all the other patterns in this book, they're not just for kids - adult sizes are included, too. Kilbride has 5 sizes, covering 14in to 23in sizes heads. You'll start from the bottom up and work towards the crown - nothing unusual or complex about the construction, and besides keeping track of the shaping in the crown, it's a very straightforward knit.


The garter lace pattern is incredibly structural and is you don't block the Hat too much, just enough, you'll find that it wears like a crown, with the lace points holding their shape. The stitch pattern intrigues me, and I'd like to try something sideways with. It suits the yarn perfectly, and will work with something a little more variegated too, but not too much.


At first glance this may look like a regular crown decrease spiral, but when you look more closely, you can see there are two spirals at play here, both curving at different ratios. I really enjoyed this, and it opens up different possibilities maths-wise, and it's something else I'd like to play with more... in a different pattern, it could be quite pronounced, whereas here I like it's subtlety.

Over the next week or so I'll be introducing each pattern from the book, and you can now pre-order the book for an early bird discount, too!

Thanks to the bundle promotion feature on Ravelry, when you buy the eBook you also get all the single patterns, too. OR: if you don't buy the eBook but buy the singles, once you've spent the value of the eBook, you get the lot. Which means if you've already made a past purchase (such as Gorton, which has been included in this collection) then what you paid for that will be discounted from the full price. Clever, huh?

Posted
AuthorWoolly Wormhead

The brilliant Louise is helping me get organised and manage some areas back stage. We've been working together for a wee while, but it's about time I mentioned it as today she's hit 'send' on review copies of Painted Woolly Toppers for Kids going out to bloggers, dyers, editors and podcasters!


If we've missed you, or you'd like to join in the fun and review the book, please send us an email via the contact form and we'll get back to you.

This shot is a favourite of mine - I've used it on the back cover of the book, as I just love the way the light falls, and the way the robot is guarding the precious Hats. The robot does feature in the book a little and there are details included about the artist, too.

Painted Woolly Toppers for Kids will also go on pre-release this week! Slowly over the next week or so I'll introduce the Hats, share some photos and background, and you'll be able to buy the eBook (that's also bundled with the singles) for an early-bird discount. Once my editors are happy that the eBook is sparkly and ready, it'll be published and the price will revert to it's usual of £10/$16.

There's lots to tell you, and I'll be taking my time, don't worry :)

Thank you for your support for my last blog post. Knowing that I can say out loud that I need a little help and that I need to lean a little helps a great deal. And knowing that the Ravelry group is there for support makes a BIG difference - it's not just there for pattern help and queries, it's a brilliant and supportive community, and always worthy of a visit.

There's still more that I'd like to do, to streamline some areas such as provide direct links to support/discussion threads, and that's going to take time. It's amazing how much back-end non-knitting admin type things happen in a creative business, and an awful lot of it comes in via email. This is something I've long since battled with, as although I know it's an essential part of the job, keeping the balance isn't easy, and it's this aspect that eats away at you more than anything else. It's not that emails are bad or that I don't want to hear from knitters of my Hats, I think it's that the volume can be overwhelming and you lose touch with the tactile things that bought you to this point in the first place. My health has forced the issue before I've had time to put everything in place, but we'll make it work somehow.

Anyhows, that's me for today. I'll share a little about the Hats here and on Instagram, and I will of course let you know when the eBook is available! (soon; very soon)

Posted
AuthorWoolly Wormhead
button for patreon
All of the free patterns and tutorials on this website are supported by my amazing Patreons! If it wasn't for them I wouldn't be able to continue to produce or host freebies. We'd love to have you join us and in return, you get exclusive behind-the-scenes material, member-only discounts and early access to new free content. Membership starts at $1 per month. If you'd like to, you can say thanks for the freebie via the Tip Jar.
ElbertsCap.Square.BlogMain.jpg

Description

Elbert’s Cap is a pixie Hat with a deep garter stitch brim and a stocking stitch crown. The body is worked flat so that the garter ridges are vertical. The crown is worked in the round and ends with a slight point.

Availability

My Patreon supporters and members of The Woolly Hat Society get exclusive early access to new free patterns and tutorials. Once the exclusive period is over it’s published here on the blog.

Support

If you have a question about this pattern, pop it in a comment below. Sorry, but I’m unable to help with my free patterns or tutorials via email or private messages.

Social Media

Share your hand-knit Hats online with these hashtags!

#WoollyWormhead

#WWHats

#WWElbertsCap


Yarn
274yd/250m/100g
DK weight, plied yarn.

Needles & Notions
Set 3.75mm/UK9/US5 DPNs/Circular or size needed to obtain gauge
3.75mm crochet hook
Approx 2yd/2m waste yarn
Stitch marker as necessary
Tapestry needle

Sample details
Chiaroscuro Dye Lab Nyad DK [274yd/250m per 100g; 100% Merino Extrafine Superwash]

Gauge
22 sts x 36 rows to 4in/10cm on 3.75mm needles over St. St.

22 sts x 44 rows to 4in/10cm on 3.75mm needles over Garter St.

Sizes
To fit sizes: 17.25 [18.25, 19.75, 21, 22.25] in/43.75 [46.25, 50.25, 53.25, 56.5] cm
Finished size: 15.25 [16.25, 17.5, 18.5, 19.75] in/38.75 [41.25, 44.5, 47, 50.25] cm
Not sure which size to make? Check my handy size and measuring guide!

Skills required
Garter Stitch

Stocking Stitch

Knitting in the round

Provisional Cast-on

Grafting Garter Stitch

Increases & Decreases

Abbreviations

K: knit

P: purl

rpt: repeat

Rnd(s): rounds

st(s): stitch(es)

k2tog: knit next 2sts together

Note

The Body of this Hat is worked sideways, and is very easy to adjust should you wish for additional sizes, or should your row gauge differ.

You simply need to work the number ridges to a multiple of 6 less one row. The garter grafting replaces one entire row, so it's important to remember to leave space for it – it won't graft correctly otherwise.

You would then pick up 1 stitch for each ridge, as the crown is worked on a multiple of 6.

How to

Using waste yarn and Provisional Cast-on method, cast on 22 [26, 30, 34, 38] sts. Change to main yarn and work the Body panel as follows:

Body panel

Row 1: Knit all sts
Repeat this row, continuing to work garter stitch flat, until 83 [89, 95, 101, 107] ridges have been worked, where 1 ridge = 2 rows. (note that when you are counting ridges, ensure that the ridge count on both sides of the work is the same. This ensures an even number of rows have been worked)

Work one more row flat.

Carefully remove Provisional Cast-on stitch by stitch, taking care to keep in pattern, transferring live stitches to 2nd needle.

Perform Garter Stitch grafting across all sts. Break yarn and weave in all ends. The garter graft will have created a final row in the work, bringing the total number of ridges to 84 [90, 96, 102, 108].

With a circular needle and yarn, and starting at the point of grafting, pick up and knit one stitch for each garter ridge. [84, 90, 96, 102, 108 sts]

Join in the round, being careful not to twist sts.

Place stitch marker to indicate start of round.
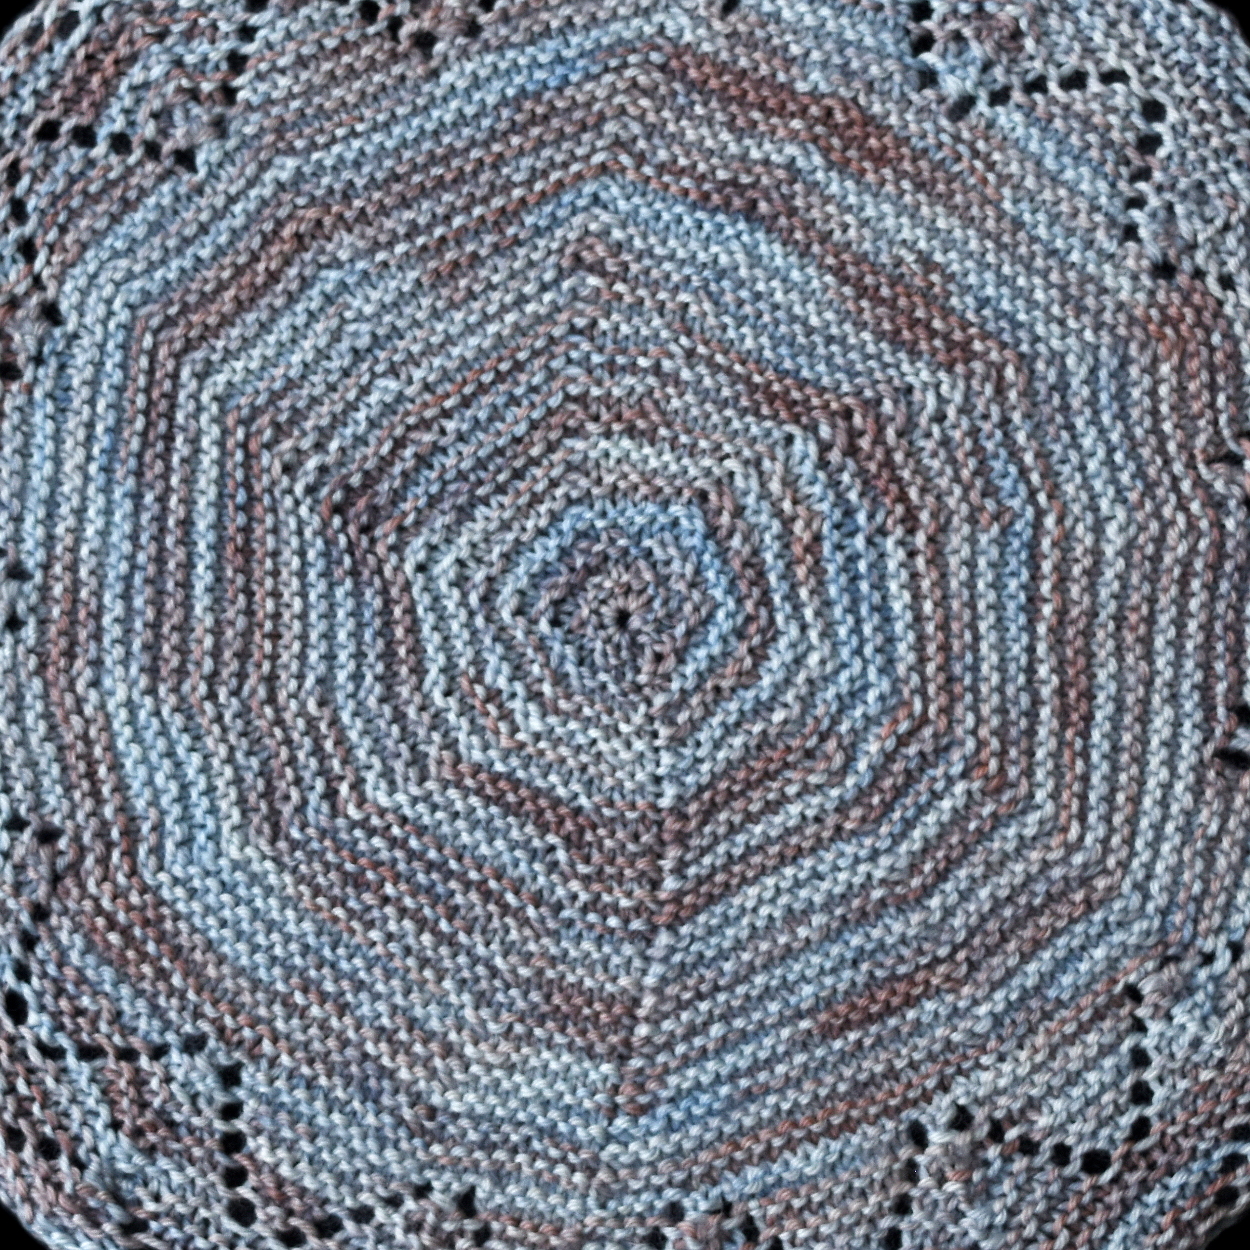
Crown

17.25in size jump to Rnd 9, 18.25in size jump to Rnd 7, 19.75in size jump to Rnd 5, 21in size jump to Rnd 3 & 22.25in size start from Rnd 1

Rnd 1: *K16, k2tog; rpt from * to end [102 sts]
Rnd 2 & all even rounds: Knit all stitches
Rnd 3: *K15, k2tog; rpt from * to end [96 sts]
Rnd 5: *K14, k2tog; rpt from * to end [90 sts]
Rnd 7: *K13, k2tog; rpt from * to end [84 sts]
Rnd 9: *K12, k2tog; rpt from * to end [78 sts]
Rnd 11: *K11, k2tog; rpt from * to end [72 sts]
Rnd 13: *K10, k2tog;rpt from * to end [66 sts]
Rnd 15: *K9, k2tog; rpt from * to end [60 sts]
Rnd 17: *K8, k2tog; rpt from * to end [54 sts]
Rnd 19: *K7, k2tog; rp from * to end [48 sts]
Rnd 21: *K6, k2tog;rpt from * to end [42 sts]
Rnd 23: *K5, k2tog;rpt from * to end [36 sts]
Rnd 25: *K4, k2tog;rpt from * to end [30 sts]
Rnd 27: *K3, k2tog;rpt from * to end [24 sts]
Rnd 29: *K2, k2tog;rpt from * to end [18 sts]
Rnd 31: *K1, k2tog;rpt from * to end [12 sts]
Rnd 33: *k2tog;rpt from * to end [6 sts]

Break yarn and draw through remaining 6sts, tighten to close.

Finishing

Weave in all ends. A gentle wash and blocking is recommended.

ElbertsCap.LR.1.jpg
ElbertsCap.LR.2.jpg
ElbertsCap.LR.3.jpg

After meeting Elbert at a discussion panel in Rimini, Italy, and after seeing his yarns in person for the first time, I wanted to face the challenge this colourway presented and design a Hat that didn’t pool and was able to show the vibrant colourway to its best. Turning one part of the Hat sideways by knitting it flat solved this problem, and knitting the remainder of the Hat in the round in a vertical direction worked perfectly with the yarn, creating a striking effect.

This pattern was originally published in the December 2015 edition of Notions magazine.

Posted
AuthorWoolly Wormhead
CategoriesHats, Patterns

We're almost there with the new book, and I am dead chuffed with the cover!

 
Painted Woolly Toppers for Kids - my new book, due for release very shortly

Painted Woolly Toppers for Kids - my new book, due for release very shortly


When I surveyed the cover photo in a previous post, although comments here were in favour of the roses, the overwhelming majority across all channels was in favour of this cheeky shot. And I do agree... there are *lots* of cheeky shots inside, more poking out tongues, pulling faces, all sorts of fun, childish behaviour and this sets the tone perfectly.

The hand writing was provided by Aran, and he's proud to have done so.

This week I'm working on the very final edits so that I can get the final draft out to my editors and review copies to dyers, bloggers and reviewers.

And if you want to find out when the book is released, don't forget to subscribe to the newsletter if you haven't already!

I've not made as much progress with the trapped nerve and RSI club as I'd hoped; I was doing well but then things got difficult again (not sure why, but suspect sleeping conditions and complacency with exercises) and now I'm back to taking things very slowly, with forced regular breaks. I'm also reconsidering my release schedule to keep the pressure at bay.

Because of all this, the print edition won't be ready at the same time as the digital edition, both for the book as well as the single patterns. Print takes much more editing, as I'll need to readjust the blacks, have test prints done etc, and the thought of all that time at this laptop is hurting my brain.

Anyways, keep an eye on the blog/Instagram/Twitter/Newsletter because before you know it, the eBook will be available for pre-order! I'll then introduce the patterns over the coming weeks, and I'm sure you're going to the love the photos as much as the patterns.

Until then.

Posted
AuthorWoolly Wormhead
2 CommentsPost a comment