

Description
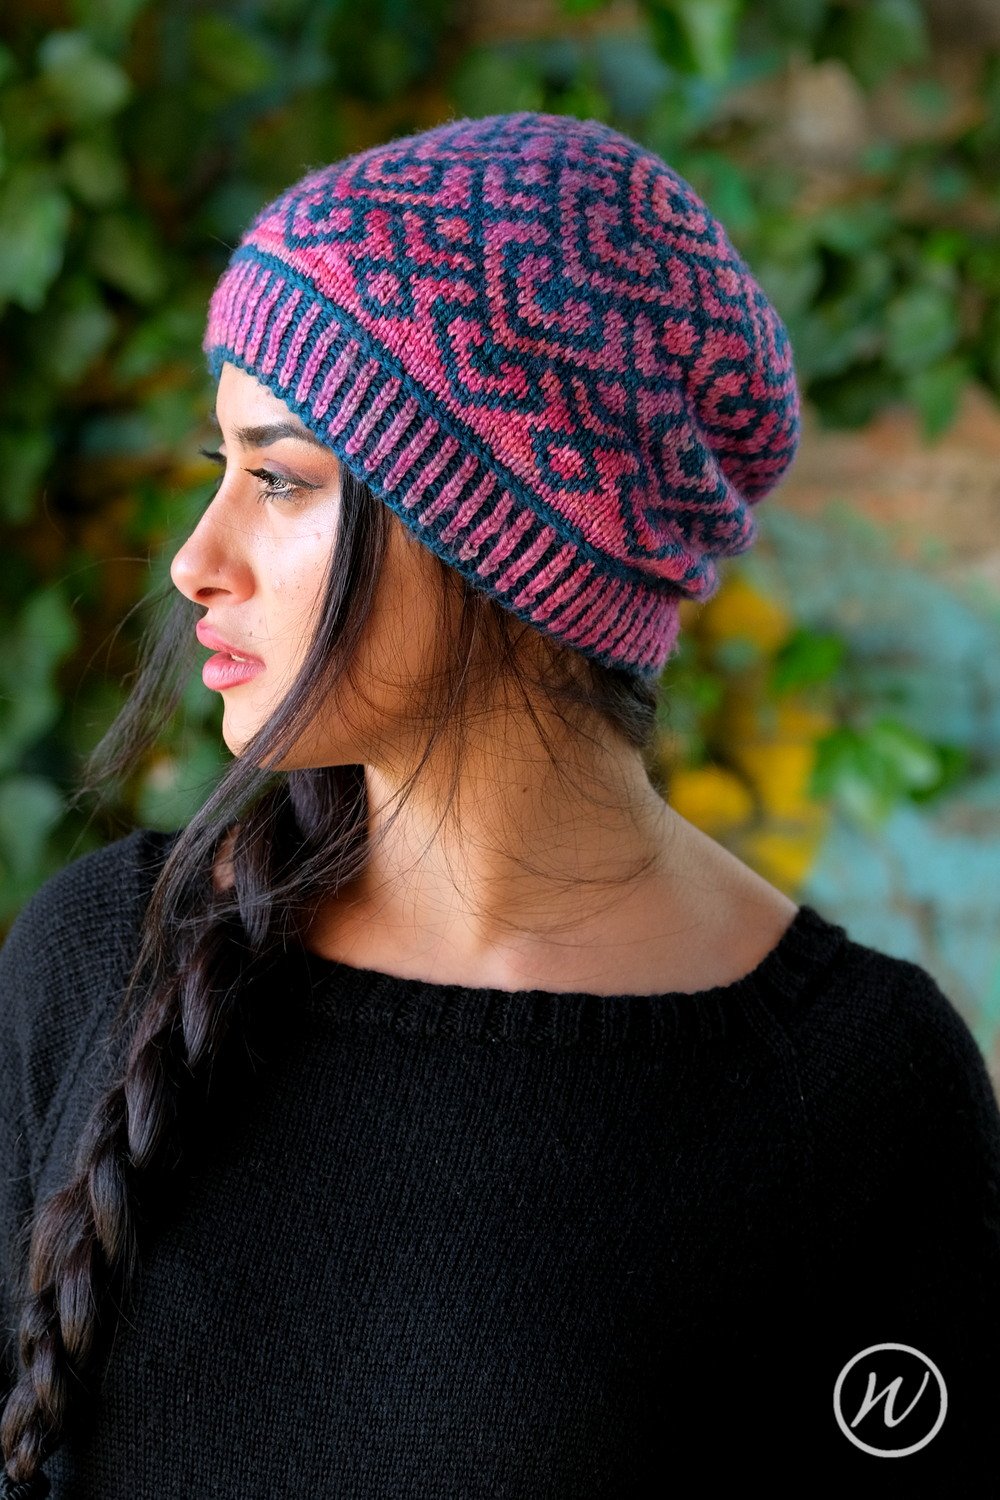
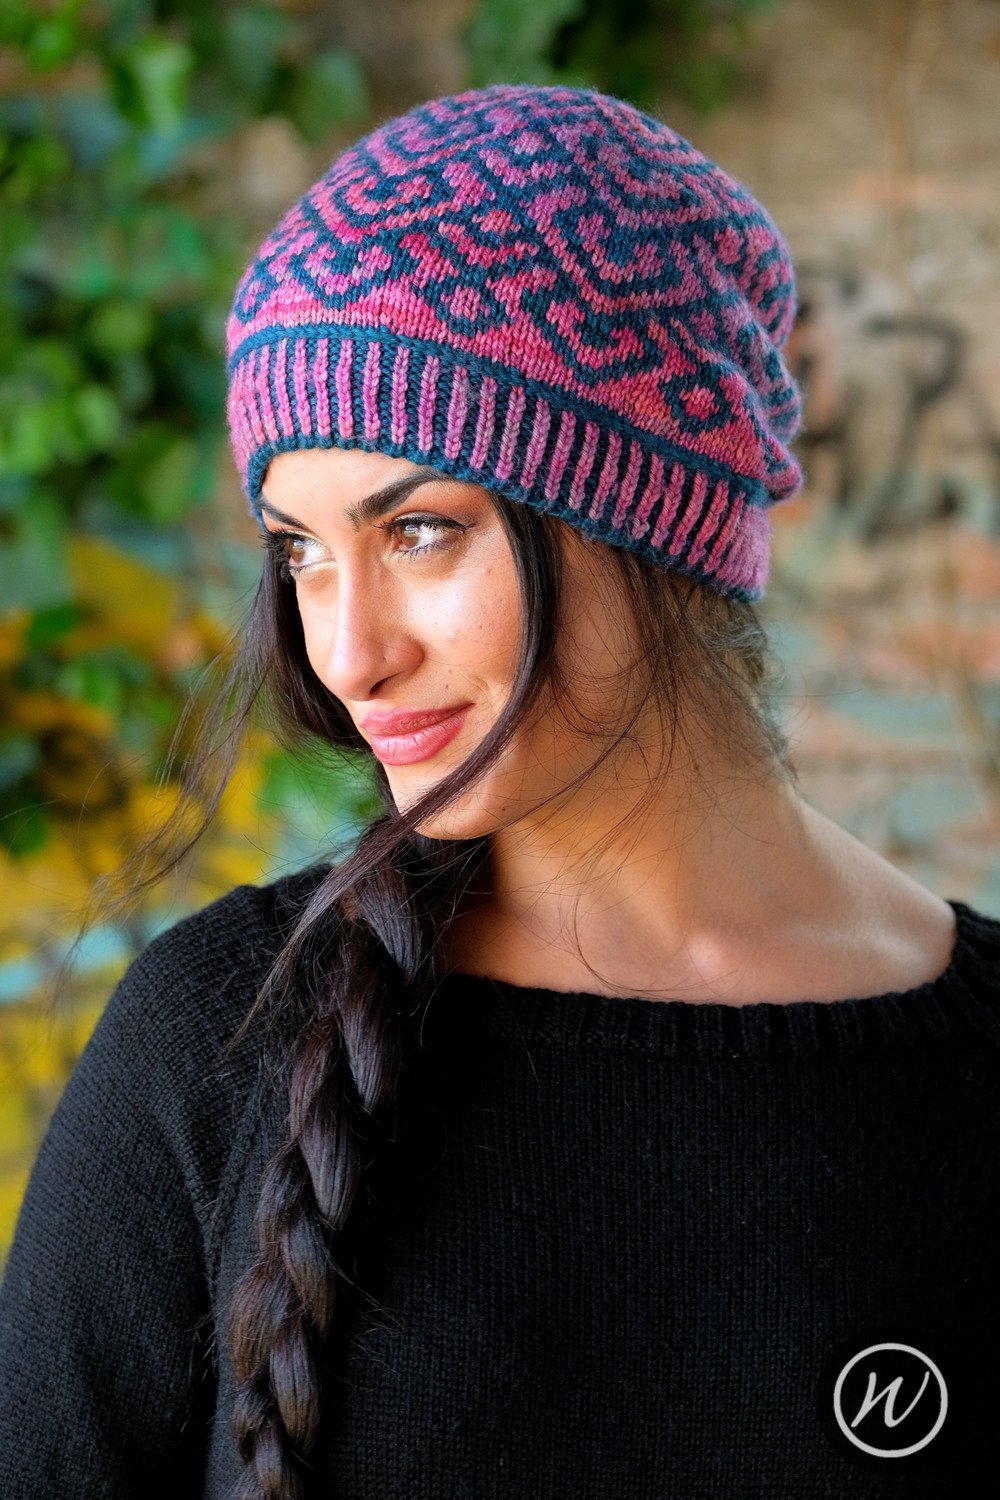
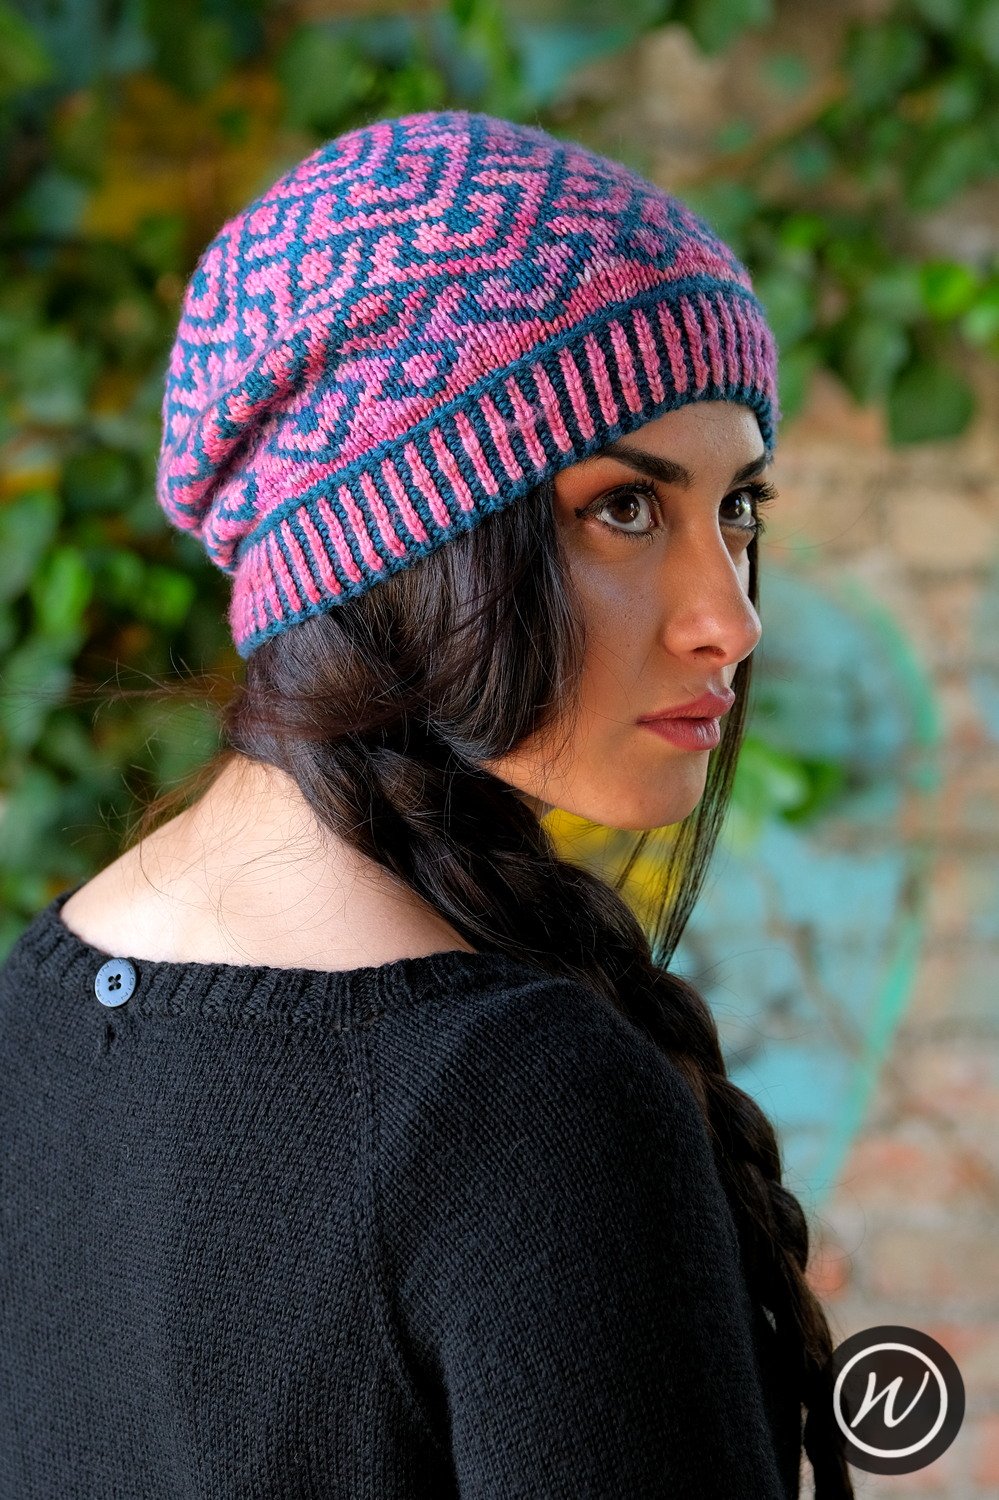
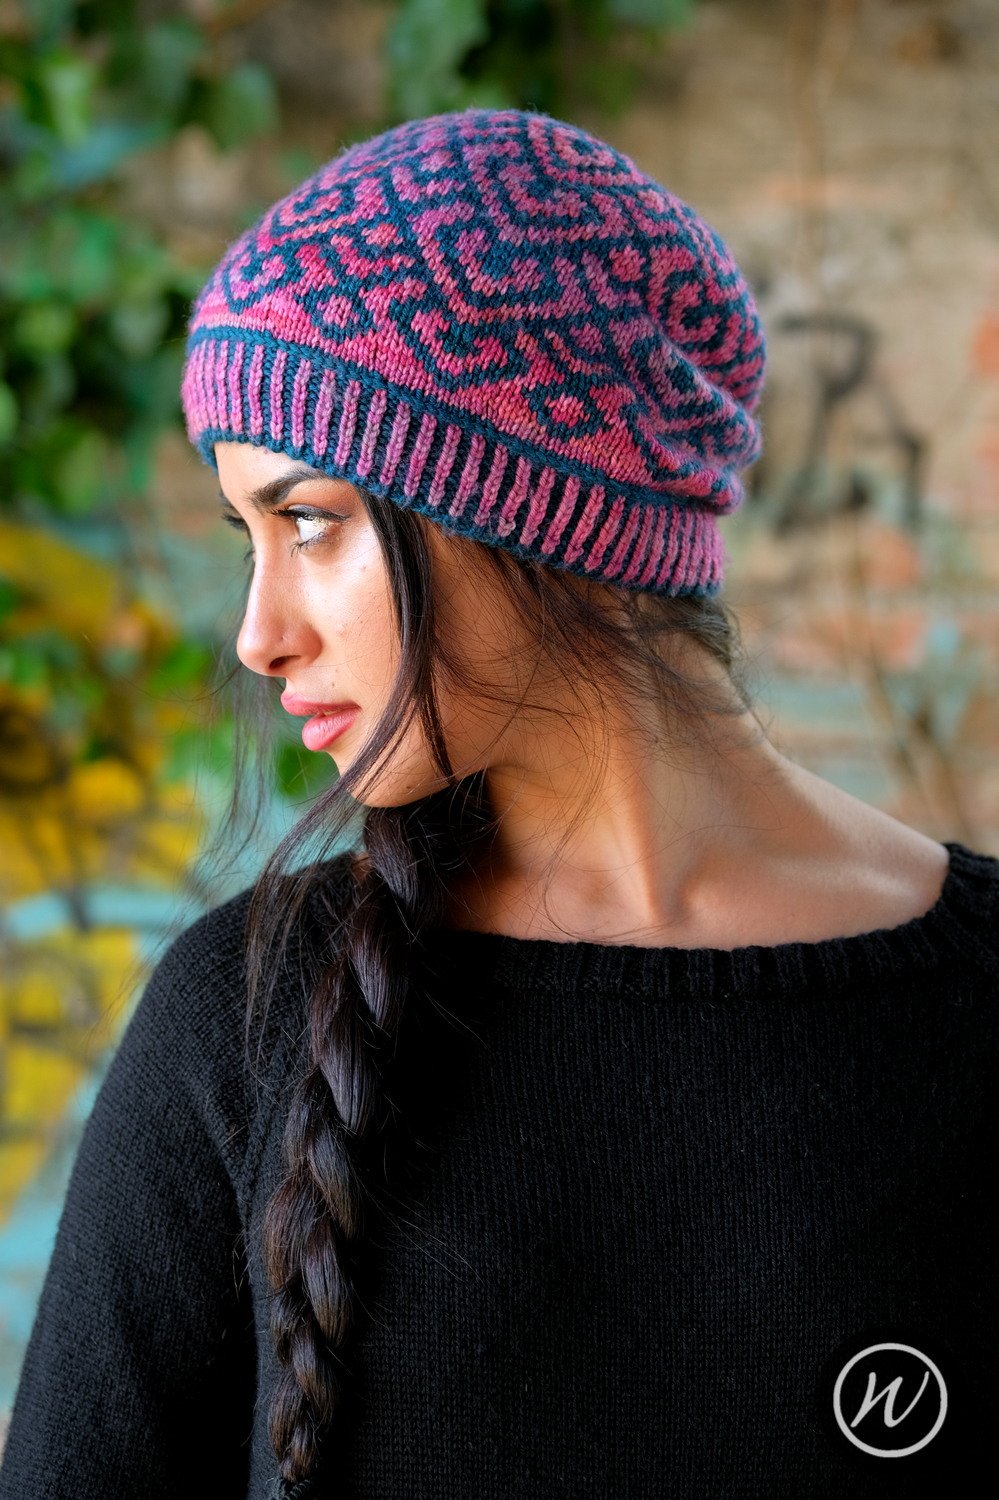
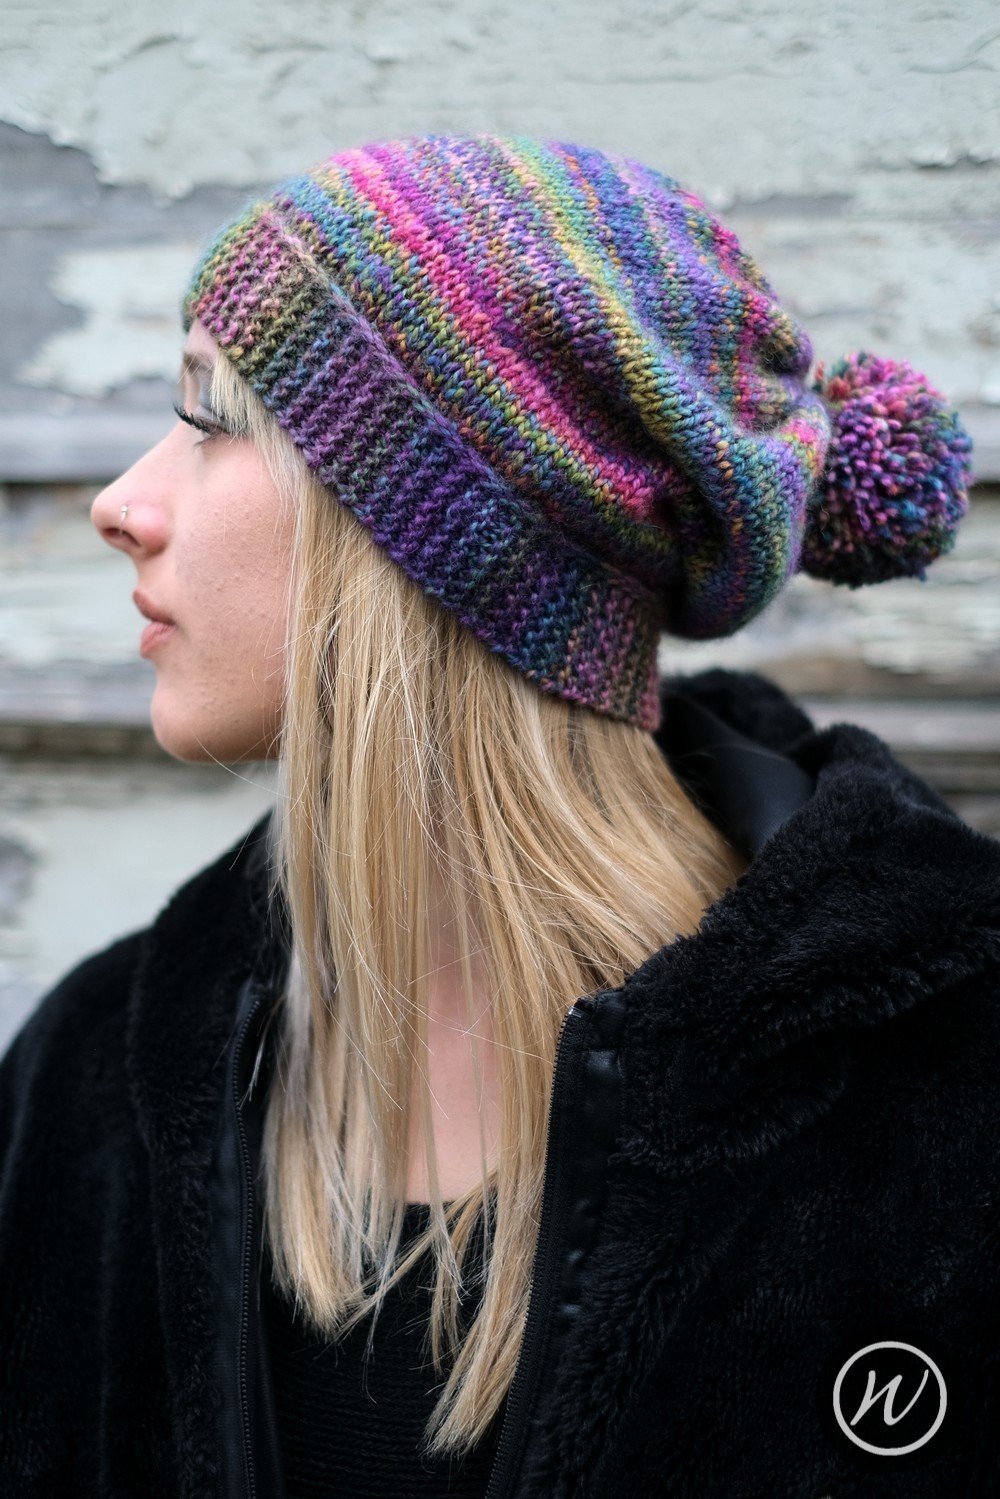
The Striped Slouch Hat features stripes in three colours over a stocking stitch background. It has a twisted ribbed brim and a gently gathered crown.
Availability
My Patreon supporters and members of The Woolly Hat Society get exclusive early access to new free patterns and tutorials. Once the exclusive period is over it’s published here on the blog.
Support
If you have a question about this pattern, pop it in a comment below. Sorry, but I’m unable to help with my free patterns or tutorials via email or private messages.
Social Media
Share your hand-knit Hats online with these hashtags!
#WWStripedSlouchHat
Yarn
Yarn A: 460yd/422m/100g
Yarn B: 230yd/211m/50g
Yarn C: 230yd/211m/50g
4ply/Sock weight, single or plied yarn; solid, semi-solid or variegated yarns.
Needles & Notions
Set 2.75mm/UK12/US2 DPNs/Circular or size needed to obtain gauge
Stitch markers as necessary
Tapestry needle
Sample details
Shown in MollyGirl Yarn Unplugged Light [230yd/211m per 50g; 100% Peruvian Wool]
Shown in size 20in/50.75cm on model with 20in/50.75cm circumference head
Note
Smaller sizes, 20in or less, are likely to get a Hat from a single 50g skein of Yarn A.
Gauge
27 sts x 42 rows to 4in/10cm on 2.75mm needles over Stocking St.
28 sts x 44 rows to 4in/10cm on 2.75mm needles over Twisted Rib
Sizes
To fit size: 17 [19, 20, 21, 23, 24] in/43.25 [48.25, 50.75, 53.25, 58.5, 61] cm
Finished size: 14.75 [16, 17.25, 18.25, 19.5, 20.5] in/37.5 [40.75, 43.75, 46.25, 49.5, 52] cm
Not sure which size to make? Check my handy size and measuring guide!
Skills required
Knitting in the round
Jogless Stripes
Abbreviations
K: knit
K1tbl: knit stitch through the back of loop
P: purl
rpt: repeat
R/rnd(s): rounds
st(s): stitch(es)
M1P: lift the horizontal loop between next 2 sts, place it onto the left needle & purl into the back of it
ssk: slip next 2 sts knitwise then knit them together through the backs of the loops
How to
Using Alternate Cable Cast-on method, cast on 104 [112, 120, 128, 136, 144] sts.
Join in the round, taking care not to twist stitches. Place stitch marker to indicate start of round.
Brim
Brim Rnd: *K1tbl, P1; rpt from * to end
Repeat this round until work measures 1 [1.25, 1.25, 1.5, 1.5, 1.75] in/2.5 [3.25, 3.25, 3.75, 3.75, 4.5] cm, then work increase round once as follows:
Inc. Rnd: *P4, M1P; rpt from * to end [130, 140, 150, 160, 170, 180 sts]
Body
Rnds 1 to 3: With Yarn A, knit all sts
Rnds 4 & 5: With Yarn B, knit all sts
Rnds 6 to 7: With Yarn C, knit all sts
Rnds 8 & 9: With Yarn B, knit all sts
Rnds 10 to 12: With Yarn A, knit all sts
Repeat these 12 rounds until work measures approx. 6.5 [7, 7.5, 8, 8.5, 9] in/16.5 [17.75, 19, 20.25, 21.5, 22.75] cm, excluding the Brim, ending after a Rnd 9, or any Yarn A round.
Crown
Place an additional 9 stitch markers so that there are 10 stitch markers evenly around.
Dec Rnd 1: *ssk, knit to marker; rpt from * to end – 10sts decreased
Repeat this rounds until 10sts remain. Break yarn and draw through remaining 10sts, tighten to close.
Finishing
Weave in all ends and block as required.


If you’ve a question about this pattern, please pop it in the comments below and I’ll get back to you as soon as I can!
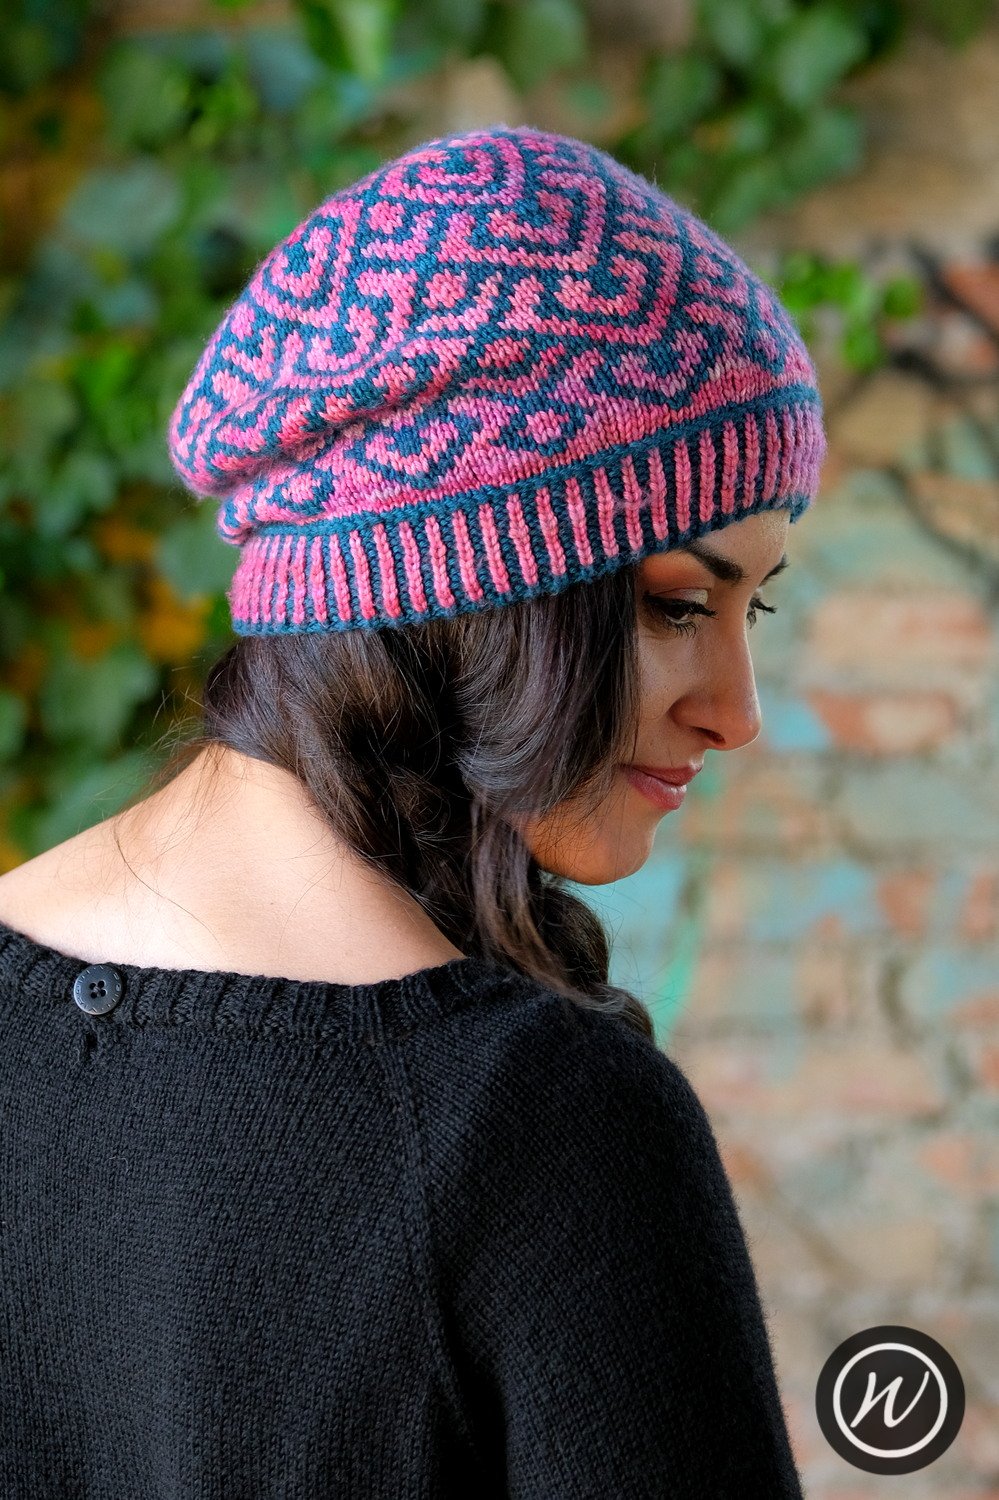
This time we decided to try taking some photos of me without a wig wearing Nettare - just me and my uber short thin grey hair - to see how they looked.

And you know what? I’m pretty OK with them! Considering how uncomfortable the camera has always made me, the panic attacks that have followed whenever I’ve tried to model, I reckon I’m doing OK. No panic attacks at all, only some mild anxiety and overwhelm from all the positive comments on Instagram and Twitter.
Which is seriously good going! Testament to the power of having the right diagnoses - ADHD and Autism - and to intensive EMDR therapy, courtesy of everyone’s support via the GFM campaign Tom set up.
The comments and feedback I received which were the most helpful were those saying they were on the fence about buying the pattern, but seeing me in the photos, someone who looks more like themselves, swung it. And that’s my aim.
I’ve been slowly working away at trying to use a wider range of models, this is something I’ve talked about before. But it’s not always easy, and trying to find older models - who weren’t me! - has proved tricky. Especially models with natural grey hair. I’ve been gifted a human hair wig which I’m in the process of bleaching then dyeing, which will give me the option of modelling with longer grey hair. It won’t be as glam and therefore as visually dominating as the cheap wig I tried before, which to me is a step in the right direction. It’ll look more real, being human hair, and it was free, except for the bleach and dye, so it’s very much worth a try.
But I still wasn’t comfortable with myself and my short hair. The wig places a little bit of distance between me as myself and the person in the photo. And yet, somehow, I took the plunge and took myself way out of my comfort zone and I’m doing reasonably OK. In fact, we’re thinking to try some more, in different environments.


Photoshoots can be expensive and time consuming. We’re fortunate enough to have a few good environments and locations nearby that we can use for free. Yet I still pay my models for their time, so they’re not free. More importantly, arranging photoshoots takes an awful lot of brain space - asking if someone’s available, arranging a date with them, arranging a location - then the make-up and hair discussions and more. That’s before any editing or photo selecting.
When we’ve a shoot arranged I can’t think or do much else for a few days before and after it, which impacts everything else. I get less creative time but more importantly I lose the flow of whatever I’m working on - hello, neurodivergent brain - which can take time to recover from but is also incredibly stressful. If we can work more with myself, Tom and Aran as models it’ll improve my work-flow as well as add us to the range of models. I won’t stop working with other models, on the contrary, but it does mean we can focus more on larger shoots with them and justify the time and money spent better.


Anyways! Went off on a bit of a tangent there. I came here to share the photos and also remind folks that the 15% discount on this pattern ends tomorrow night, 5th November 2022. Use code code SweetNectar here, and in my Ravelry, Etsy and Payhip stores.
Ravelry and Etsy both provide direct links with the coupon applied:
Ravelry: https://www.ravelry.com/redeem/woolly-wormhead?code=SweetNectar
Etsy: https://www.etsy.com/uk/shop/WoollyWormheadHats?coupon=SWEETNECTAR
Hope you enjoy the pattern, I’m looking forward to seeing what you make with it!
Yup indeedy, the newsletter went out this morning to members of The Woolly Hat Society with details of the Hat and their exclusive member discount code.

To get 15% discount on this pattern between now and 5th November 2022, use the code SweetNectar here, and in my Ravelry, Etsy and Payhip stores.
Ravelry and Etsy both provide direct links with the coupon applied:
Ravelry: https://www.ravelry.com/redeem/woolly-wormhead?code=SweetNectar
Etsy: https://www.etsy.com/uk/shop/WoollyWormheadHats?coupon=SWEETNECTAR
I’m hoping to get some photos and video of the inside of the Hat today, as well as some flat shots of the Hat. A lot of my Hats don’t photograph well flat but I’m hoping this one will!
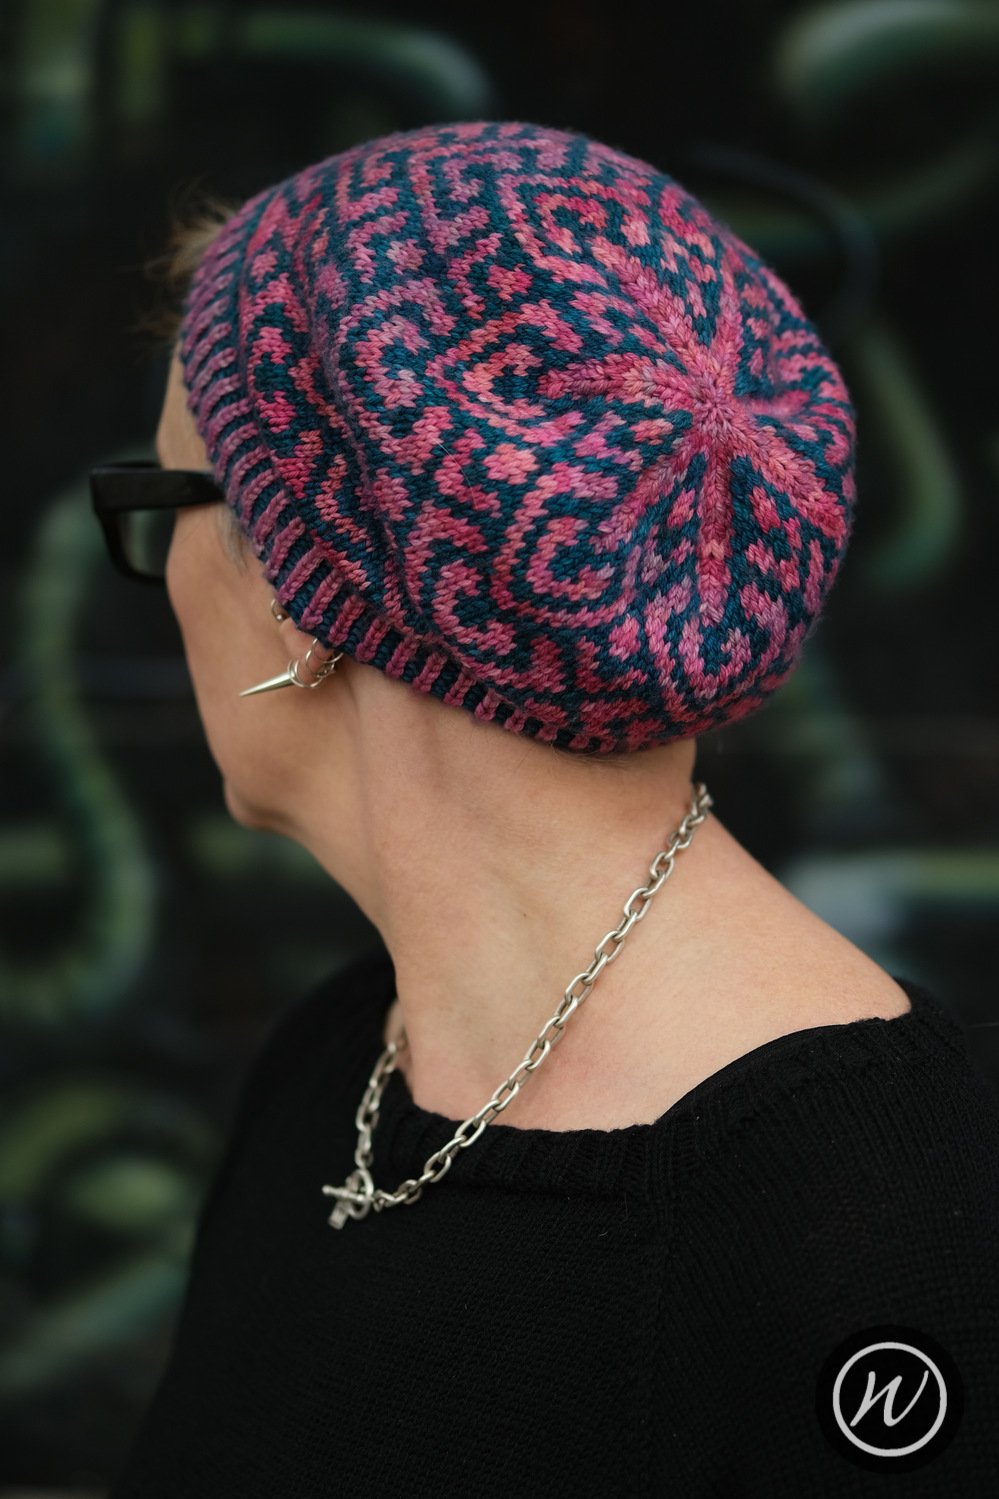
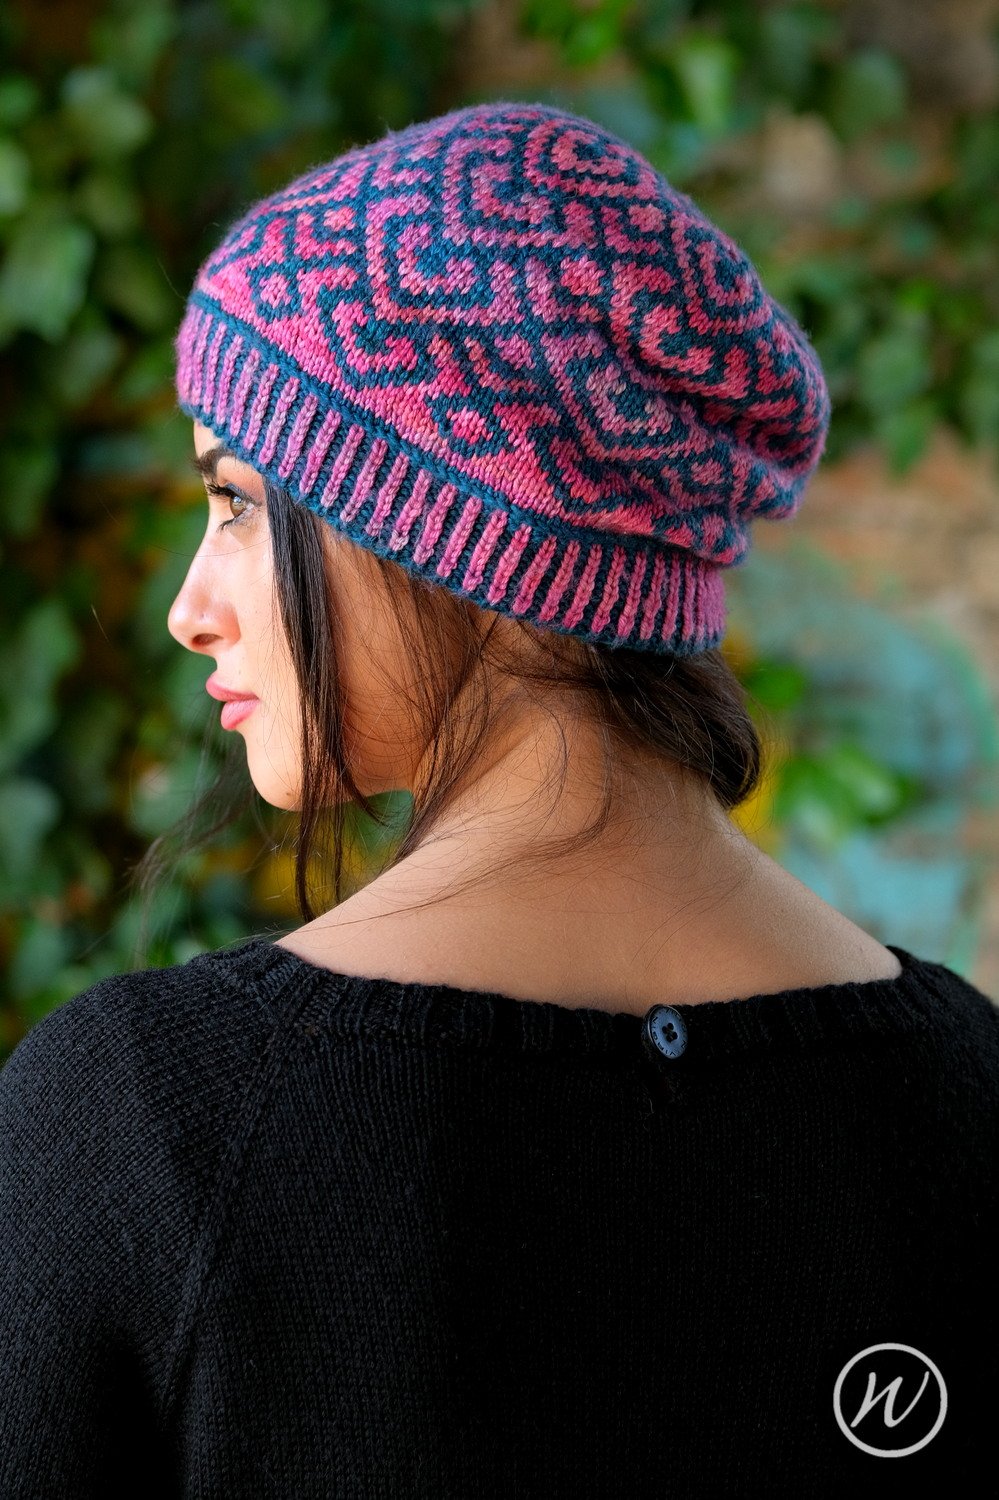
If stranded colourwork is your thing, then you' might be interested in this new pattern, due to be published this coming Thursday, 27th October.


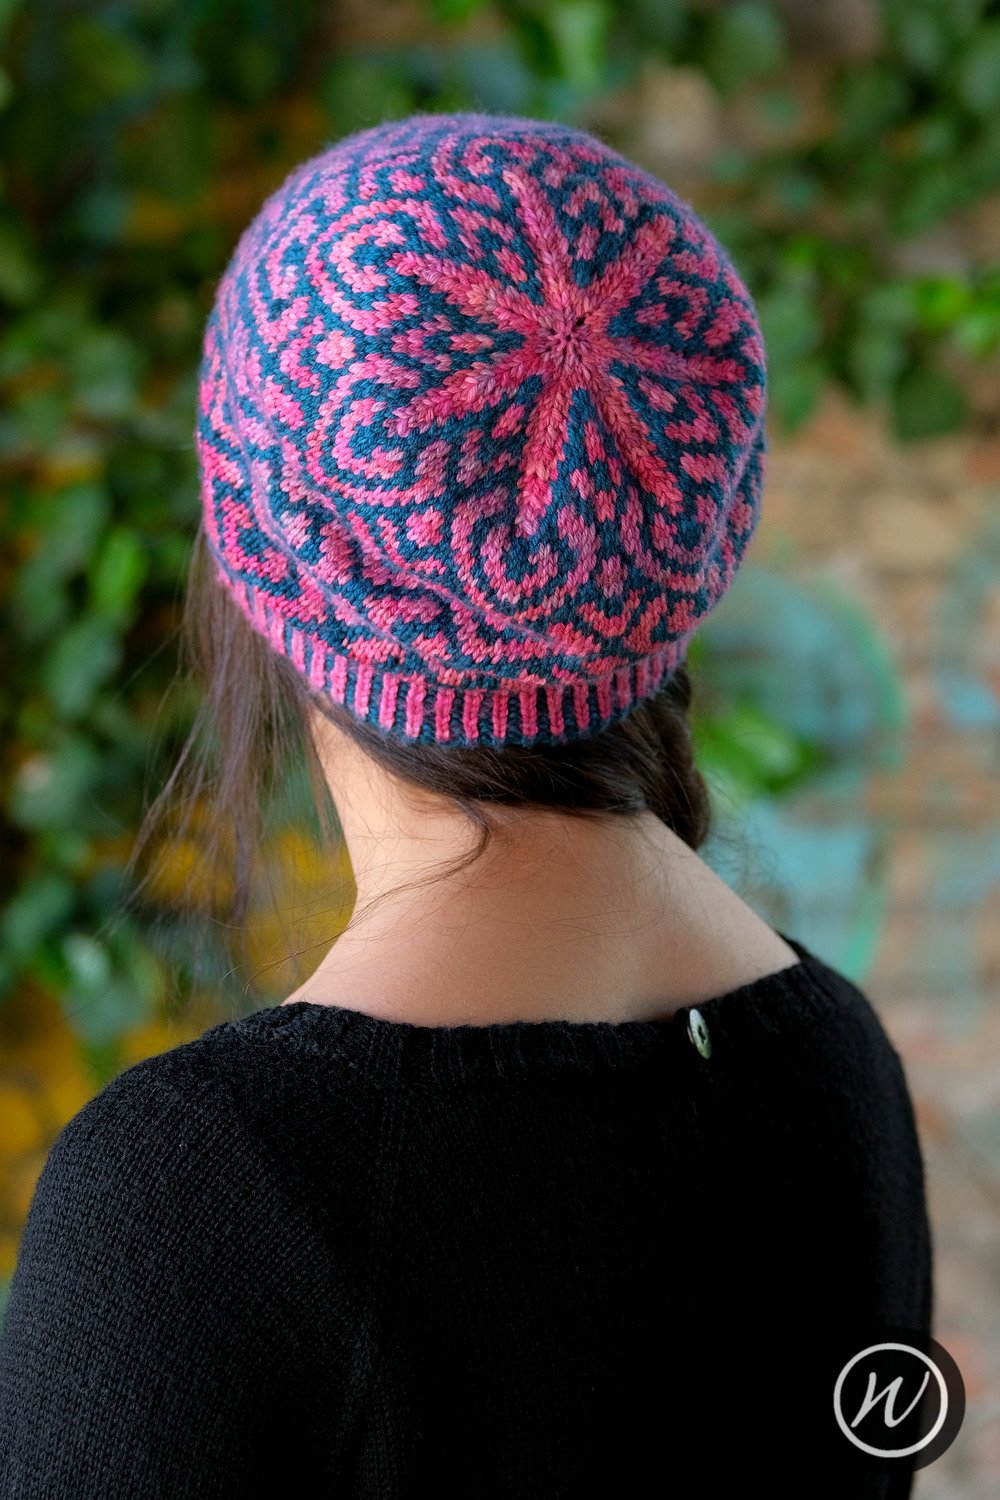
It’s been a while since I designed a stranded Hat. This one jumped onto my needles earlier in the year, then got left by the wayside as I worked on other things. It’s colourwork pattern is a self-contained motif - it doesn’t grow out of the brim and it completes itself during the crown shaping. This concept led to a few challenges, especially as, as always, I wanted to the motif to be all-over and uninterrupted, which meant the use of moving markers.
When using fairisle and stranded knitting patterns in garments there are tricks you can use to ensure the motif remains central and incorporate any shaping. But you can’t get away with those kinds of tricks in a Hat as the shaping occurs in different places, and there aren’t any side or shoulder seams to work motif steps or changes in to. So the only way around it is moving markers.
They’re not as difficult at all, I promise! And it’s all covered in the written instructions and chart, which indicate where to move the marker and how many stitches to slip. And I’ll re-iterate that it’s important to slip the stitches when moving the marker, not knit them, as that’s what creates the jog.
Sure, you get a small float where you move the marker and slip the stitches but this is stranded colourwork - the wrong side of the work is nothing but floats! And so it gets hidden.


Nettare went through several rounds of tech editing to make sure all the challenges the design threw up were ironed out! And it’s in mighty fine shape.
The pattern is graded by gauge, and two sizes are written into the pattern. However, armed with a gauge swatch you can adjust the sizing to your own needs by tweaking either your needle size, yarn weight, or both. The sample is shown in Malabrigo Arroyo knit to a 4ply gauge. Although Arroyo is listed as a sport weight I find it a creates a lovely dense yet drapey fabric over 2.75mm needles, which is perfect for making a cosy stranded Hat.
The pattern is provided in both written and charted format, and will include download links for the relevant tutorials. We’re also tidying up some of my old video tutorials over on Instagram should folks prefer to learn the methods that way.
Members of The Woolly Hat Society will get a newsletter on Thursday with their exclusive discount code, so keep an eye out for that! I do hope you enjoy this Hat, it reminded me that I can have fun with stranded designs and that I probably should design more of them….

Description
The Simple Slouch is worked in stocking stitch. It’s a roomy Hat featuring a sideways garter stitch brim and a gathered crown. The pompom is optional
Availability
My Patreon supporters and members of The Woolly Hat Society get exclusive early access to new free patterns and tutorials. Once the exclusive period is over it’s published here on the blog.
Support
If you have a question about this pattern, pop it in a comment below. Sorry, but I’m unable to help with my free patterns or tutorials via email or private messages.
Social Media
Share your hand-knit Hats online with these hashtags!
#WWSimpleSlouchHat
Yarn
100g/160yd/147m
Chunky weight, single or plied yarn; solid, semi-solid or variegated yarns.
Needles & Notions
Set 5mm/UK6/US8 DPNS/Circular or size needed to obtain gauge
5mm crochet hook
Approx 1yd/1m waste yarn
Stitch marker as necessary
Tapestry needle
Sample details
Shown in Hand Spun [160yd/147m per 100g; 100% Superwash Merino]
Shown in size 22in/56cm on model with 21.75in/55.25cm circumference head
Gauge
16 sts x 24 rows to 4in/10cm on 5mm needles over Garter St.
Sizes
To fit size: 18 [20, 22, 24] in/ 45.75 [50.75, 56, 61] cm
Finished size: 16.25 [17.5, 18.75, 20] in/ 41.275 [44.5, 47.5, 50.75] cm
Not sure which size to make? Check my handy size and measuring guide!
Skills required
Picking up Stitches from a Slipped Stitch Selvedge
Knitting in the round
Abbreviations
K: knit
P: purl
rpt: repeat
R/rnd(s): rounds
st(s): stitch(es)
M1: lift the horizontal loop between next 2 sts, place it onto the left needle & knit into the back of it
How to
Using waste yarn and Provisional Cast-on method, cast on 7 [8, 9, 10] sts. Change to main yarn.
Brim
Row 1: Knit to last stitch, bring yarn forward, slip stitch purlwise, turn
Row 2: Knit all sts
Repeat these 2 rows, working a Slipped Stitch Selvedge along one edge, until 128 [138, 148, 158] rows, or 64 [69, 74, 79] ridges have been worked.
When counting ridges ensure that the ridge count on both sides of the work is the same, including the ridge created with the provisional cast-on.
Then work Row 1 once more, leaving the yarn at the back. Break yarn leaving a 1yd/1m tail.
Carefully remove Provisional Cast-on stitch by stitch, taking care to keep in pattern, transferring live stitches to 2nd needle. Bring both sets of stitches together and perform Grafting for Garter Stitch across all the stitches.
With the slipped stitch selvedge facing upwards, and using a circular needle, pick up and knit 65 [70, 75, 80] sts along the top edge of the band. You’ll pick up one stitch for each garter ridge, and the stitch will be picked up from behind the selvedge edge - pick up the stitches by slipping the needle underneath the edge of the ridge.
Join in the round. Place stitch marker to indicate start of round.
Inc Rnd: *K5, M1; rpt from * to end [78, 84, 90, 96 sts]
Body
Rnd 1: Knit all sts
Repeat this round until work measures 7 [8, 9, 10] in/ 17.75 [20.25, 23, 25.5] cm, excluding the Brim.
Crown
Using either the Gathered Bind-off or the Modified Gathered Bind-off, transfer all stitches from the needle to yarn and gather to close.
Pompom
Cut 2 circular pieces measuring 2.5in/6.25cm diameter from thin cardboard. The inner circle should be approx. 1.25in/3.25cm. Placing the two pieces of card together, wrap the yarn through the centre and around the outer circle until all the card is covered. Continue wrapping the yarn until either the centre hole has closed or all the yarn has been used.
Carefully cut the yarn along the edge of the circle to reveal the covered card. Cut all of the yarn, then tie a knot between the two layers off card, effectively tying all the pieces of yarn together, before removing the card. Trim pompom before attaching securely to the Hat.
Finishing
Weave in all ends and block as required. Attach pompom after blocking.


If you’ve a question about this pattern, please pop it in the comments below and I’ll get back to you as soon as I can!


