
I don’t tend to knit a lot of stripes; they’re not something I’ve ever worn and although I don’t wear most of what I design, they’re not really something I want to design with often, either! That said, I do get the urge to created stripey Hats from time to time but one thing that stops that happening is the lack of a good jogless stripe method.
I’ve taught a few methods over the years and my favourite is probably the travelling jogless stripe method used in my Anca’s beret pattern. This method I’m sharing today I tried out on the new free Striped Slouch pattern, and it didn’t fair to badly.
I used a grippy 100% Peruvian wool for these samples, ‘Unplugged Light’ from Molly Girl Yarn - your stripes may lay differently with a smoother or grippier yarn.

1) You’ll prepare for this jogless method on the last round of every colour you work.
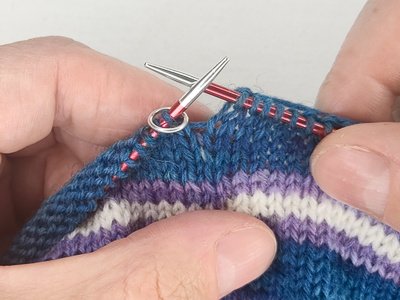
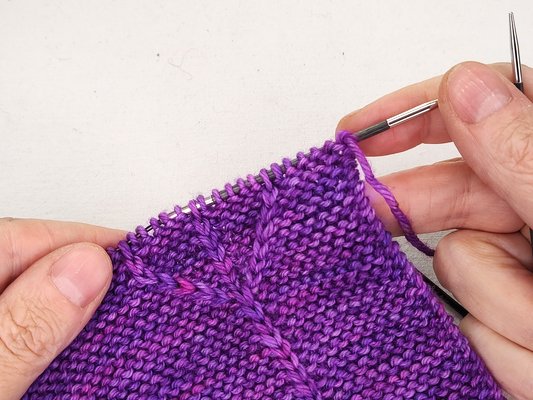
2) Knit to the marker.

3) Then slip the last stitch of the round back onto the left-hand needle. Don’t unpick, just slip it.

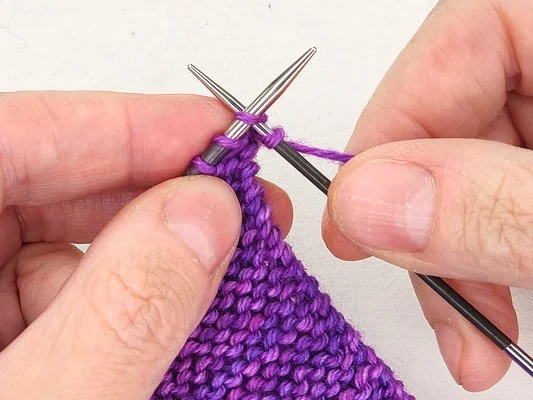
4) You’re then going to knit this stitch again with the new colour.
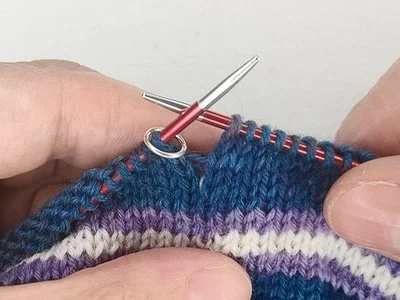
5) The last stitch of the round has now been worked twice, and the new colour will now show.

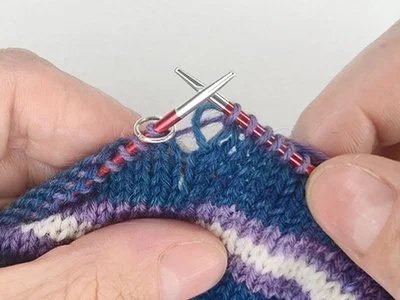
6) Knit the next round in the new colour, stopping just before the last stitch.

7) With the tip of the right-hand needle, gently lift the stitch from the row below. What you’re doing here is lifting the last stitch when it was knit with the previous colour.

8) Then pop this stitch onto the left-hand needle so that it sits next to the last stitch.

9) Now knit these two stitches together to complete the round.
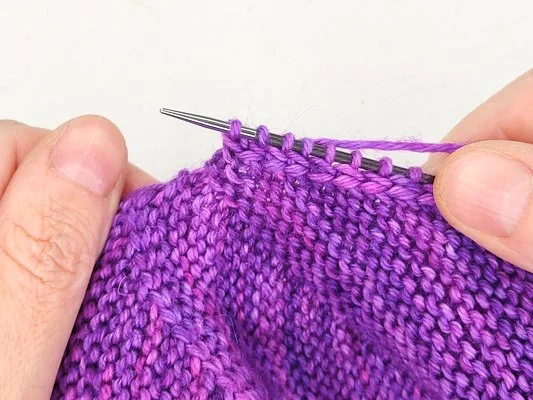
10) The round has now been finished, and the loop that was worked in the previous yarn may be a little saggy, you’ll want to tighten it up at this point to maintain an even tension.

11) And here it is, after evening up!

12) Here we can see how the jog has become much less visible after working another round in the second colour.
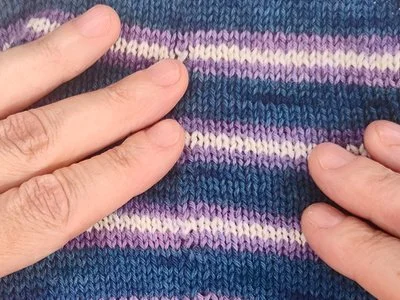
13) And here it is on the finished Striped Slouch Hat. It’s not perfect, but it’s not bad either! I’m not sure whether it’s the grippiness of the yarn causes the join to not be completely smooth, or my knitting style or tension. But overall I think it has potential in the right circumstances and reckon it’s worth a try.
Support
If you’ve a question about this technique, pop it in a comment below or visit the forum! I’m unable to offer help with patterns or techniques via email.

Creating a lateral braid across a row is virtually the same as in the round, except it starts and finishes slightly differently. To work this technique, you’ll also need to refer to my tutorial for Working a Lateral Braid in the Round.
1) In this example the braid will be worked across a slipped stitch pattern over garter stitch, and across short rows – you can work a lateral braid across any stitch pattern. Unlike when you work a braid across colourwork, where you want to work a plain row or round first, you want to do the opposite across stitch patterns and not work a plain row before starting.

2) To start the braid, we need to create the stitch that will become the chain that travels across the work. Where we borrowed that stitch from the end of the round before, we need to increase it when working flat. The easiest increase to do is a kbf. Start by knitting into the back of the first stitch of the row, and leave the stitch on the needle.
3) Then knit into the front of the same stitch

4) And drop both stitches off the needle

5) Then place the 2nd stitch back onto the tip of the left-hand needle – this will become the chain stitch.

6) From this point, repeat steps 2 to 6 of working the braid in the round. When you’re ready to finish, jump to ‘Finishing the Braid’ below.
Managing Textured Stitches
This tutorial was photographed whilst reknitting a sample for my Trittico pattern, which features slipped stitches across garter stitch. Because this braid method changes the orientation of the stitches we need to consider any patterned stitches we may be working the braid across, and prepare them. And it’s very simply done!

1) As you approach the pattern stitch that needs to have it’s orientation maintained, don’t immediately transfer the chain stitch

2) Insert the tip of the right-hand needle into the next pattern stitch on the left-hand needle and gently lift it up and off

3) Turn the stitch towards the back, or twist it once towards the right, then place the stitch back onto the left-hand needle

4) Then transfer the chain stitch and continue to work the braid
Finishing the Braid

1) As you reach the last stitch, whether it’s a regular stitch, patterned stitch or a short rowed stitch, we finish the braid in the same way each time

2) Transfer the chain stitch as before

3) Then insert your needle through the back loops of both the chain stitch and the stitch together and knit them together. We need to decrease the extra stitch we created at the beginning of the braid, and decreasing this way ensures the chain stitch lays on top
4) Once the braid is finished, you’ll simply turn your work and knit back across the stitches as directed in the pattern
Support
If you’ve a question about this technique, pop it in a comment below or visit the forum! I’m unable to offer help with patterns or techniques via email.

The Alternate Cable Cast-on has long been a favorite of mine. I’ve been using it in my patterns and teaching it in my classes for going on 13 years and I never get tired of it!
What I like about it is it’s versatility, it’s a highly adaptable cast on method that can be mixed up for different types of rib such as 2x2 ribbing or 1x2 ribbing. It can also be combined with the Cable Cast-on method to create mixed edges, such as those used in my Kernmantle and Bubbles patterns.
I was recently asked on Twitter to help troubleshoot the cast on, and I thought it’d make a great blog post. The sticking points that come up are all things I teach in my workshops so why not explain them here and help more folks!
One thing to bear in mind that what creates this cast on isn’t which stitch you’ve just cast on, but how the yarn travels under the needle and which stitch is cast on next. This is why simply casting on two knits and then two purls doesn’t work.
I’ll break this down into sections - how to tell which stitch you’ve just cast on, how to count your stitches and make sure you’ve cast on knit and purl pairs, and what it looks like if you cast on the wrong stitch next.
Which stitch is which?
Once you know how to look at the stitches you’ve just cast on, working out which is which becomes easier.

1) When you’ve just created a knit stitch, the base of the stitch will come from the front of the work and the yarn will be at the back. It’s no different to your regular knit stitches - the yarn is always at the back and the base of the ‘V’ comes from the front of the work.
Do remember that where the yarn is indicates which stitch has just been worked, NOT which stitch is next!

2) When you’ve just created a purl stitch, the yarn will be at the front and the base of the stitch will be recessed, or anchored at the back. Notice how the yarn doesn’t just sit at the front of the stitch you’ve just created, but sits in front of the stitch before it - that’s because we needed to use that stitch to create the purl stitch. If you were to flip this cast-on around this stitch would be a knit stitch on the other side, which helps indicate where it’s anchored.
As with the knit part of the cast-on, where the yarn is tells which stitch has just been cast on, not what you cast on next.
Counting the stitches
You’ll need to count your stitches at some point, and this is a good time to check that you’ve got pairs of knits and purls and no stray extras.

3) You’ll remember from the main Alternate Cable Cast-on tutorial that you treat the first knot, or loop around the needle, as the first purl stitch. This helps you in two ways - you’ll end the casting on with a knit stitch for an even-numbered rib, which means you go straight into K1, P1 for the first row or round - much more intuitive than needing to swap things around or start the ribbing with a purl stitch!
And it also means that we can used the more pronounced knit stitch as an anchor for counting - again, I’ve found counting off in pairs easier to do if I use the dominant stitch as the marker.

4) All the way along your cast on the stitches will sit like this - one back, one forward; one back, one forward. The visual aspect of the stitches - which sits forward and which sits back - makes it much easier for us to check that we’ve cast them on correctly, and then count. I only count the knit stitches and I count them in pairs, e.g. “2; 4; 6; 8” and so on. You can use the tip of your needle to count or your finger, whatever works for you. The cast on finishes with one knit stitch for an even-numbered cast on.
How to tell when you’re out of sequence
This is a useful skill to have, and one you’ll quickly learn once you’ve got used to how your stitches sit, and where and how they are anchored. This is where the point of not being able to cast on extra knits or purls to create different ribbing patterns starts to make more sense, and also the fact that it’s how the yarn travels underneath the needle from the previous stitch that creates the ribbed edge, not the stitch itself.

Whether you’ve gone wrong with an extra knit or an extra purl, the way the stitches look once they’re knocked out of sync is very similar; the only real difference is where the yarn lays after the last stitch.
Looking at this example, we can see the stitches are evenly in pairs, purl then knit, up until the last three stitches. It looks like a further purl stitch was cast on, as we can see a stitch that sits back, but from there knowing which stitch is which is tricky because we can’t see the same distinct anchors that we see elsewhere in the cast on stitches. All we can tell is that the last stitch cast on was a knit stitch, and we know that because of where the yarn is.
If the correct stitches had been cast on, the last stitch should be a purl, so we know we have to unpick one stitch at least. My advice would be to unpick to the last obviously correct stitch, and usually the easiest point to unpick to is the last definite knit stitch, so in this example I’d unpick the last 3 stitches.
Unless you’ve made a mistake in the middle of a cast on and not noticed until it’s too late, you’ll not be unpicking too many stitches. Counting the stitches off in pairs as you go, even if you’re only visually checking that they are in pairs rather than counting how many you’ve cast on, will help you avoid having to rip right back.
Support
I hope this has helped! If you’ve a question about this technique, pop it in a comment below or visit the forum.
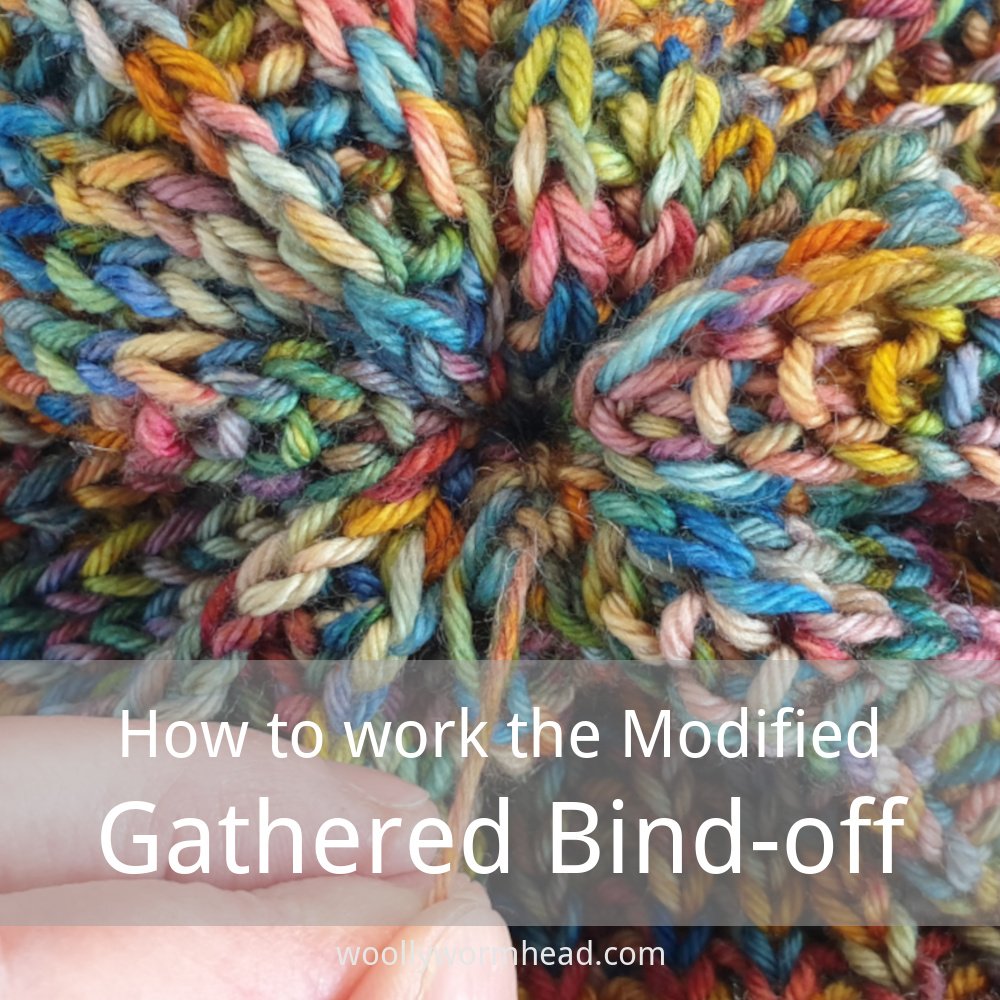
This is the modified version of the Gathered Bind-off. It’s worked in two parts, and we work on alternate stitches. Doing this reduces the bulk and makes for a more comfortable finish to the crown.
This method for binding off is a great way to finish a vertically knit bottom up Hat without any kind of shaping. This makes it ideal for beginner knitters, who may not have learnt decrease methods yet, but it also means it can be used on a Hat where the stitch pattern may not work well with various shaping methods.
Do bear in mind that when working a gathered bind-off, the body of the Hat will need to be much longer than it would usually be when starting the crown shaping. On a standard vertically knit beanie, the crown accounts for roughly one-third of the overall length of a Hat, so your Hat will want to be at least a third longer before finishing. Furthermore, the nature of the gather creates some bulk, even with the modified version, and that bulk eats some of that length, so you’ll want to knit for longer to accommodate that, too.

1) Once you’ve reached the desired length of your Hat, bearing in mind that you’ll want to knit for longer than a Hat that may have a shaped crown, you’re ready to start the gather.

2) Cut the yarn, leaving a yarn tail of approximately twice the circumference of your Hat. Then cut a 2nd yarn tail of the same length from the ball of yarn.

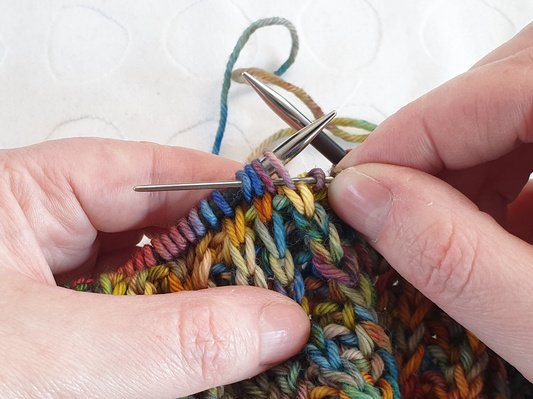
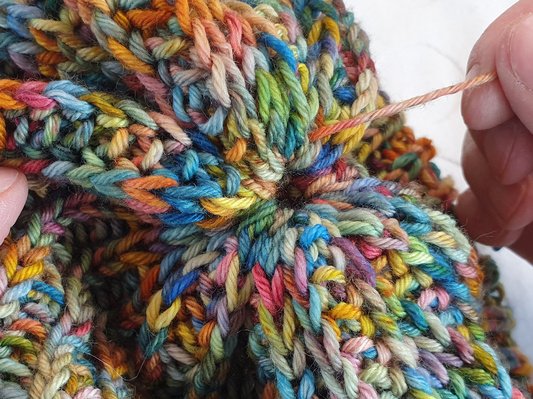
3) Thread the first yarn tail onto a tapestry needle and with the right side of the work facing, thread the needle through every other stitch on the left-hand knitting needle.

4) In this example, which is shown in Fisherman’s Rib, the tapestry needle is inserted into the knit stitches only.

5) Continue to do this for every other stitch. You can speed things up by inserting the tapestry needle through a few stitches at a time, although do make sure you’re not splitting the yarn, as that’ll cause a problem when you come to do the gather.

6) This is how the stitches that have been threaded onto the yarn tail will look whilst they’re still on the needle. Continue threading every other stitch onto the yarn until you come back to the beginning again. Unlike the standard gathered bind-off you’ll want to leave the stitches on the knitting needle to work the second part of the gather.

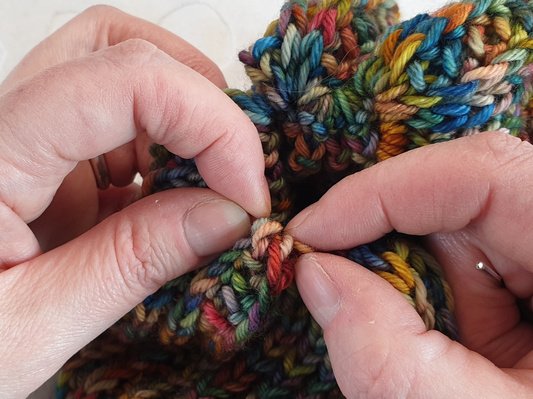
7) We’ll now want to gather the 2nd set of stitches. To do this, thread the 2nd yarn tail onto a tapestry needle and with the wrong side of the work facing, insert the tapestry needle into the stitches that were ignored when we worked from the right side.

8) We can see here how we’re catching every other stitch, and that the stitches are offset from the first part of this bind-off.

9) Continue catching every other stitch, ensuring the stitch hasn’t already been caught on the first yarn tail, until you come back to the beginning again.

10) Gently slide the knitting needle out from the stitches, taking care not to pull either of the yarn tails out.
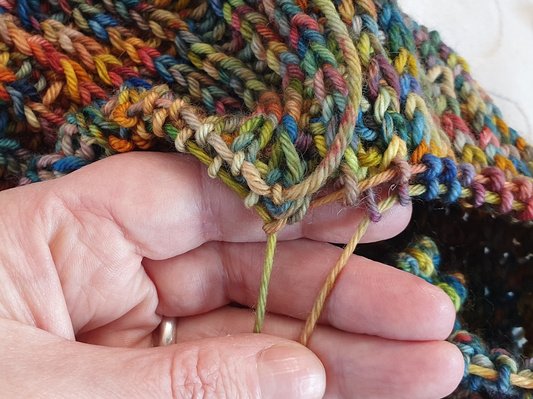
11) We now have 2 sets of stitches on two yarn tails, and the gather will be worked in two parts.

12) With the right side of the work facing and working with the stitches held on the 2nd yarn tail, gently gather the stitches. Take care to avoid the stitches getting stuck on each other and bunching up.

13) Carefully turn the work inside out to tighten the gathered stitches and securely fasten the yarn tail, to prevent them loosening.

14) Then turn work inside out again so the right side is facing and gently pull the first yarn tail to gather the first set of stitches. Again, take care to avoid them bunching up and getting stuck.

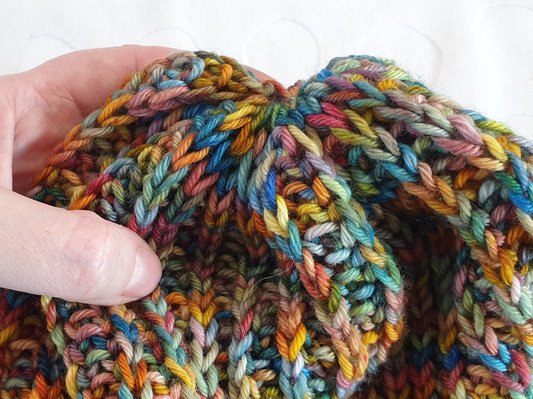
15) Once all of the stitches are evenly gathered, pull the yarn tail as tight as you can then thread it through the centre hole to fasten securely on the wrong side.

16) The bind-off is now complete! Weave in all ends then wash and block your Hat as required.
Support
If you’ve a question about this technique, pop it in a comment below or visit the forum! I’m unable to offer help with patterns or techniques via email. I do hope you find this a useful way to finish a bottom up Hat!
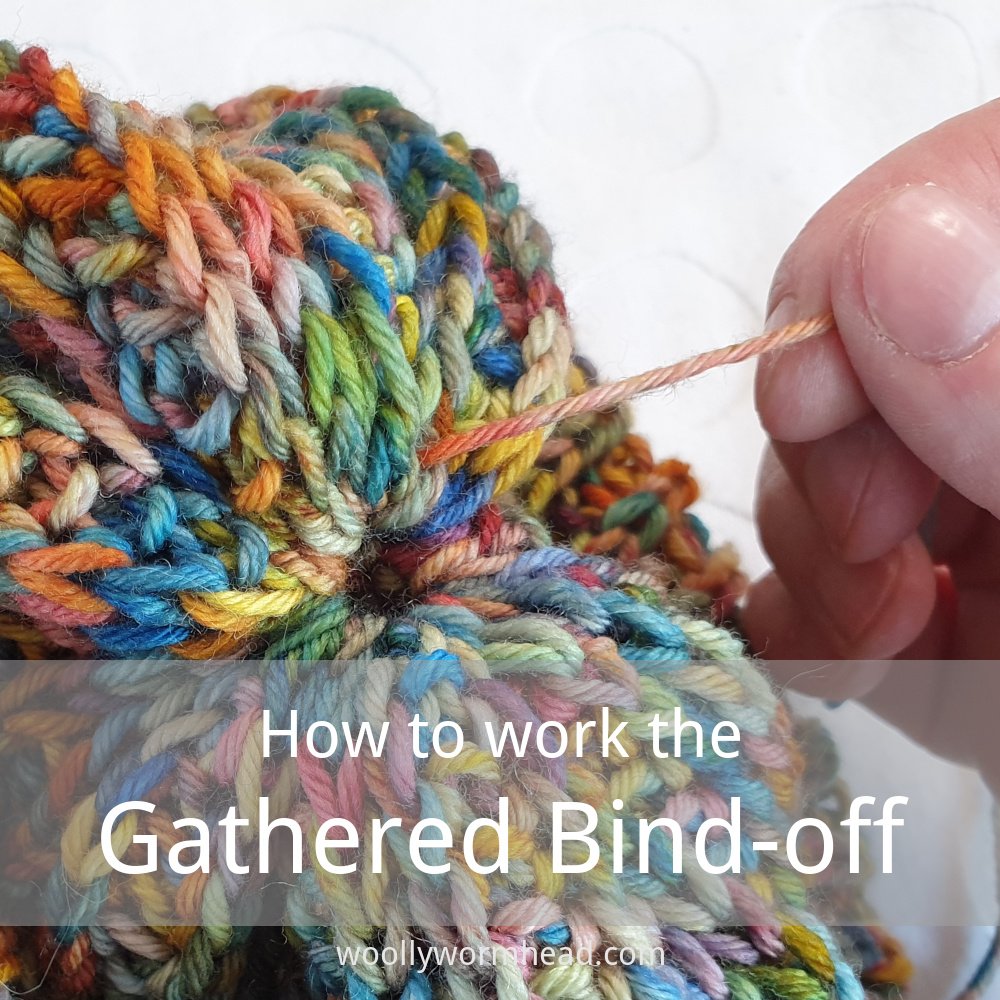
This method for binding off is a great way to finish a vertically knit bottom up Hat without any kind of shaping. This makes it ideal for beginner knitters, who may not have learnt decrease methods yet, but it also means it can be used on a Hat where the stitch pattern may not work well with various shaping methods.
Do bear in mind that when working a gathered bind-off, the body of the Hat will need to be much longer than it would usually be when starting the crown shaping. On a standard vertically knit beanie, the crown accounts for roughly one-third of the overall length of a Hat, so your Hat will want to be at least a third longer before finishing. Furthermore, the nature of the gather creates some bulk, even with the modified version, and that bulk eats some of that length, so you’ll want to knit for longer to accommodate that, too.
I learnt this method from the loom knitting community and it’s just as helpful for hand knit Hats!
1) Once you’ve reached the desired length of your Hat, bearing in mind that you’ll want to knit for longer than a Hat that may have a shaped crown, you’re ready to start the gather.
2) Cut the yarn, leaving a yarn tail of approximately twice the circumference of your Hat.

3) Thread the yarn tail onto a tapestry needle and insert it into the next stitch on your left-hand knitting needle.
4) Continue to do this for all of the stitches on your needle – insert the tapestry needle into each one.

5) Once you have a few stitches on your tapestry needle you can drop them off the knitting needle. You can speed things up by inserting the tapestry needle through a few stitches at a time, although do make sure you’re not splitting the yarn, as that’ll cause a problem when you come to do the gather.

6) Once all of the stitches have been threaded onto the tapestry needle, you can remove the knitting needle.

7) Gently pull the yarn tail so that it starts to gather.
8) You may need to encourage the stitches along as it gathers, as sometimes the stitches can get a little stuck and bunch up if you try to gather too quickly.
9) Tighten the gather as much as you can to close the hole. Heavier gauge yarns, or lots of stitches, may mean that you won’t close the hole completely.
10) Take the yarn tail through the centre of the hole and secure it to prevent it loosening. Then weave in all ends and block as required.
Support
If you’ve a question about this technique, pop it in a comment below or visit the forum! I’m unable to offer help with patterns or techniques via email. I do hope you find this a useful way to finish a bottom up Hat!


