

This tutorial has been written specifically for the Circled Hats collection, but can also be used in any situation where you may be wanting to graft slipped stitches, in particular slipped stitches on garter stitch.
The key to a successful graft is in the preparation, and ensuring that the stitches have the correct orientation when they are released from the provisional cast on.

1) In this step you will release the stitches from the provisional cast on one by one, as you would in preparation for any graft.

2) As you approach the slipped stitch columns, you will see one provisional stitch right up next to the slipped stitches – let this drop, as it's part of the slipped stitches – it won't look quite like the other stitches you have released.
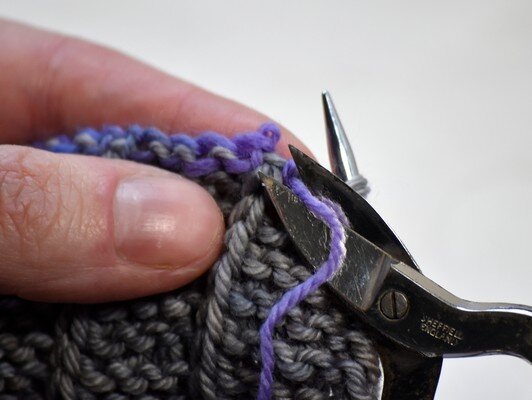
3) Because you slipped stitches on the very first row immediately after the provisional cast-on, you won't be able to unravel these stitches in quite the same way as you did the others, and you'll need to cut the yarn.

4) Gently pull out the waste yarn until it reaches the next provisional stitch – you will see the loop across the back (which would have run through the released stitch you let drop) and the two legs of the upside down 'V'

5) Insert the needle underneath both legs of the upside down 'V'

6) To ensure correct orientation for the graft, the right hand leg needs to be twisted inwards/towards the left. The left leg should already have the correct orientation.

7) You can see from this image how the stitch needs to be twisted – this is very important for this graft.

8) Continue to release the rest of the stitches either normally for the garter stitch sections, or steps 2 to 6 for the slipped stitch sections.
The pattern that is shown in this sample had a repeat of K4, S1, and you can see that there are 3 regular stitches and two legs once the stitches have been release. Although the stitches have changed (which they would – what we see in step 8 is the underside of the stitches) there are still 5 stitches in the repeat.
For each slipped stitch expect a pair of legs, and for the plain knit sections expect one stitch less than there was.
Support
As always, if you have a question about this technique or need some help with it, leave a comment below! I’m afraid I’m unable to offer help via email or private message but you’re welcome to post in our forums.


