button for patreon
All of the free patterns and tutorials on this website are supported by my amazing Patreons! If it wasn't for them I wouldn't be able to continue to produce or host freebies. We'd love to have you join us and in return, you get exclusive behind-the-scenes material, member-only discounts and early access to new free content. Membership starts at $1 per month. If you'd like to, you can say thanks for the freebie via the Tip Jar.
ScrappyFlapper.Square.BlogMain.jpg

Description

Scrappy Flapper is a top down earflap Hat in stocking stitch, worked in the round. It comes with two crown versions - fitted crown and pixie crown.

Availability

My Patreon supporters and members of The Woolly Hat Society get exclusive early access to new free patterns and tutorials. Once the exclusive period is over it’s published here on the blog.

Support

If you have a question about this pattern, pop it in a comment below. Sorry, but I’m unable to help with my free patterns or tutorials via email or private messages.

Social Media

Share your hand-knit Hats online with these hashtags!

#WoollyWormhead

#WWHats

#WWScrappyFlapperHat


Yarn
100g of DK, 4ply or Aran weight yarns – hold 4ply+DK together to achieve gauge

Needles & Notions
Set 4.5mm/UK7/US7 DPNs/Circular or size needed to obtain gauge
3.5mm crochet hook
Stitch marker as necessary
Tapestry needle

Sample details
Shown in size 23in/58.5cm on model with 23in/58.5cm circumference head

Gauge
18 sts x 24 rows to 4in/10cm on 4.5mm needles over St.St.

Sizes
To fit size: 20 [22, 23] in/ 50.75 [56, 58.5] cm
Finished size: 18.5 [20, 21.5] in/ 47 [50.75, 54.5] cm
Not sure which size to make? Check my handy size and measuring guide!

Skills required
Stocking Stitch

Knitting in the round

Increases & decreases

Abbreviations

K: knit

P: purl

rpt: repeat

st(s): stitch(es)

M1: pick up the horizontal loop before the next stitch, place it onto the left needle and knit into the back of it

SSK: slip next 2 sts knitwise, then knit these 2 sts together through the backs of the loops

k2tog: knit next 2sts together

Notes

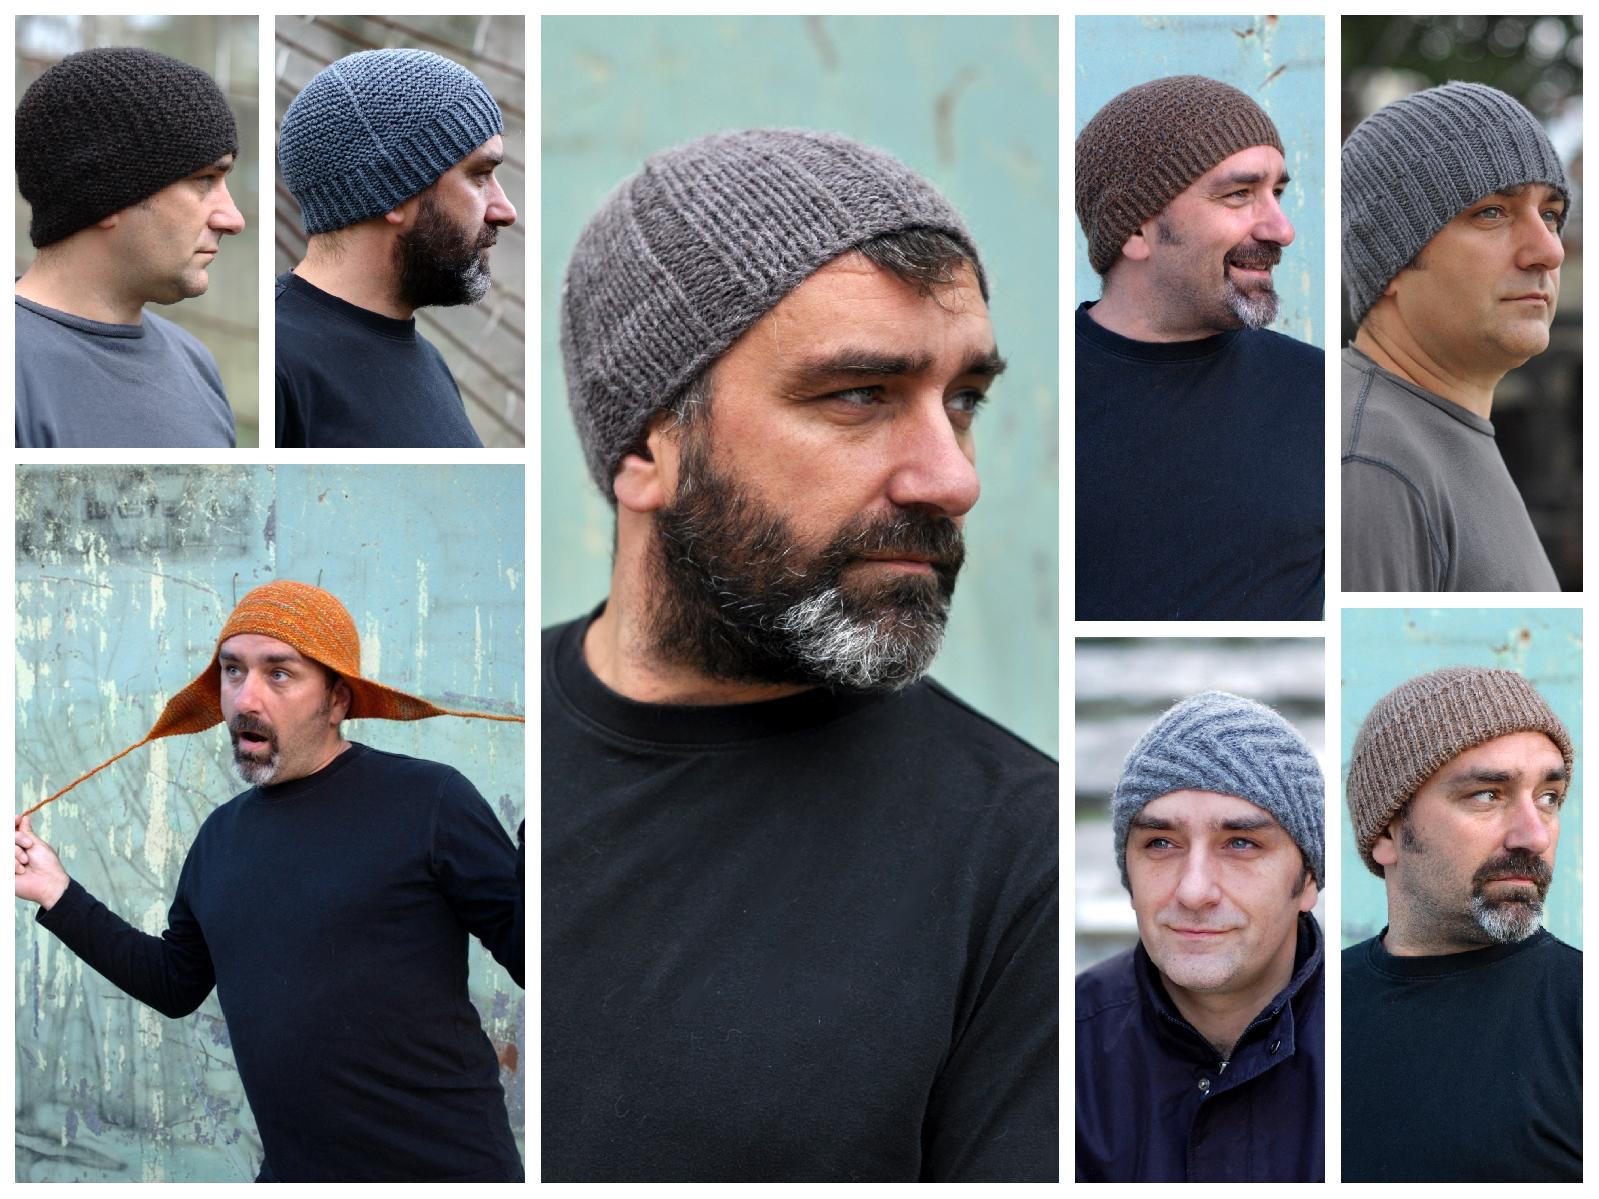
This pattern is designed to use up stash oddments. To obtain gauge, knit a strand of DK & 4ply together, or use any Aran or worsted weight yarn on it's own.

Pixie version

Cast on 6sts

Next rnd: knit all sts

Next rnd: Knit into the front & back of each st [12 sts]

Next rnd: knit all sts

Next rnd: *K1, M1, K1; rpt from * to end [18 sts]

Next rnd: knit all sts

Next rnd: *K1, M1, K2; rpt from * to end [24 sts]

Next rnd: knit all sts

Next rnd: *K1, M1, K3; rpt from * to end [30 sts]

Next rnd: knit all sts

Next rnd: *K1, M1, K4; rpt from * to end [36 sts]

Next rnd: knit all sts

Next rnd: *K1, M1, K5; rpt from * to end [42 sts]

Next rnd: knit all sts

Next rnd: *K1, M1, K6; rpt from * to end [48 sts]

Next rnd: knit all sts

Continue increasing in this fashion, increasing 6 sts every other round, until you have 84 [90, 96] sts

Regular version

Cast on 6sts

Next rnd: knit all sts

Next rnd: Knit into the front & back of each st [12 sts]

Next rnd: *K1, M1, K1; rpt from * to end [18 sts]

(if you find on this row that picking up the loop for M1 is difficult, then increase the extra stitch by knitting into both the front and the back of the first stitch of the repeat. Picking up the loop will be easier in later rounds)

Next rnd: *K1, M1, K2; rpt from * to end [24 sts]

Next rnd: *K1, M1, K3; rpt from * to end [30 sts]

Next rnd: *K1, M1, K4; rpt from * to end [36 sts]

Next rnd: *K1, M1, K5; rpt from * to end [42 sts]

Next rnd: *K1, M1, K6; rpt from * to end [48 sts]

Continue increasing in this fashion, increasing 6 sts every round, until you have 84 [90, 96] sts
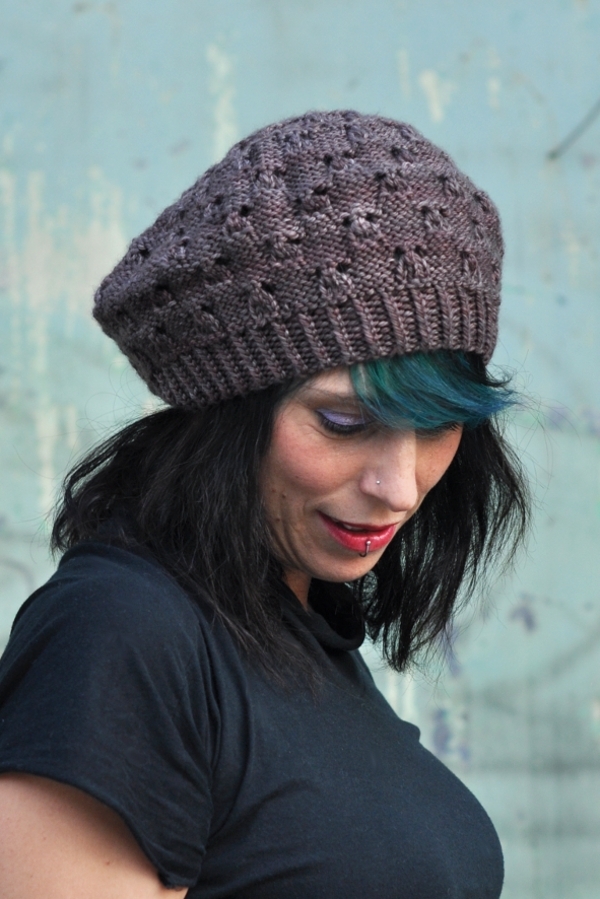
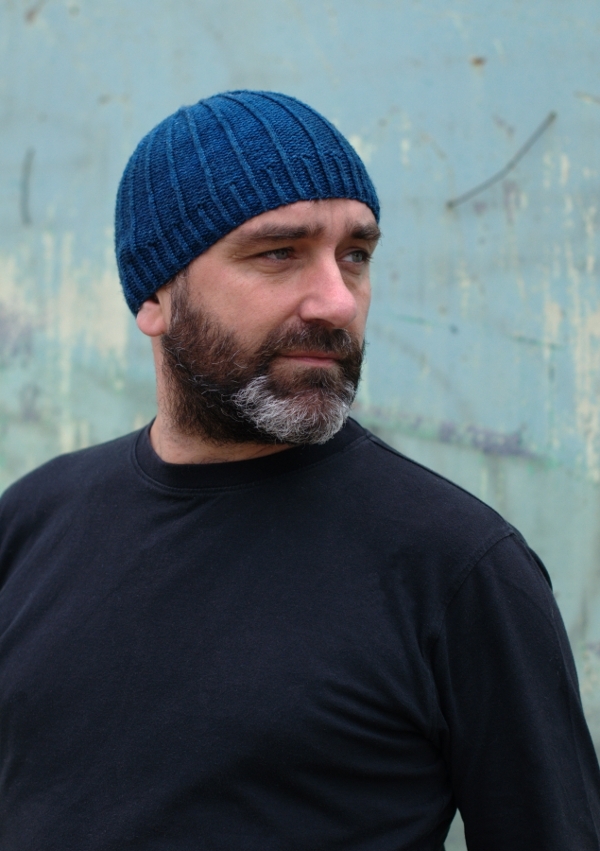
Body

Now work Stocking Stitch by knitting every round until work measures 4 [4.5, 5] inches/10 [11.5, 12.75] cm from last increase round, ending at start of round.
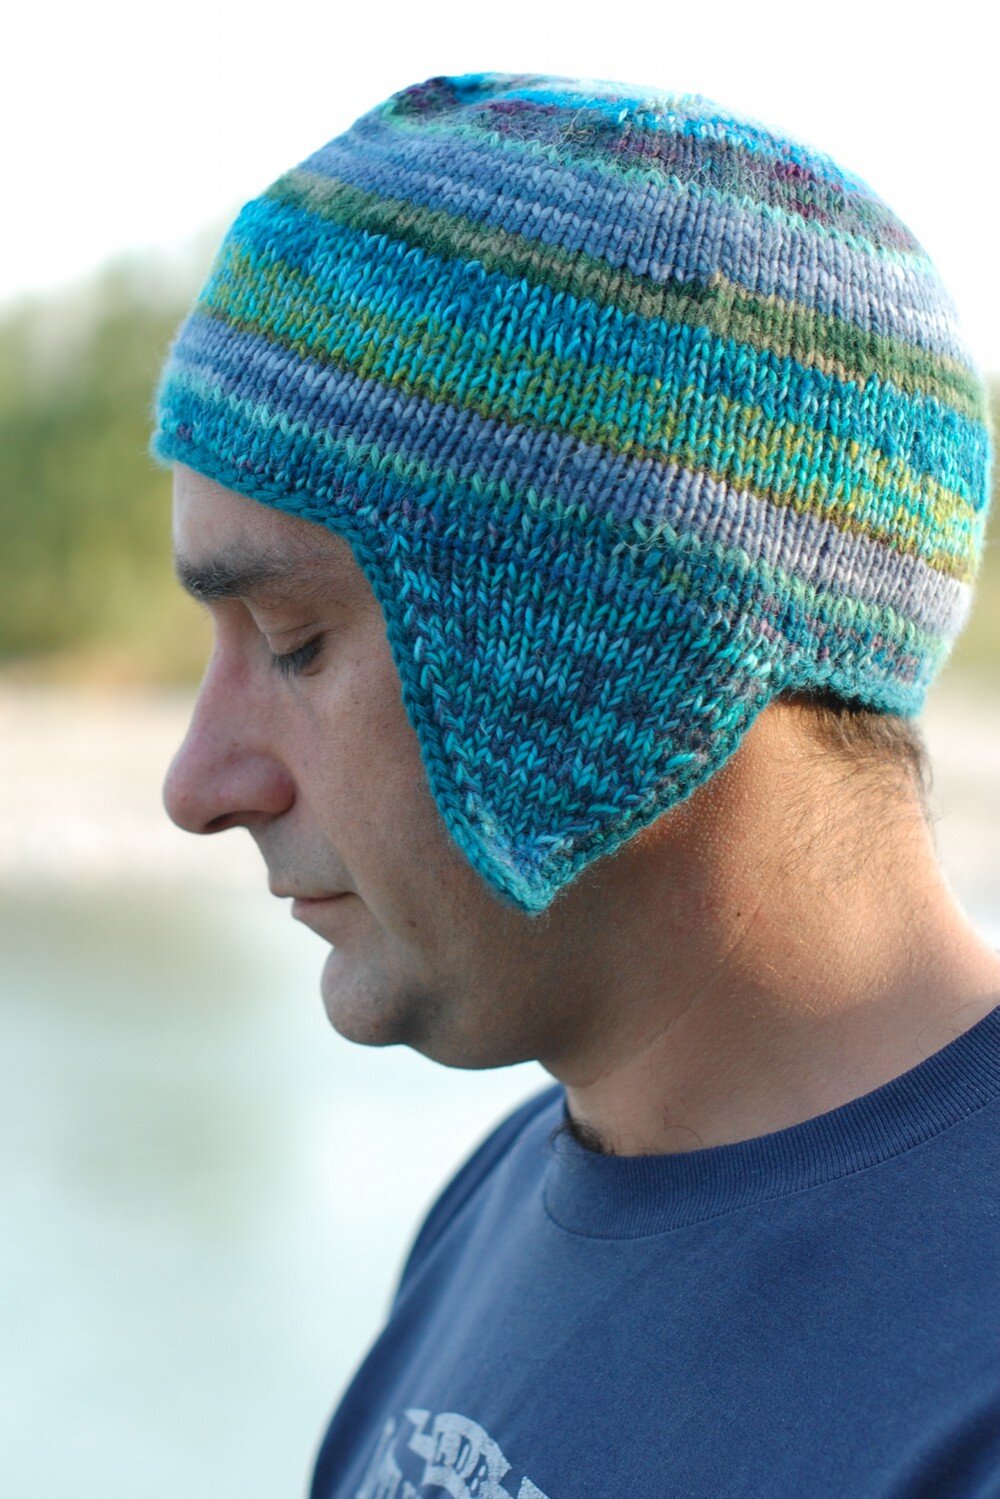
Ear-Flaps

Next rnd: Cast off 12 [13, 14] sts, K 16 [17, 18] (1st ear-flap), cast off 28 [30, 32] sts, K16 [17, 18] (2nd ear-flap), cast off 12 [13, 14] sts.

Break yarn and fasten, then rejoin to 1st ear-flap.

Work 20 rows plain stockinette stitch for longer ear-flap version or 10 rows for short ear-flap version

Then work the following 2 rows until 2 [3, 2] sts remain then cast off.

Next row: Ssk, knit to last 2 sts, K2tog

Next row: Purl all sts

Rejoin yarn to right side of 2nd flap. Repeat to match 1st ear-flap.

Using a crochet hook and leftover yarn, work Uk-dc/US-sc all the way round the edge. This is optional but does give a much neater finish. Use a contrast yarn or one of the colours you have already used – your choice

Finishing

Weave in all ends. A gentle wash and blocking is required to help the increase lines settle in and lay flat.

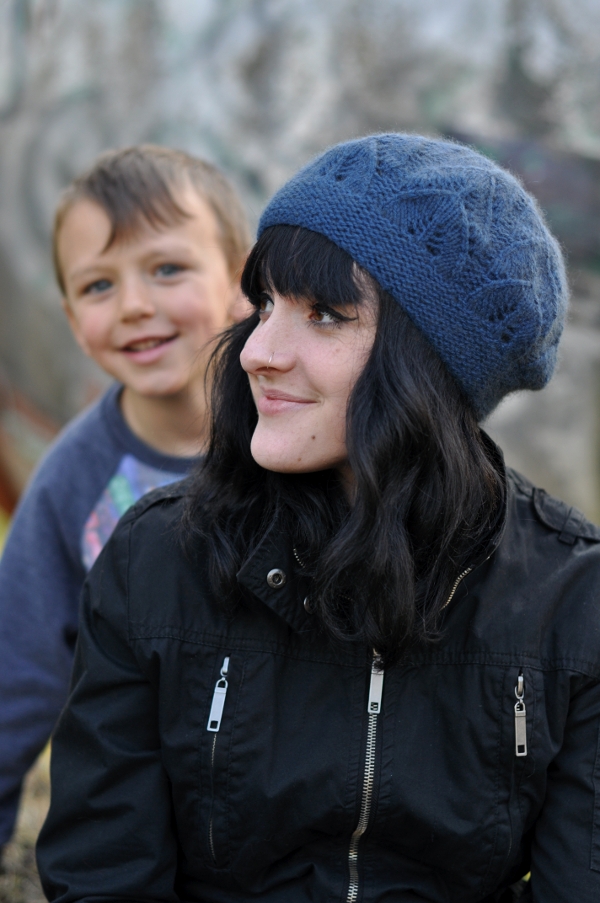
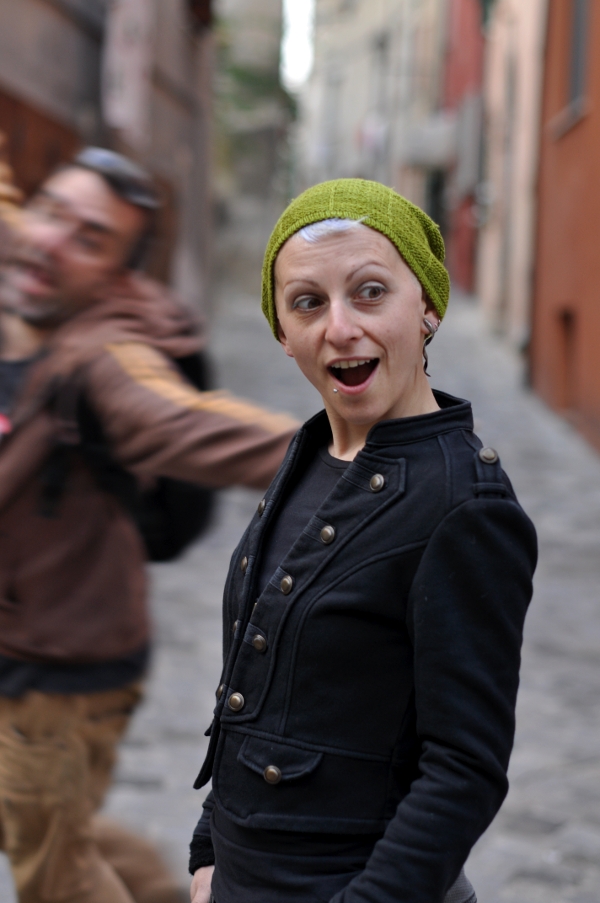
(Mr Tom hated modelling for these Hats... you can tell, can't you....)


There are a few of my older patterns that, for a variety of reasons, won't be carried forward and revised or updated and hence won't be part of the new catalogue. Rather than have these patterns disappear, I thought I'd make them free :).

As with all my free patterns, all support is handled via my forum or by leaving a comment below - any questions, even about delivery or older versions, please pop them below.

So, here's Scrappy Flapper!

ScrappyFlapper.LR.3.jpg
ScrappyFlapper.LR.1.jpg
ScrappyFlapper.LR.4.jpg
Posted
AuthorWoolly Wormhead
2 CommentsPost a comment
button for patreon
All of the free patterns and tutorials on this website are supported by my amazing Patreons! If it wasn't for them I wouldn't be able to continue to produce or host freebies. We'd love to have you join us and in return, you get exclusive behind-the-scenes material, member-only discounts and early access to new free content. Membership starts at $1 per month. If you'd like to, you can say thanks for the freebie via the Tip Jar.
Noma.Square.BlogMain.jpg

Description

Noma is a garter stitch earflap Hat, worked top down and in the round. The earflaps are generous and end in a long I-cord.

Availability

My Patreon supporters and members of The Woolly Hat Society get exclusive early access to new free patterns and tutorials. Once the exclusive period is over it’s published here on the blog.

Support

If you have a question about this pattern, pop it in a comment below. Sorry, but I’m unable to help with my free patterns or tutorials via email or private messages.

Social Media

Share your hand-knit Hats online with these hashtags!

#WoollyWormhead

#WWHats

#WWNomaHat


Yarn
218yd/199m/90g
DK weight, plied yarn

Needles & Notions
Set 3.5mm/UK--/US4 DPNs/Circular or size needed to obtain gauge
Stitch marker as necessary
Tapestry needle

Sample details
Shown in BabyLongLegs 3ply Handspun
[218yd/199m per 90g; 100% Wool]

Shown in size 23in/58.5cm on model with 23in/58.5cm circumference head

Gauge
22 sts x 30 rows to 4in/10cm on 3.5mm needles over St.St.
22 sts x 42 rows to 4in/10cm on 3.5mm needles over Garter.St.

Sizes
To fit sizes: 19 [21, 23] in/48.5 [53.5, 58.5] cm
Finished size: 16.25 [18.5, 20.75] in/ 41 [47, 52.75] cm
Not sure which size to make? Check my handy size and measuring guide!

Skills required
Garter Stitch

Knitting in the round

Increases & decreases

Circular cast-on

I-cords

Abbreviations

K: knit

P: purl

rpt: repeat

st(s): stitch(es)

M1: pick up the horizontal loop before the next stitch, place it onto the left needle and knit into the back of it

SSK: slip next 2 sts knitwise, then knit these 2 sts together through the backs of the loops

k2tog: knit next 2sts together

Single I-Cord Crown

Cast on 3sts. Knit as per I-cord for 3in/7.5cm (or desired length)

Next rnd: Knit into the front and back of each stitch [6 sts]

Join in the round, taking care not to twist the sts.

Place stitch marker to indicate start of round.

Plain Crown

Using circular cast-on, cast on 6 sts

Join in the round, taking care not to twist the sts.

Place stitch marker to indicate start of round.

Crown (both versions)

Rnd 1 & all odd rounds: Purl all sts

Rnd 2: knit all sts

Rnd 4: *M1, K1, M1, K1; rpt from * to end [12 sts]

Rnd 6: *M1, K1, M1, K3; rpt from * to end [18 sts]

Rnd 8: *M1, K1, M1, K5; rpt from * to end [24 sts]

Rnd 10: *M1, K1, M1, K7; rpt from * to end [30 sts]

Rnd 12: *M1, K1, M1, K9; rpt from * to end [36 sts]

Rnd 14: *M1, K1, M1, K11; rpt from * to end [42 sts]

Rnd 16: *M1, K1, M1, K13; rpt from * to end [48 sts]

Rnd 18: *M1, K1, M1, K15; rpt from * to end [54 sts]

Continue in this manner, increasing 6 sts on alternate rounds, until you have 90 [102, 114] sts

Body (& Brim)

Now work garter stitch in the round for the body by knitting alternate rounds of knit and purl until work measures 3.75 [4, 4.25] in/ 9.5 [10.25, 11] cm (or desired length) from last increase round, ending after a purl round.

Next rnd: cast off 10 [12, 14] sts, K19 [21, 23] (1st ear-flap), cast off 32 [36, 40] sts, K 19 [21, 23] (2nd ear-flap), cast off 10 [12,14] sts.

Nb: join yarn to wrong side of work for earflaps to keep garter stitch continuity.

Earflaps

Rejoin yarn to 1st earflap and work in garter stitch (knit every row) until length of earflap measures 2.5 [2.75, 3] in/ 6.5 [7, 7.5] cm with knitting relaxed, not stretched.

Next row: K1, ssk, K to last 3 sts, k2tog, K1

Next row: Knit all sts

Repeat these 2 rows until you have 5sts remaining, ending after a plain knit row

Next row: ssk, K1, k2tog [3sts]

Work I-cord for 8in/20 cm (desired length) and fasten off.

Rejoin yarn and work 2nd ear-flap to match 1st.

Finishing

Weave in all ends. A gentle wash and blocking is recommended.


Noma.Tom.LR.1.jpg
Noma.Tom.LR.3.jpg
Noma.Tom.LR.2.jpg

Noma was originally published way back in 2010 in SlipKnot, the journal of the KCG (Knitting & Crochet Guild (UK)). I designed it using some gorgeous handpsun yarn that BabyLongLegs sent me, a blend of merino and cashmere named 'An Ode to Vincent'. I've had every intention of republishing the pattern, but it's just kinda sat there, waiting.

The problem is, is that it's not an easy Hat to photograph. The original shots weren't all that great, and each time I've got it out to reshoot it, it's found it's way to the bottom of the pile again.

It's a Tom sized Hat, which means that really, he's the only one who can model it.

This has never really impressed Tom much.

I think we got there this time, though.

Have fun knitting it, as well as wearing it!

Before you go, do tell us which is your fave of the photos - ta :)

Posted
AuthorWoolly Wormhead
10 CommentsPost a comment

How did it get to late August already?

You may be surprised to hear that I've been busy on the pattern front behind the scenes over the last couple of months, and there's a whole host of patterns queued up for release. I don't think this has ever happened before (or should I say, I've never been this organised before) and given life of late, I'm feeling a little bit impressed with myself. And I'm also kinda wondering how this all happened.

The first release today is Banksia:


Josie's wonderful suggestion won the naming competition, and Banksia it is. Describes it pretty well, no?


There are 3 sizes in the pattern, and due to the change in yarn and gauge, those sizes are a little different to the original. A slight adjustment in yarn/gauge/needle size will provide even more sizes, should the one you need not be listed.

The pattern has been tweaked and tidied a little, but is essentially the same in nature. An illustrated tutorial for the cast on is included, and the charts are large and clear and on a page all of their own.

What really makes a difference though is the yarn. The Langdale Superwash from Eden Cottage has such luster and drape and deep, subtle colourways that make the Hat look so very different. The Hat to hold is wonderfully soft and it wears so well - it really is the right yarn for the design.

----------------------------------------------------------------------------------

The second release today is Darkke:


And here's Mr. Tom looking rather dashing with his beard! (not that he'd agree, mind)


Darkke was originally published in Simply Knitting no.115, which hit the shelves last December. It's been revamped and reformatted and of course, rephotographed and it's there for the taking. With 3 sizes included and instructions in both written and charted format, you get  a fair bit for the price. There's also an illustrated tutorial for the cast on, and feedback from knitters says this helps a lot.

The recommended yarn is Semi~Precious DK from my buddy BabyLongLegs. It's a strong, structured yarn that gives brilliant stitch definition and you really can't go wrong with it. Gorgeous stuff.

----------------------------------------------------------------------------------

Both of these will be featured in the Newsletter which will be going out later today, so if you've not signed up yet now's your chance! Invariably I'll offer a promotional discount that's exclusive to subscribers, so it'll be worth joining for that alone.

Hat season is almost here...

Posted
AuthorWoolly Wormhead

It's pretty normal to suddenly discover Aran in the frame when we're doing a photoshoot...

... even if at times he gets a little help from his Dad.

And there are days when I wonder.....

... whether I've got two kids, not one.

Posted
AuthorWoolly Wormhead
6 CommentsPost a comment