It's pretty normal to suddenly discover Aran in the frame when we're doing a photoshoot...
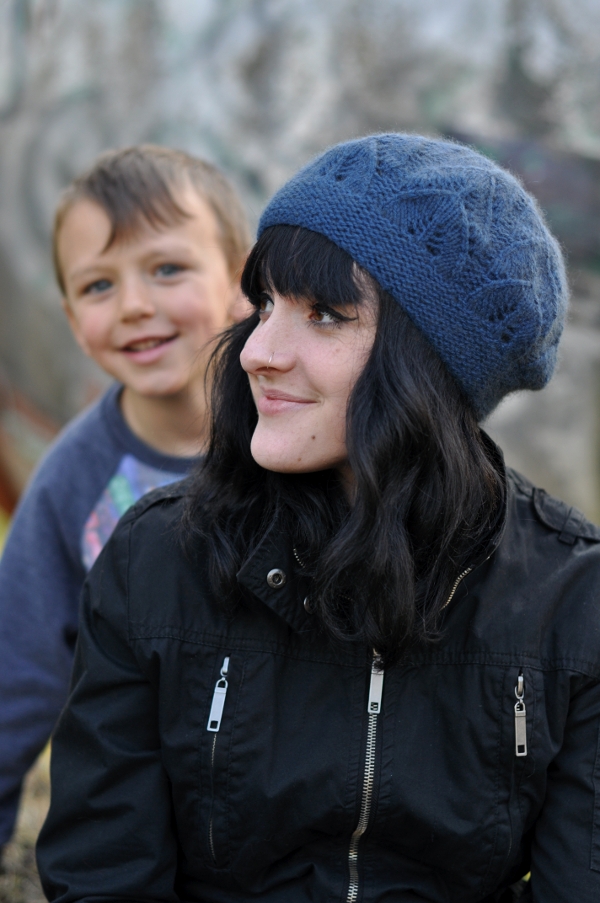
... even if at times he gets a little help from his Dad.

And there are days when I wonder.....

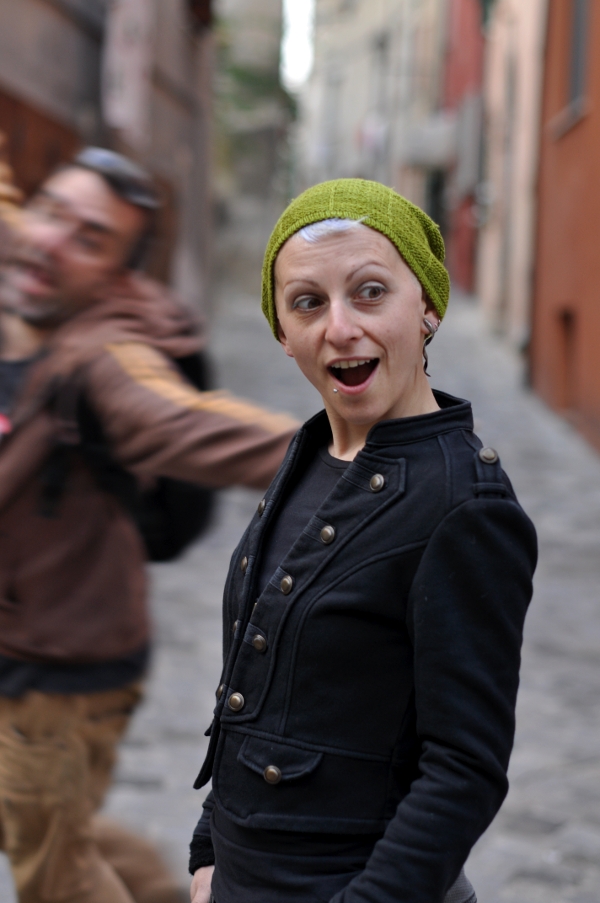
... whether I've got two kids, not one.

It's pretty normal to suddenly discover Aran in the frame when we're doing a photoshoot...
... even if at times he gets a little help from his Dad.
And there are days when I wonder.....
... whether I've got two kids, not one.
Not only have I been working away like a madwoman on Classic Woolly Toppers, I've also found time to get two new patterns published. Have no idea quite how I've managed it, but here they are nonetheless!
Buzzba is a grown up version of Buzzbee from Wee Woolly Toppers. Since I published the first grown up WWT pattern, loads of requests have come on for others, and Buzzbee was without a doubt the most popular request. This sample has been knitted up for *ages* yet has sat waiting for me to find the time to not only rewrite the pattern, but also get it modelled.

The plan originally was to photograph it on Aran, but in his wonderful 4yo manner, he refused to wear purple and it went back on the to-do list. Then, as we started the CWT photoshoots, I took the chance to snap this one on Silvia (Aran & Silvia have the same size head) and Silvia rocked it.
The grown up version is essentially the same Hat, unlike the other grown up versions of WWT designs where more noticeable details have changed; this time the difference is the huge range of sizes. This single edition includes sizes ranging from preemie (12in) to adult (22in). If you have the original version in the book and are confident at upgrading a pattern for larger sizes then you'll likely not need this version; this one is for those who don't have the book or would like someone else to have done the grading work for them!
The next new release is Ledger.
This is another sample that's been finished for at least 6mths and has been awaiting those elusive photos. Like Buzzba, it's sized for the whole family, and I made a grown up sized sample, too.
Ledger was originally intended for Classic Woolly Toppers, but as the collection grew and the designs evolved, it was clear that CWT was primarily women's Hats, and this one didn't fit with the others anymore and was destined for a solo publication.
The pattern is a simple but effective one. It utilises the 2x2 AC cast-on that I developed, and from it's 2x2 Brim, it steps down into a 1x1 Body. The Crown shaping works with the rib pattern, creating a fully reversible Hat. The combination of ribs gives this classic beanie a different look.
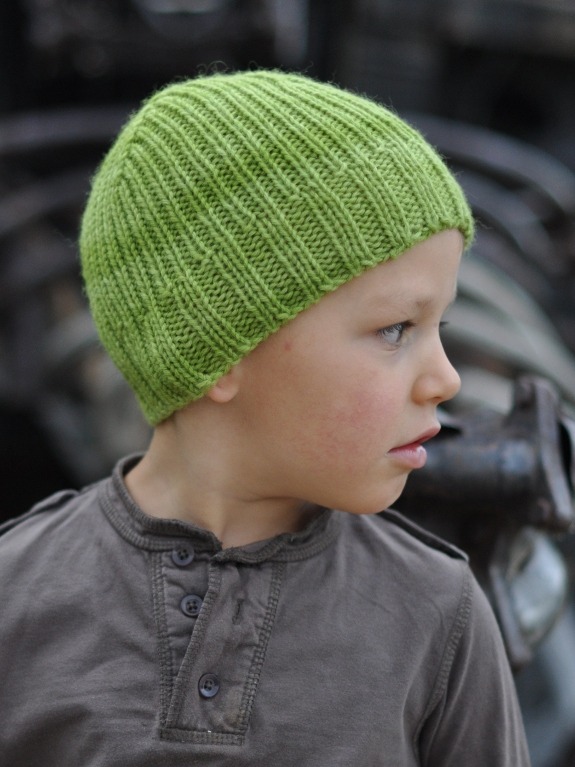
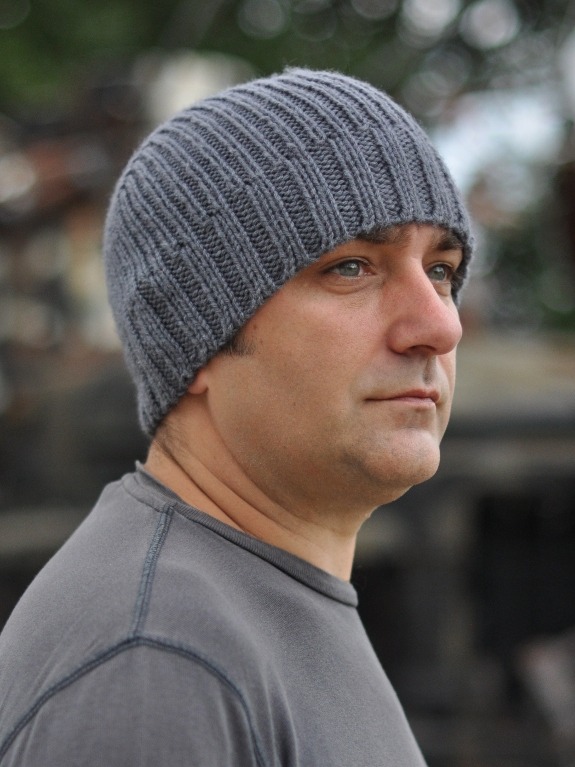
Ledger is sized from 6mths (16in) through to large adult/male (24in) and is worked in a worsted weight yarn. The sample that Tom is wearing was knit with KnitPicks Gloss DK, which I found to give a perfect worsted gauge. Aran's sample is knit with Heaven's Hands Wool Classic, utilising leftovers from the Aurora pattern. Any standard worsted gauge will work, and the smaller sizes are perfect for leftovers.
That's all from me today, hope you like them! I'm almost ready to reveal the Classic Woolly Toppers cover, which is pretty exciting. And quite a few of the CWT patterns are ready to be published individually, which also means I can get the pre-order up pretty soon... yey!
Thank you for everything you do! For being an amazing Dad and partner, and for building our home, and for entertaining all my strange requests for things you think I don't really need.
Enjoy the whiskey and earn your hangover (but save me a drop of the brandy, yes?)
------------------------------
PS/ you may have noticed a few pages aren't working properly on the site - after working all weekend to build shiny new cart and download buttons, and after adding them all, the whole cart system went very wonky. After some investigating it was starting to look like how I'd added the images had made the code go skewy, but it appears there was a conflict between my site builder (SquareSpace) and the Ravelry cart code (in javascript) which was kicked into action by the change in images (gotta love how javascript can be so volatile!). Must say, SquareSpace were very good in quickly helping me work out what had happened. Now that's sorted, I'm rebuilding as quickly as I can, and it should all be fixed by the end of today (internet connection & birthday celebrations permitting). It's been a heck of a lot of work - nearly 200 pages in need of individual updates!
I'm afraid this also means that the new Alternate Cable cast-on rib tutorials have been put back by a couple of days.
ETA/ 196 strings of javascript code & 160 pages later, the website rebuild is done and all pages should now be working. Phew! There's bound to be a few hiccups surface over the next few weeks, possibly a few bits of code that I missed, and if you find anything a bit wonky please let me know. Thanks so much for your patience!

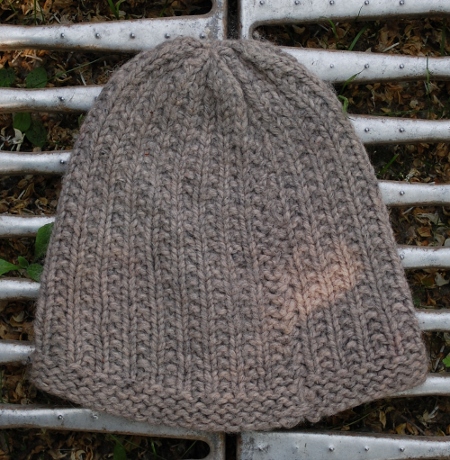
Description
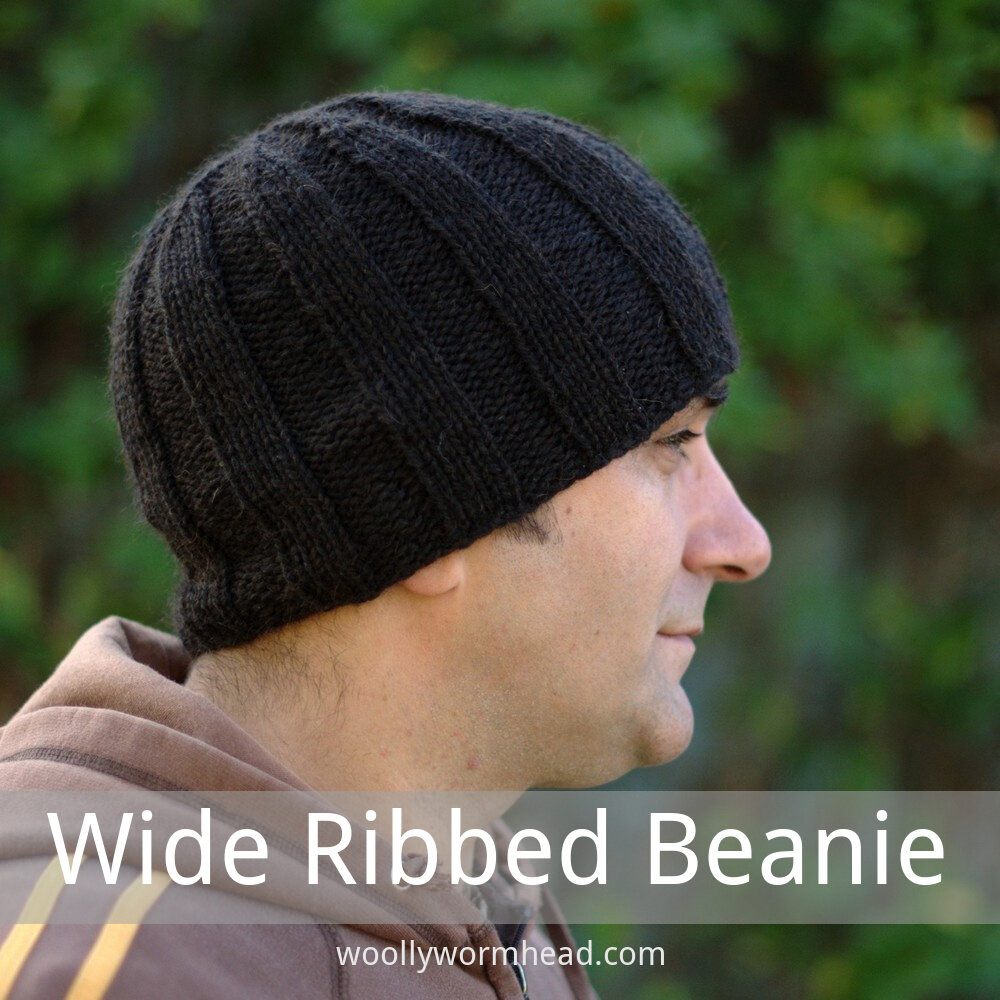
Wide Ribbed Beanie features a pattern of wide knit and purl ribs from brim to crown. The crown is short and shaping is incorporated into the pattern. The ribs narrow as they reach the centre.
Availability
My Patreon supporters and members of The Woolly Hat Society get exclusive early access to new free patterns and tutorials. Once the exclusive period is over it’s published here on the blog.
Support
If you have a question about this pattern, pop it in a comment below. Sorry, but I’m unable to help with my free patterns or tutorials via email or private messages.
Social Media
Share your hand-knit Hats online with these hashtags!
#WWWideRibbedBeanie
Yarn
164 yd/150 m/100g
Aran, Chunky or Heavy Worsted weight, plied yarn.
Needles & Notions
Set 5mm/UK6/US8 DPNs/Circular or size needed to obtain gauge
Stitch marker as necessary
Tapestry needle
Sample details
Shown in The Little Knitting Company Geko [164yd/150m per 100g; 85% Wool, 15% Alpaca]
Gauge
17 sts x 24 rows to 4in/10cm on 5mm needles over St.St.
Sizes
To fit sizes: 17 [20, 22, 24] in/ 43 [51, 56, 61] cm
Finished size: 15 [17, 18.75, 20.75] in/ 38.35 [43, 47.75, 52.5] cm
Not sure which size to make? Check my handy size and measuring guide!
Skills required
Ribbing
Knitting in the round
Abbreviations
K: knit
P: purl
rpt: repeat
st(s): stitch(es)
k2tog: knit next 2sts together
Notes
The main body of this Hat is worked in a rib based on multiples of 8. Should you wish, it would be easy to substitute a different rib – try a 7x1, 6x2, 5x3 or even a 2x2. However, to ensure the pattern created by the crown shaping remains in tact, always start the ribbing with the purl element.
To alter the length of the Hat to a longer beanie work until the main body measures an inch or so longer than stated; add an additional 3 inches should you want a fold up brim.
How to
Cast on 64 [72, 80, 88] sts
Join in the round, being careful not to twist sts.
Place stitch marker to indicate start of round.
Body
Next Rnd: *P4, K4; rpt from * to end.
This round forms the pattern for the main body. Work in pattern until the main body of the Hat measures approximately 5 [5.5, 6.25, 7] in/12.75 [14, 15.75, 17.75] cm (or desired length)
Crown
Rnd 1: *P4, K2, K2tog; rpt from * to end [56, 63, 70, 77 sts]
Rnd 2: *P4, K3; rpt from * to end
Rnd 3: *P4, K1, K2tog; rpt from * to end [48, 54, 60, 66 sts]
Rnd 4: *P4, K2; rpt from * to end
Rnd 5: *P4, K2tog; rpt from * to end [40, 45, 50, 55 sts]
Rnd 6: *P4, K1; rpt from * to end
Rnd 7: *P3, K2tog; rpt from * to end [32, 36, 40, 44 sts]
Rnd 8: *P3, K1; rpt from * to end
Rnd 9: *P2, K2tog; rpt from * to end [24, 27, 30, 33 sts]
Rnd 10: *P2, K1; rpt from * to end
Rnd 11: *P1, K2tog; rpt from * to end [16, 18, 20, 22 sts]
Rnd 12: *P1, K1; rpt from * to end
Rnd 13: *K2tog; rpt from * to end [8, 9, 10, 11 sts]
Break yarn and draw through remaining 8 [9, 10, 11] sts, tighten to close.
Finishing
Weave in all ends. Blocking isn't required although a gentle wash and blocking will help the stitches settle and even out. - block gently to avoid stretching the Hat.

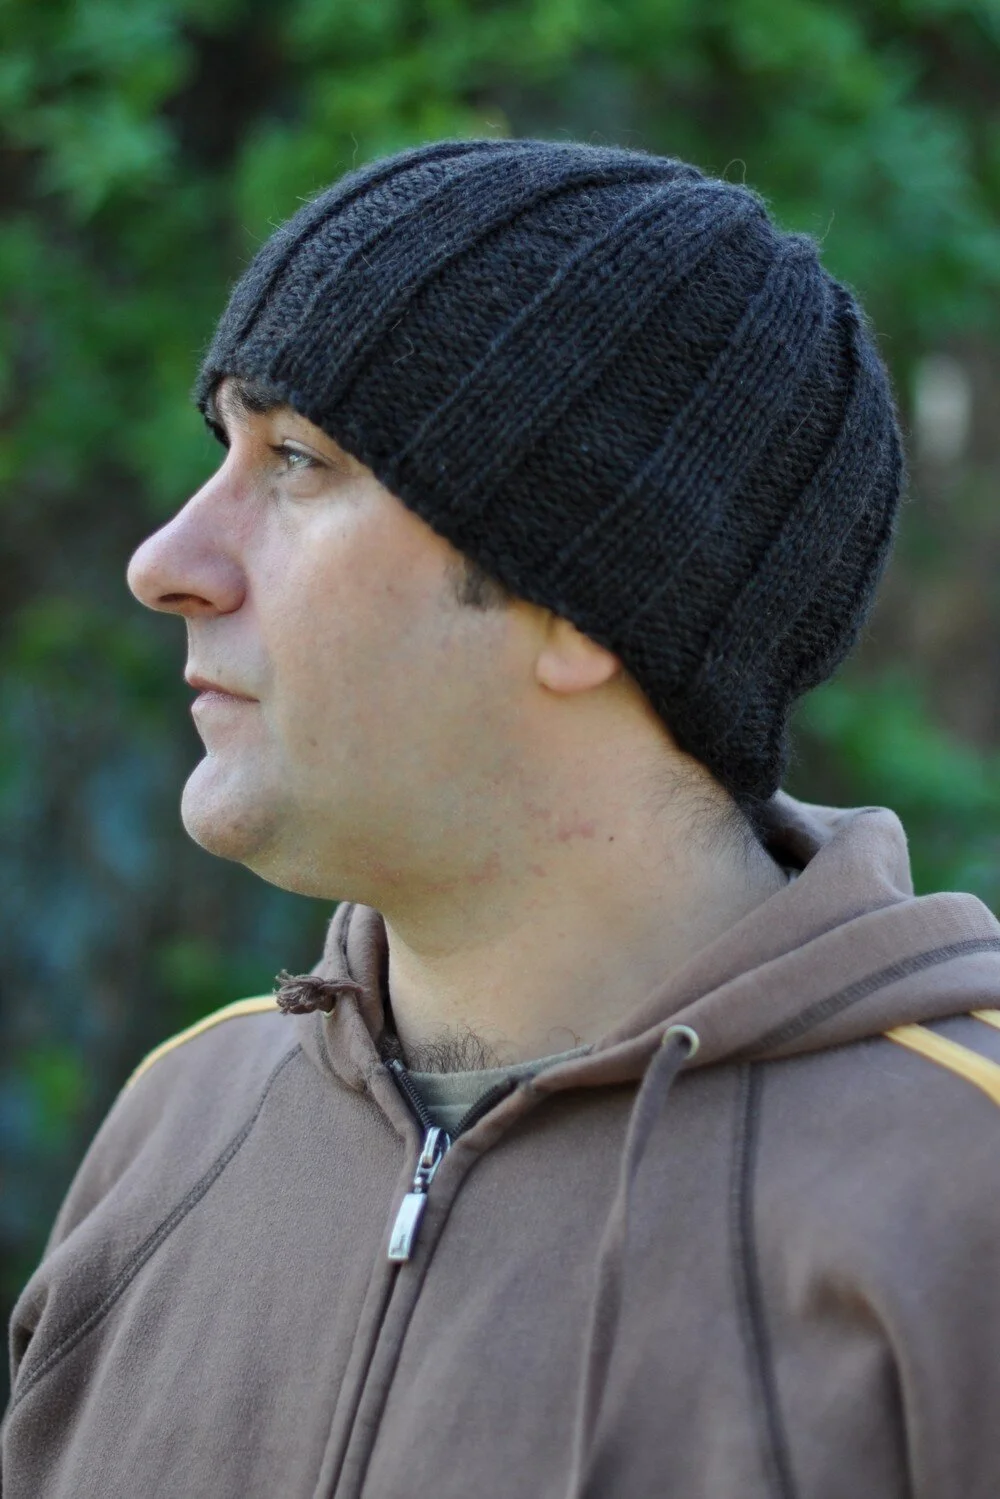

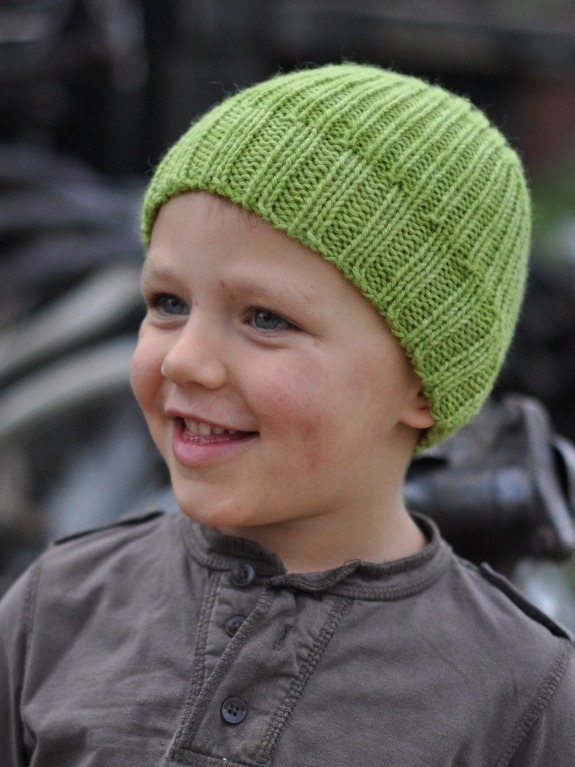
Tom's always moaning at me about his lack of Hats. He moans that just about every Hat is either a gift for someone else, or is a pattern sample and isn't allowed near his head post photo shoot. He moans to me that the man who lives with the woolly Hat designer has very few woolly Hats.
This has now been rectified.
Originally the plan was to cast-on for Ribbed Beanie, a simple no-brainer pattern that wouldn't require me to think. Heck, he didn't want me to design a whole new pattern for him, as he knew it'd end up in the banned-from-wearing pile. So I dug through my stash, which is a little thin on the ground when it comes to chunky yarn, and remembered that I had some of the TLKC Geko yarn leftover from designing and knitting the Geko Beanie. It's a particulalry nice yarn, and I love the natural colours it comes in; it's the ideal mens Hat yarn.
Armed with only 73g, which wouldn't normally be enough for a Tom sized Hat, I cast on remembering that the yardage for this yarn was way better than average. Having already swatched and learnt how it behaved, I didn't need to worry about running out. The gauge was slightly different to that of the other ribbed beanie pattern, but that was only a wee bit maths. Once knit, there was about 5g of yarn left.
Now, I've never been keen on how the crown shaping worked on the Ribbed Beanie, and if I'm honest, it's a pattern I really don't like at all. It was written back when I was learning the ropes and always saw it as an exercise rather than a design, if that makes sense?
So I changed it. And we do like this one much more.
I did think about updating the Ribbed Beanie pattern, but seeing as the crown shaping is different enough, and the change in yarn and gauge meant rejigging and the need for an additional (larger) size, I figured I ought to publish it separately. Seeing as I completely and utterly fail at making a Hat without writing down what I did.
Not a bad way to start a monday, with a free pattern, huh?
This is the 2nd of three designs that I've done for The Little Knitting Company. Inspired by a woolly Hat that I purchased in Greece many moons ago, I played around with a stitch pattern I thought close to the original, and the design grew from there.
There are very few photos of me wearing the original Hat, and the few that I have are totally cringe worthy; I did consider sharing them then thought better of it. Trust me though when I say that I was super happy at having found a local Hat in 40 degC temperatures for my personal woolly Hat collection. I try to collect woolly Hats (as well as other local textiles) from the various places I visit on my travels, and finding one in such a warm climate during the height of summer was both magical and bizzare.
And this is how that Hat looks these days. Rather worn and stretched, yet it's texture and form is still there. As far as I could find out, this was the local fisherman's style, and they had the self same Hat for sale (hand knitted by the woman who sold it to me, in pure wool no less) in natural white and black - no dyed yarns, simply as they came. You can see it was knitted flat and has no crown shaping - a basic tube stitched up and gathered at the top.
Tom has taken a liking to this Hat and slowly, it's been growing old and tired. When the lovely folks at TLKC told me that their Geko yarn was one they'd like me to work with, I figured now was the time to revisit this Hat and create a design inspired by it. Y'see, Santorini, the island where I found this Hat, is one full of Geckos. The memories of Gecko and lizard inspired ceramics, crafts and souvenirs around the island are still with me, even if the hand made pieces I carefully bought back have been lost over the years. I couldn't think of a better use of this yarn, rather apt wouldn't you agree?

And here we have Tom sporting the new design, Geko Beanie. You can see that I kept the garter stitch band, as I felt it worked well with the stitch pattern. In the original it was there simply as an edge to prevent curling but for my design, I wanted to change the proportions and add a deeper brim. One thing I was keen to do differently was the crown shaping, as the gathered crown look doesn't do it so much for me. It has it's uses but in general, I like the challenge of the crown shaping, and the pattern it can create adds a whole other dimension.

Tom was very specific about the length of the Hat, and his input was muchly appreciated. He didn't just want a Hat that would cover his ears, he wanted one that wouldn't let him down during the height of winter. And the extra length does suit him, so he'd be right about the styling. The pattern can of course be knit slightly shorter, should that be a preference. Infact, Geko Beanie is pretty customisable like that - there are 4 sizes included but you could easily adapt to suit your needs.
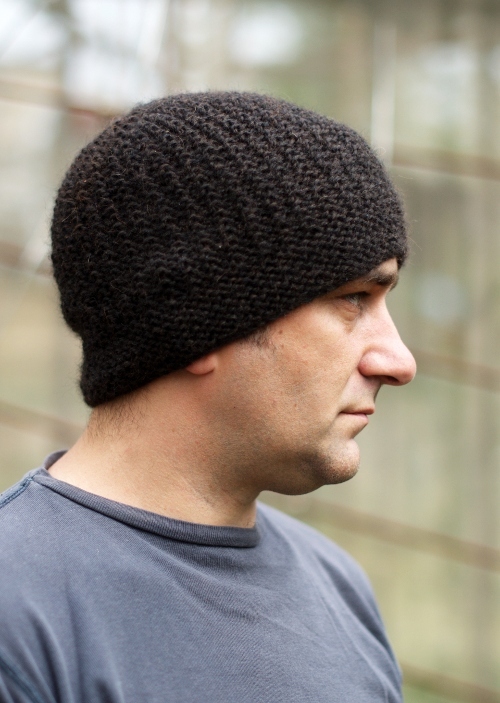
When swatching and knitting in the round, I found the stitch pattern to be rather nice on the reverse, and that's something a bit special about this pattern, something that the inspirational Hat doesn't have. For the Geko Beanie the crown shaping was carefully planned, so that whichever way it was worn, even the crown looked fab. Often, even if a stitch pattern is reversible the shaping might not be, and so a Hat or garment might not look so great if turned inside out. You probably know by now that I'm a bit of a stickler for details and as I worked through the crown shaping, I ripped out several possibilities as they didn't look as perfect as I'd like. And it didn't elude me for long - with this Hat, the brim, the stitch pattern and the shaping are all truly reversible.
There aren't any charts included, as the stitch pattern is super simple. Simplicity and clean lines are the key elements here, and Tom is pretty chuffed with the result. So there you have it, the Geko Beanie, full of practicality, memories and comfort :)


