
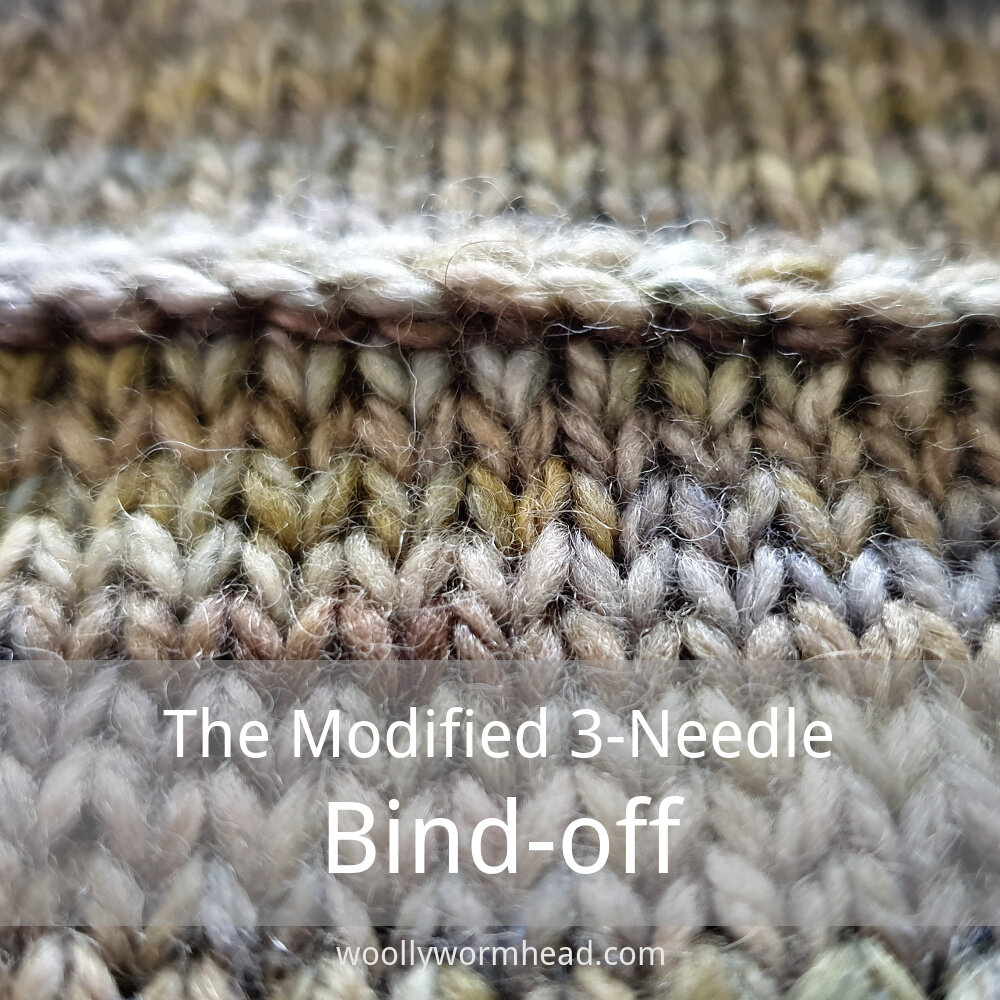
This 3-needle bind-off method improves the method most of us are familiar with by removing the bias in the bind-off.
Because a 3-needle bind-off has a k2tog at every point, there’ll always be one side of the bind-off that has two ridges sitting under each bind-off ‘V’ stitch, and those two ridges cause it to lean to one side. With this modified method we reduce that by purling one of the stitches. It doesn’t remove the bias completely, as there is still one stitch that has to passover the other and that leaves a slight ridge on one side. However overall it is more balanced, given that purling one of the stitches puts a ridge on the other side of the bind-off, albeit underneath.
For those of us who like to use a 3-needle bind-off on the right side this method makes a huge difference to the finish of the bind-off and I’m keen to use it more often!

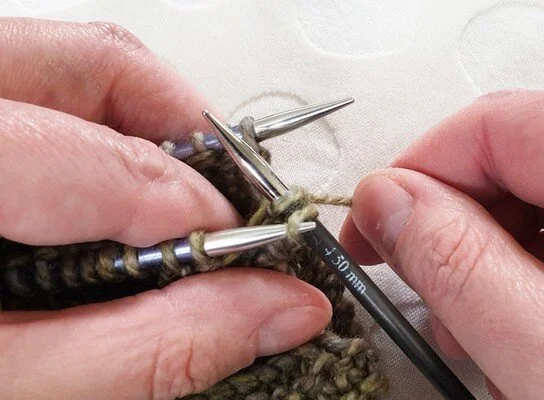
1) Using the spare needle, insert in knit-wise into the first stitch on the front needle and wrap the stitch as if to knit it, but leave the stitch on the needle.

2) Insert the needle purlwise into the first stitch on the back needle.

3) Wrap the stitch as if to purl it

4) then purl the loop through the stitch and drop the stitch off the needle.

5) Next take the yarn to the back

6) then pull the new stitch through the first stitch on the front needle (which is incomplete and has been waiting there)

7) Then drop that first stitch off the needle. The first part of the bind-off is now complete.

8) Insert the needle knitwise into the next stitch on the front needle and wrap it as if to knit it.

9) Same as before, don’t complete the stitch and instead insert the needle purlwise into the next stitch on the back needle.

10) Wrap this stitch purlwise, as before, then pull the loop through and drop the stitch off the needle.

11) Take the yarn to the back

12) then pull the stitch you’ve just made through the stitch that’s waiting on the front needle.
13) Using the tip of the working needle lift the first stitch you cast-off on the left needle

14) and passover it over the most recent stitch, completing this part of the bind-off.

15) You’ll start to see the ‘V’s sitting neatly as you cast off more stitches.

When you’ve finished the bind-off you’ll be able to see that there’s only one ridge sitting under the cast off chain, instead of the usual two that you get with a regular 3needle bind-off.
You’ll also notice that it’s much flatter and more refined – ideal for where a 3needle bind-off is needed not only structurally, but decoratively.
Support
If you’ve a question about this technique, pop it in a comment below or visit the forum! I’m unable to offer help with patterns or techniques via email.


